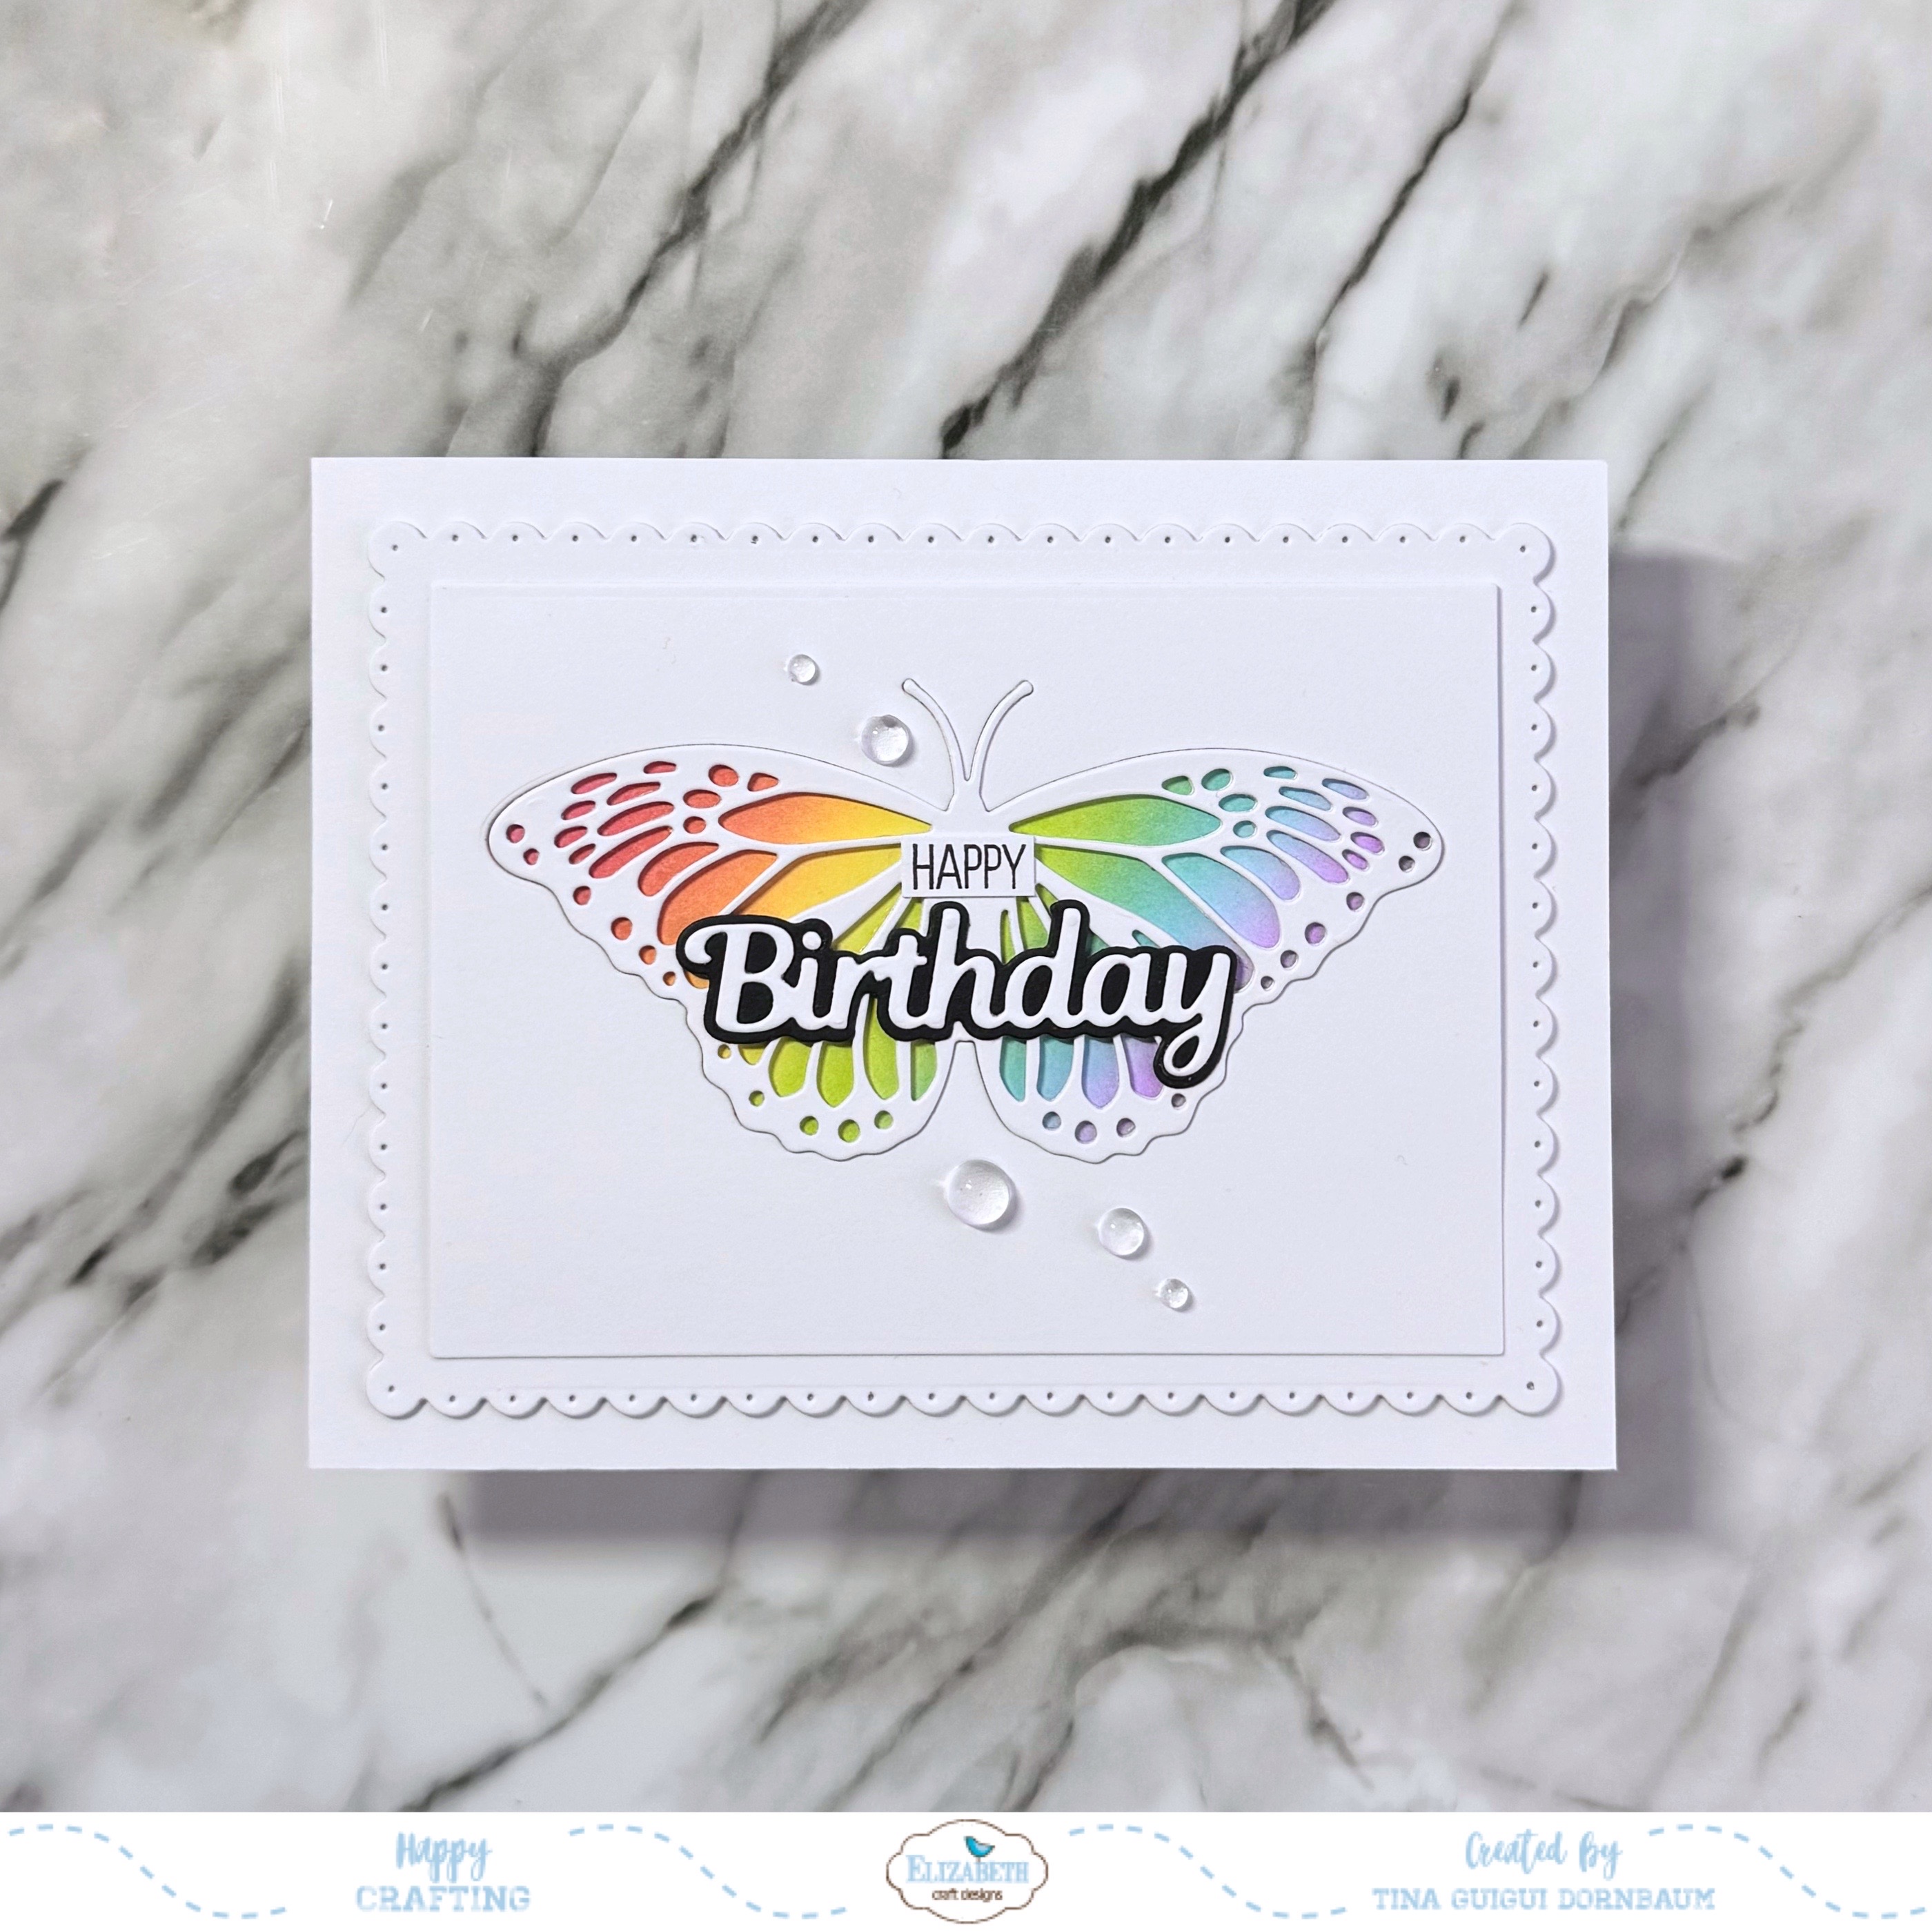
Hi everyone,
I am super excited to announce that I am on the Crafty Meraki DT. I got to play with the Love Like No Other Collection and below you will find the steps to create your own card

Step 1 - Trim White Cardstock to 4 1/4” x 11”, score at 5 1/2” and fold in half for a horizontal top fold card. (A2)
Step 2 - Trim White Cardstock to 4 1/4” x 5 1/2”. Apply inks of your choice using a Blender Brush. I used inks in a pastel pink, pastel yellow, pastel green and pastel green for a soft background. Trim to 3 3/8” x 4 5/8” and adhere to card front using adhesive of your choice.
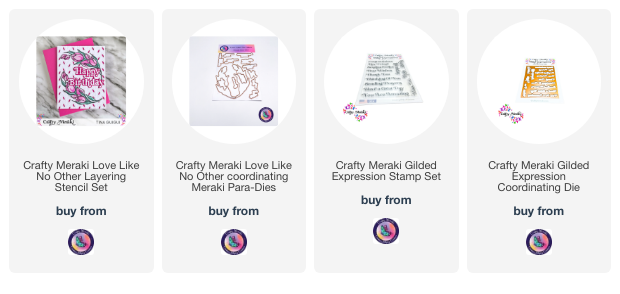
Step 3 - Place Love Like No Other Stencil #1 on White Cardstock and start to ink blend in colors of your choice. Work your way through all the stencils until your ink blending is done.
Step 4 - Diecut the panel from Step 3 with the matching Love Like No Other Dies and adhere to card front using Foam Tape.
Step 5 - Stamp Gilded Expression using Versafine Onyx Black Ink. Diecut with the matching Gilded Expression Die. This is fabulous because it cuts all the sentiments in one pass.

This card can be used for many occasions by simply changing the color and/or sentiment. Below is a link to the products used. Thank you for stopping by and happy crafting!
Products Used: