Today I am sharing a Valentine's Card which is the first of several more to follow over the next few weeks. I also have a wonderful Blog Giveaway to start the New Year. I am giving away an Elizabeth Craft Designs ModaScrap Lace Corner Die. All you have to do is Follow my Blog to automatically be entered in a random drawing. On January 22 I will announce the winner. Good luck to everyone.
Here is the Prize
Now let's get started. The finished card measures 4 1/4" x 5 1/2" folded. Below you will find the easy steps to replicate this card.

- Step 1 - Trim White Soft Finish Cardstock to 5 1/2" x 8 1/2", fold in half for a horizontal card.
- Step 2 - Trim White Soft Finish Cardstock to 4" x 5 1/4". Tear a scrap piece of cardstock and place it on the right side of the trimmed paper leaving a blank section, with an ink blending tool apply red ink. (I used Distress Inks). Move the torn cardstock and repeat Step 2 using a shade lighter. Each time you repeat you will ink a lighter shade. See below photo for reference.

- Step 3 - Emboss the inked cardstock with the Heart Background Die in a diecut machine. To do this you will need a diecut machine with the plates as if you were embossing with a folder. You will need to add an embossing pad for this. For instance if using a Cuttlebug you will use Plate A, B, Embossing Pad, Inked Cardstock, Heart Background Die, then Plate B. Instead of the die cutting through the cardstock it will leave an embossed impression. For all other machines you can go on youtube to find out the right "sandwich". Adhere the background to the center front of card using 3mm Clear Double Sided Adhesive Tape.
- Step 4 - Ink a scrap piece of white Soft Finish Cardstock using the same colors used for the background. Diecut Entwined Hearts (middle size die & smallest die). Adhere the entwined heart to the bottom left side of card using Multi Medium Glue. Add Crystal Nuvo Drops to the 3 small hearts and let dry throughly. Once dry adhere the small hearts using Multi Medium Glue and place around the entwined heart.
- Step 5 - Diecut sentiment using the same inked Cardstock. Stamp directly on the diecut with Embossing Ink. Sprinkle clear Embossing Powder and heat set it with a Heat Gun. Repeat this 3 times for even smooth coverage. Adhere to the center of entwined heart using Multi Medium Glue.
- Step 6 - Stamp small sentiment on the same inked Cardstock with Black Ink. Trim and adhere underneath the embossed sentiment using foam tape.


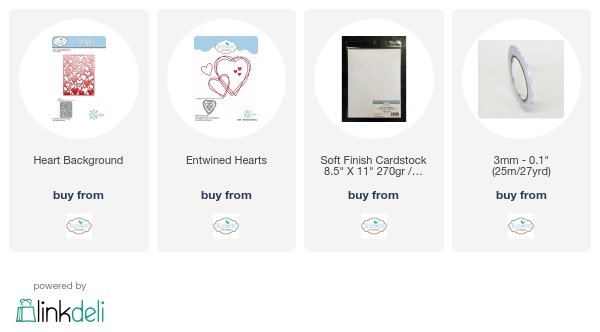
Below is a link for all Elizabeth Craft Designs Product Used for your easy convenience.

Other Products Used
Distress Inks
Crystal Nuvo Drops
Multi Medium Glue
Happy Happy Happy Sentiment Die (Fawn Lawn)
Stained Glass Love Sentiment Stamp (Simon Says Stamp)
Thank you for stopping by and see you soon.


Your cards are gorgeous, Tina! I couldn't resist signing-up as your newest follower, Jo x
ReplyDeleteSuch a contemporary looking card. Luv it!
ReplyDelete