
I have a last minute card to share with you. Before I get started I wanted to give a Shout Out for Gina K Designs. I wanted the Merry And Bright Stamp and Die Kit but it was sold out. I looked everywhere and couldn't find even some similar stamps for what I had in mind so I wrote to customer service and immediately they wrote back and informed me that they were ordering more and would put me on a list. Would you believe after a few days they actually wrote to me to let me know they had received the kit and asked me if I still wanted it. I was extremely happy and being in Canada I was impressed at how quickly I received it. Fabulous customer service Gina K!!!
Now let's get started. Below you will find the steps to replicate this card. Finished card measures 4 1/4" x 5 1/2" folded.

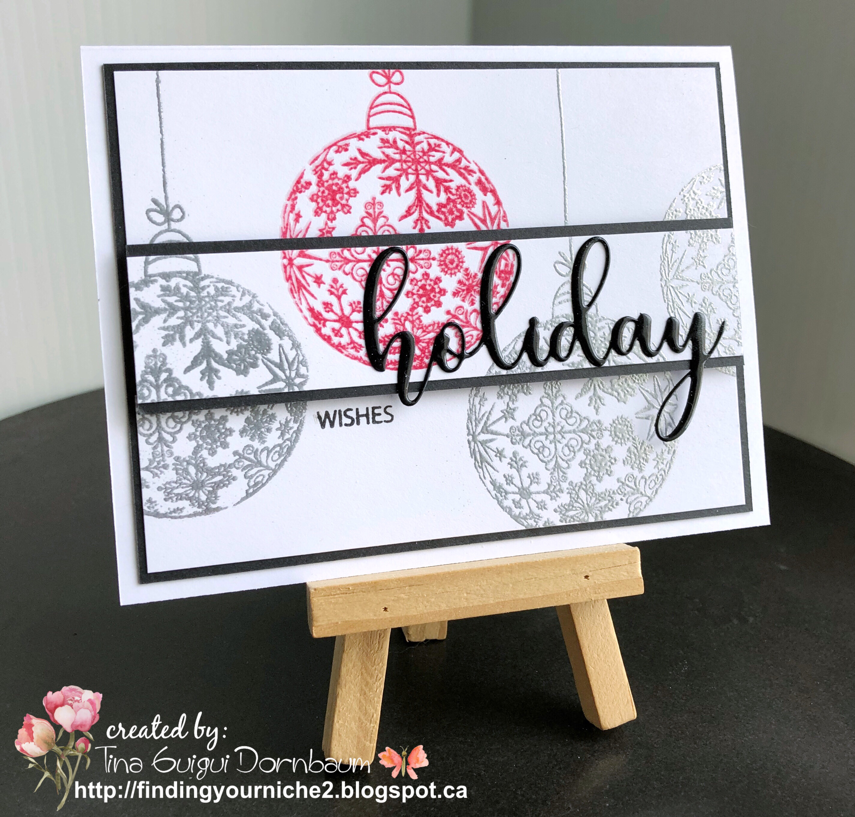
- Step 1 - Base of card - Trim White Cardstock to 5 1/2" x 8 1/2", fold in half.
- Step 2 - Trim Black Cardstock to 4" x 5 1/4" and adhere to front base of card.
- Step 3 - On White Cardstock trimmed to 3 3/4" x 5" Stamp Merry And Bright Ornament Stamp with red ink. (You will need a stamp position tool for this.) Once dry use a stamping powder pad over the stamped image. Stamp over same image using embossing ink. Sprinkle Clear Embossing Powder and use a heat gun to heat set it. Now stamp image randomly 3 times with embossing ink. Sprinkle Silver Embossing Powder and use a heat gun to set it. (See below photos for position of stamped images.)
- Step 4 - Trim the stamped cardstock in 3 strips. (See below for visual).
- Step 5 - Adhere top stamped strip and bottom stamped strip to the Black Cardstock. (Top strip to the top of Black Cardstock and Bottom strip to the bottom of Black Cardstock). Before adhering the Center strip matte it with Black cardstock. Adhere to center of card using foam tape. This will add dimension.
- Step 6 - Diecut large sentiment on White Cardstock. (I used the Holiday sentiment from Merry And Bright.) With an Embossing Ink pad press directly on the diecut. Sprinkle Black Embossing Powder and with a heat gun heat set it. Repeat this step 3 times for even coverage and dimension. Adhere to the center piece using Multi Medium Glue.
- Step 7 - Stamp small sentiment underneath the raised center with Black Ink. (You can do this step after Step 5 but will need to place the center piece to mark the place you will stamp it.


Thank you for stopping by. Be sure to come back soon for another card tutorial and a Giveaway to start the New Year.
I love everything about this card. The pop of red, the lifted center and the embossed sentiment. Beautiful!
ReplyDelete