Friday, August 28, 2020

WOW! Embossing Powder And Kat Scrappiness Blog Hop

Hi Everyone! Welcome to the Wow! Embossing Powder and Kat Scrappiness Blog Hop. There will be 2 days of inspiration using Kat Scrappiness product and Wow! Embossing Powder.

The Blog hop starts Friday 28th (see below for times) and continues on Saturday 29th August 2020.

6AM Central Time

7AM Eastern Time

9PM AEST

12PM UK

It will run for a week and ends on September 3rd, the winners will be announced the week of September 5th 2020 on both the WOW! Embossing Powder and Kat Scrappiness Blog.

WOW! Embossing Powder is giving away a $25 Gift Certificate to either their UK or USA Store and Kat Scrappiness is giving away a $25 Gift Certificate to their store. All you need to do to win is COMMENT. The more blogs you comment on the more chances you have to win! The winners will be chosen at RANDOM from ANY of the blogs on the two day hop.

If you have come here from Riikka Kovasin...then you have come from the right place. If you get lost along the way I have listed the lineups for both days at the end of this post!

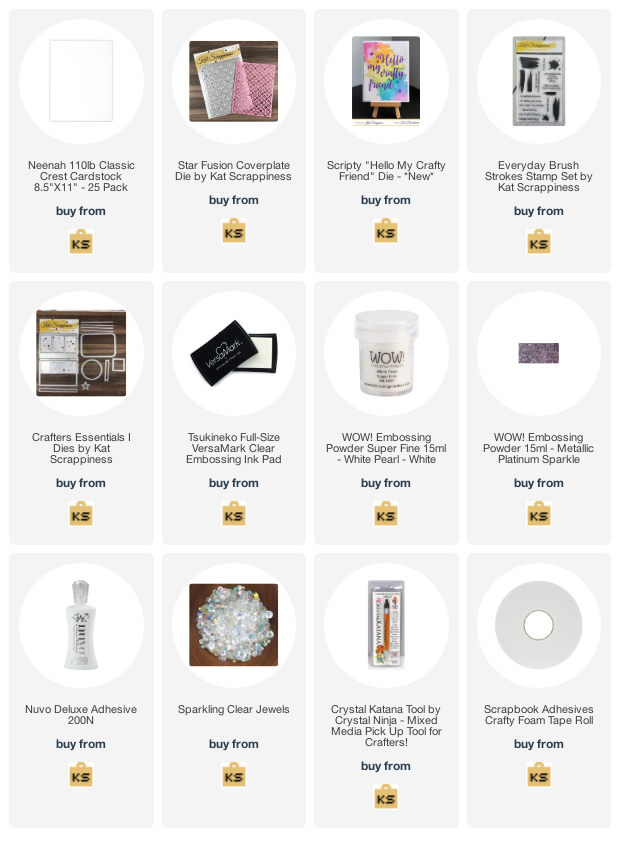
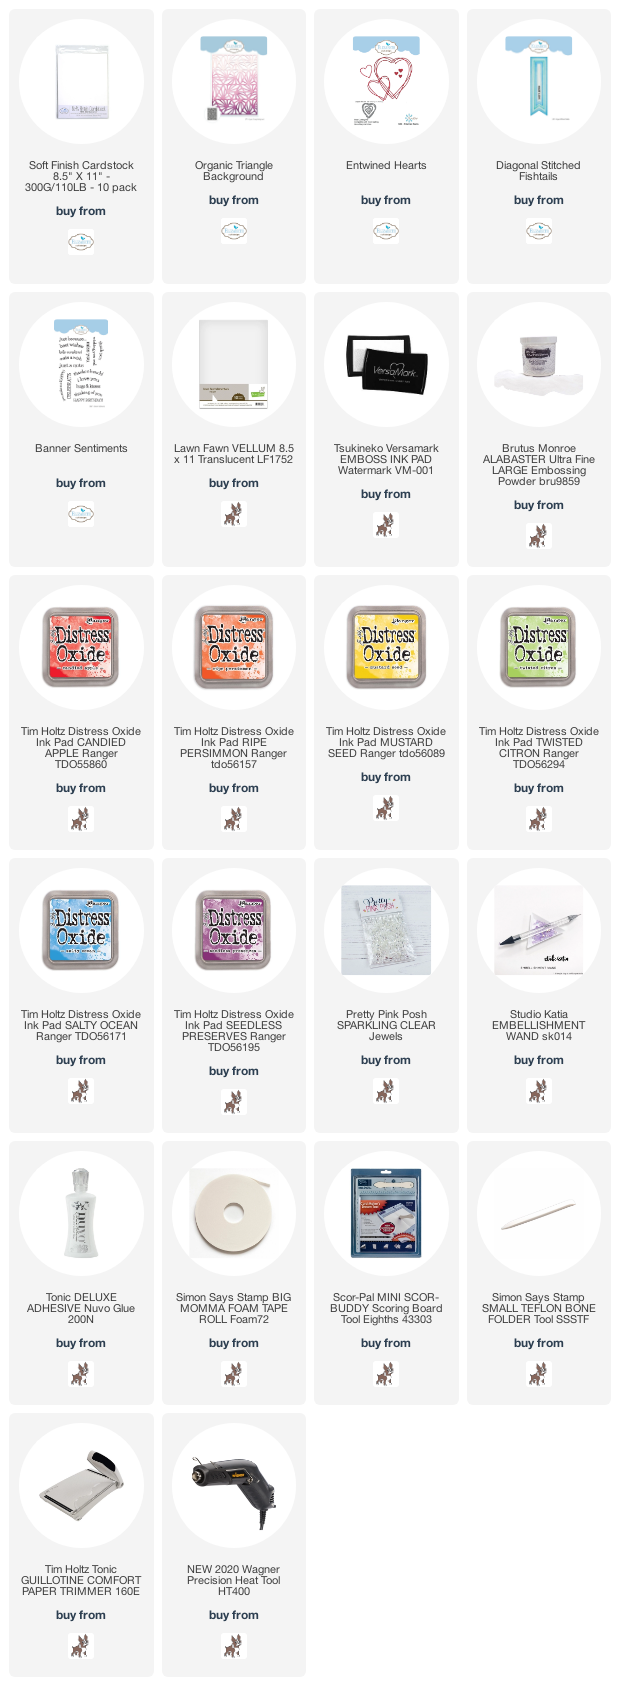
Below you will find the steps to create your own Hello My Crafty Friend card.


Step 1 - Trim White Cardstock to 8 1/2” x 5 1/2”, score at 4 1/4” and fold in half for a vertical side fold card (A2).

Step 2 - Trim Soft Pink Cardstock to 5 1/2” x 4 1/4” and adhere to card front using Nuvo Deluxe Adhesive.

Step 3 - Diecut Star Fusion Coverplate using the same Soft Pink Cardstock from Step 2. Apply Versamark and sprinkle Wow White Pearl Embossing Powder. Remove the excess and heat set it with a heat tool. Repeat only if you don’t have even coverage. Adhere to card using Nuvo Deluxe Adhesive.

Step 4 - Diecut Never Ending Heart using Patterned Paper. Adhere to card front using Nuvo Deluxe Adhesive with part of the right side hanging off. Trim off the excess.

Step 5 - Diecut Hello My Crafty Friend using Black Cardstock (only Hello). Apply Versamark and sprinkle Wow Metallic Platinum Sparkle Embossing Powder. Remove the excess and heat set it with a heat tool. Optional - trace the Hello die onto Vellum and cut it out or use a scan and cut machine to create a shadow for the Hello diecut. Adhere the Hello diecut to the vellum and adhere it to card front using Nuvo Deluxe Adhesive.

Step 6 - Stamp Everyday Brush Strokes sentiment using Versamark (only My Crafty Friend) on Black Cardstock. Sprinkle Wow Metallic Platinum Sparkle Embossing Powder. Remove the excess and heat set it with a heat tool. Diecut the sentiment using Crafters Essentials I (fishtail banner). Adhere to the card using Foam Tape.

Step 7 - For added interest and sparkle randomly adhere Sparkling Clear Jewels using Nuvo Deluxe Adhesive and a Crystal Katana.

Sunday, August 9, 2020

Elizabeth Craft Designs August Group Post

Hi everyone! Today is the Elizabeth Craft Designs August Group Post. The theme is Who Did You Miss Over The Summer. I knew instantly it was my son. I have not seen my son since the pandemic started and I miss him dearly! I decided on a rainbow background signifying Things Will Get Better. Below you will find the steps to create your own Miss You Card.

Step 1 - Trim White Soft Finish Cardstock to 8 1/2” x 5 1/2”, score at 4 1/4” and fold in half for a vertical side fold card. (A2)

Step 2 - Trim White Soft Finish Cardstock to 5 1/2” x 4 1/4”. Apply Distress Oxide Ink in rainbow colours. I used Candied Apple, Ripe Persimmon, Mustard Seed, Twisted Citron, Salty Ocean, Seedless Preserves.

Step 3 - Diecut Organic Triangles Background using the panel created in Step 2. Adhere to card front using Nuvo Deluxe Adhesive.

Step 4 - Stamp Banner Sentiment on Vellum using Versamark Ink. Sprinkle White Embossing Powder and remove the excess. Heat set it with a heat tool. Diecut Diagonal Stitched Fishtails to the sentiment created. Adhere to the card front using Nuvo Deluxe Adhesive beneath the letters so the glue doesn’t show through.

Step 5 - Diecut Entwined Hearts using Medium Red Cardstock and diecut again using Dark Red Cardstock. Using the diecut (heart) trace on red Cardstock. Fussy cut it and adhere the Dark Red diecut outline, inlay all the pieces in Medium Red.

Step 6 - For added interest and sparkle randomly adhere Clear Jewels using an Embellishment Wand and Nuvo Deluxe Adhesive.

This card can be used for many occasions by changing the colours, sentiment and shape. Below is a link to all the products used. Thank you for stopping by and Happy Crafting!

Products Used:

Saturday, August 1, 2020

i-Crafter August Release

Hi Everyone,
Today is the i-Crafter August Release. There is several interactive dies being released today. I used the Flip Card Flower. It is stunning with its big flower and very easy to make. Below you will find the steps to create your own card.


Step 1 - Trim White Cardstock to 4 1/4” x 11”, score at 5 1/2” and fold in half for a vertical side fold card. (A2)

Step 2 - Diecut Flip Card Flower (the full panel) using Patterned Paper and (the full panel with the Flower aligned) using another Patterned Paper. Assemble together. Optional: For added interest  diecut just the Flower using a Bold Patterned Paper and rotated it and diecutting again. This will give you just the Flower. Adhere on top using Nuvo Deluxe Adhesive.

Step 3 - Adhere the entire panel to the card front.

Step 4 - Diecut the leaves and sentiment using 2 Colors of Green Cardstock. For the sentiment I used the lighter green for the word and darker green for the word shadow. Adhere to the card front using Nuvo Deluxe Adhesive.


This card can be used for many occasions by changing the colours and sentiment. The Flip Card Flower dies is such a fun and easy way to create an interactive card. Below is a link to the shop. Thank you for stopping by and Happy Crafting!

Products Used: