Friday, November 27, 2020

Shake Your Merry Maker Card

Hi everyone!

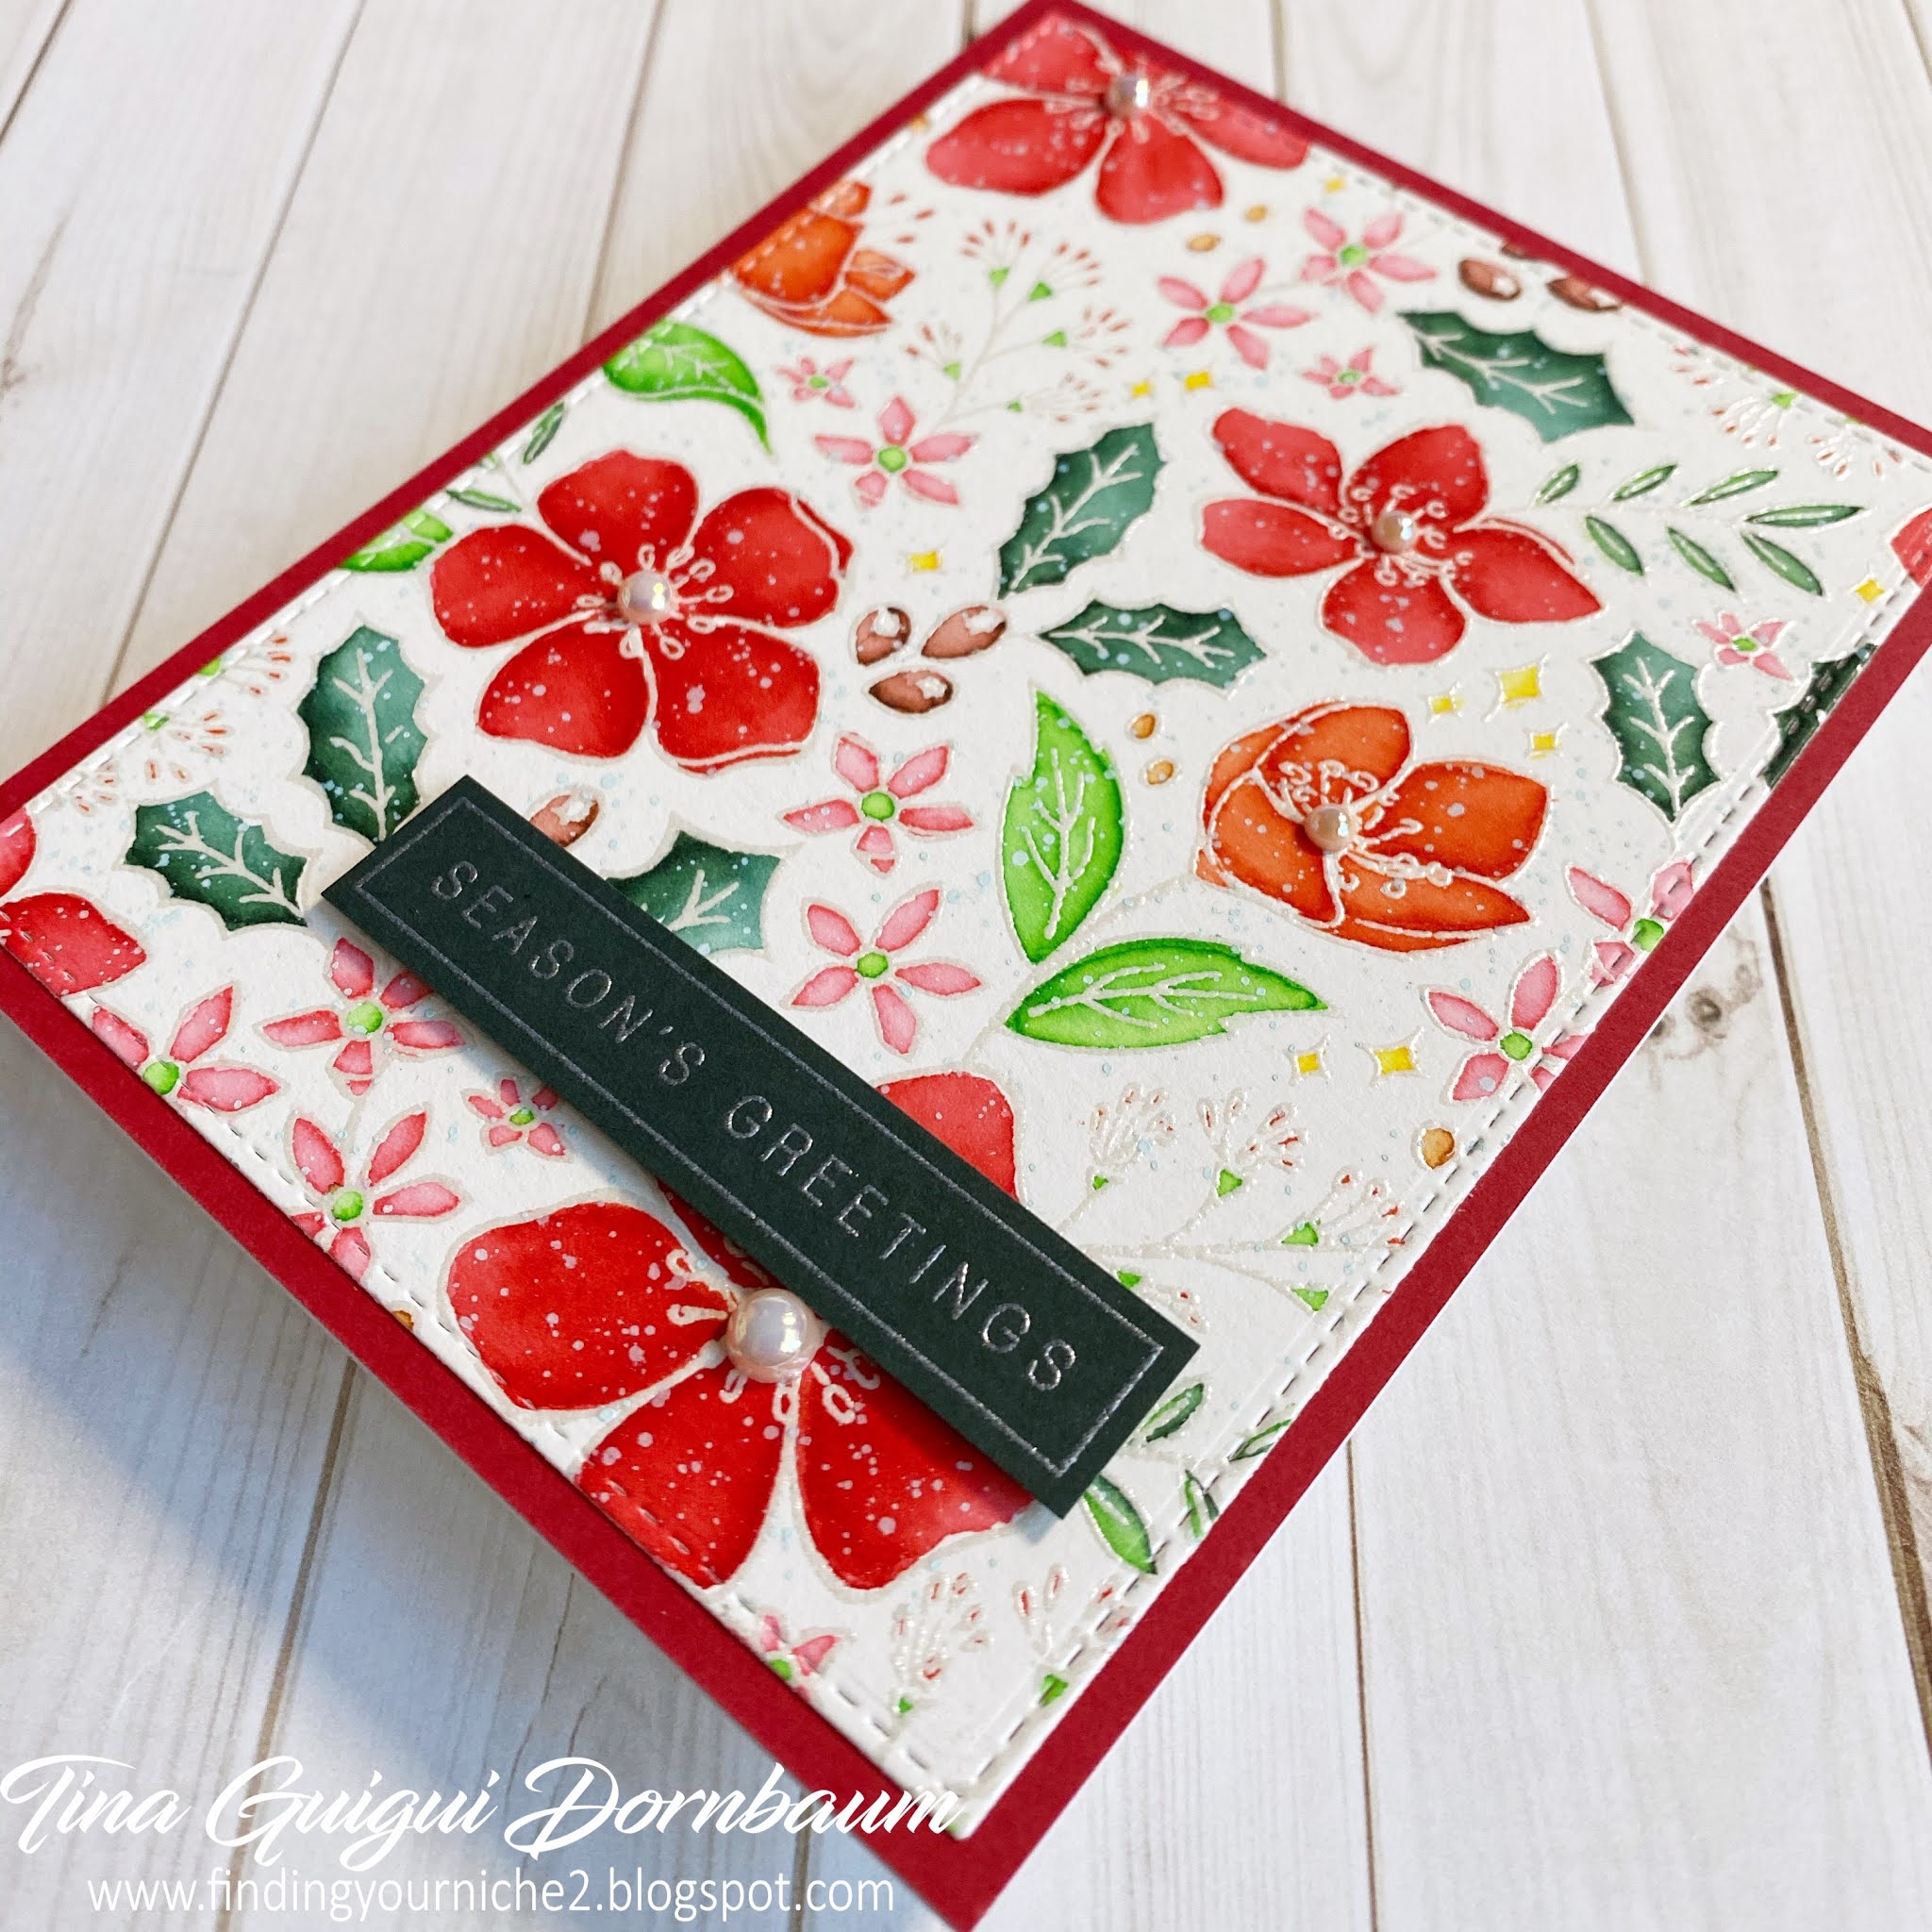
Today I am on the Trinity Stamps blog as Guest Designer for November. I have a fun card to share with you using the Shake Your Merry Stamp set, 6x6 Layered Pine Stencils and the Slimline Series Envelope Builder Dies. I will show you how you can use the Scallop die from the set to use on an A2 card. Below you will find the steps to create your own Shake Your Merry Maker card.


Step 1 - Trim White Cardstock to 8 1/2” x 5 1/2”, score at 4 1/4” and fold in half for a vertical side fold card. (A2)

Step 2 - Trim Patterned Paper to 5 1/2” x 4 1/4” and adhere to card front using Nuvo Deluxe Adhesive. (I used Simple Stories 6x8 Simple Vintage Christmas Paper Pad.)

Step 3 - Trim White Cardstock to 5 1/2” x 4 1/4”. Use Purple Tape to temporarily adhere the Cardstock and then the 6x6 Layered Pine Stencil (1st layer). Using an ink applicator apply your lightest green ink and work onto the 2nd layer with a darker shade, ending with the darkest for the last layer. (I used Distress Oxide Inks Old Paper, Mowed Lawn and Pine Needles.) Apply ink to add the tree trunk and star. To create a glittery snow effect I applied Nuvo Crystals Drops Simple White and while it was still wet I sprinkled Glitter. Let dry. Trim to 5” x 3 3/4” and adhere to card using Nuvo Deluxe Adhesive.

Step 4 - Diecut Slimline Series Envelope Builder using Red Cardstock. Trim it in half and reposition to make it 5” x 3 3/4”. Adhere to card using Nuvo Deluxe Adhesive. By aligning it you barely see that it was cut. 

Step 5 - Stamp Shake Your Merry Maker image using Gina K Amalgam Ink. Color using medium of your choice. I used Spectrum Noir Classique Markers. Optional for added interest use Nuvo Shimmer Pen to add sparkle to the white accents on the Santa image. Diecut or fussy cut the image and adhere to card using an Action Wobble.

Step 6 - Stamp Shake Your Merry Maker sentiment using Versafine Onyx Black Ink at the upper left corner.

Step 7 - For added interest and sparkle randomly adhere Gold Baubles using an Embellishment Wand and Nuvo Deluxe Adhesive.


Action Wobble in Action


The Shake Your Merry Maker stamp set was begging for that Action Wobble so Santa could get his groove on. If you would like to see all the products I used visit my blog for all details. Below is a link to all the products used. Thank you so much for stopping by and Happy Crafting!

Products Used:

Sunday, November 15, 2020

Elizabeth Craft Designs November Group Post Christmas

Hi everyone, welcome back to the Elizabeth Craft Designs Group Post. This month the theme is Christmas which is just in time for the new mini Holiday release. There are 5 new dies. Holiday Elf - Hers, Holiday Elf - His, Jack Frost, Winter Accessories, and Snow Globe. Today's card is using the Holiday Elf - Hers along with some earlier product. Below you will find the steps to create your own Have A Holly Jolly Christmas card.

Step 1 - Trim White Soft Finish Cardstock to 8 1/2" x 5 1/2", score at 4 1/4" and fold in half for a horizontal top folding card. (A2)

Step 2 - Trim White Soft Finish Cardstock to 4 1/4" x 5 1/2". Apply Distress Oxide Ink Tumbled Glass using a Blender Brush. I went heavy on the top and lighter towards the bottom. Place a snow stencil on top and apply Snow Glitter Paste. Remove the stencil and let dry.

Step 3 - Diecut Stitched Rectangles to the panel created in Step 2. Adhere to card using 3mm Clear Double Sided Adhesive Tape.

Step 4 - Diecut Santa’s Sleigh (sleigh die) using Red Cardstock and Gold Metallic Cardstock for the legs of the sleigh. Adhere the legs to the sleigh using Kid’s Choice Glue. Stamp Joyful Wishes sentiment using Versamark to the left side of the Sleigh. Sprinkle Gold Embossing Powder and remove the excess. Heat set it with a Heat Teal. Adhere the Sleigh to the card front using Kid’s Choice Glue leaving a gap opening at the top. 

Step 5 - Diecut Santa’s Sleigh (presents) using Metallic Cardstock for the ribbons and Patterned Paper for the Gift’s. Assemble and adhere to card using Kid’s Choice Glue.

Step 6 - Diecut Holiday Elf - Hers using various colors of Cardstock. Assemble and adhere to card using Kid’s Choice Glue.


This card is perfect for a Winter or Holiday themed card. The Holiday Elf - Hers can also be used on other occasion cards by removing the trimmings on the boots, hat and collar. Below is a link to all the products used. The Holiday Elf - Hers will be added once it is in available on the website. Thank you for stopping by and Happy Crafting!

Products Used:

Friday, November 13, 2020

Hello Rainbow Slimline Card

Hi everyone! I am super excited to be a Guest Designer for Trinity Stamps for the month of November. Today I am sharing a technique, a tip, along with a Slimline style card. I used the Slimline Series Rainbow Builder Die Set, Slimline Series Envelope Builder Die Set and the Slimline Stripes 6 x 9 Laser Cut 2-Piece Stencil Set. Below you will find the steps to create your own Hello Rainbow Slimline Card.


Step 1 - Trim White Cardstock to 8 1/2” x 7”, score at 3 1/2” and fold in half for a horizontal side fold card. (Slimline)

Step 2 - Trim White Cardstock to 8 1/2” x 3 1/2”. Spray some Pixie Spray onto the backside of the Slimline Stripes 6 x 9 Laser Cut 2-Piece Stencil (Diagonal Stencil). Let it dry for a minute and then place it on top of the trimmed White Cardstock. Apply Distress Oxide Ink using a Foam Applicator. Starting from the left side moving towards the right. Candied Apple, Spiced Marmalade, Squeezed Lemonade, Cracked Pistachio, Salty Ocean, Wilted Violet. Remove the stencil. Although I love how my panel turned out I knew that my Rainbow would be bright colours so I decided to spray water on the stencil which still had the inks I applied and use it to transfer onto another panel. Let dry and then adhere to card front using Nuvo Deluxe Adhesive.


Step 3 - Diecut Slimline Series Rainbow Builder using White Cardstock (Rainbow). If you don’t have multiple colours of Cardstock I like to diecut in White and then colour it using my Alcohol Markers. This allows me to select the colours of my choice. I used the negative cut of the rainbow to trace an outline onto a scrap piece of Cardstock. Trim it out use it to adhere the layers of each rainbow. Now I only have to adhere one panel.


Step 4 - Diecut Slimline Series Rainbow Builder using White Cardstock (Clouds). For the clouds on the right side adhere the top cloud layer to the under cloud layer using Nuvo Deluxe Adhesive. Adhere it to the card using Foam Tape. Adhere the rainbow using Foam Tape. Adhere the cloud on the left side using Nuvo Deluxe Adhesive where it overlaps the rainbow and Foam Tape where it doesn’t overlap.

Step 5 - Diecut Slimline Series Envelope Builder sentiment using White Cardstock for the word and Black Cardstock for the shadow. Adhere the top layer to the bottom and then adhere to the card using Nuvo Deluxe Adhesive.

Step 6 - For added interest and sparkle randomly adhere Something New Embellishment Mix Pearls using an Embellishment Tool and Nuvo Deluxe Adhesive.


This card can be used for many occasions by simply changing the sentiment. I hope this card has inspired you and brought you several tips along the way. Below is a link to all the products used. Thank you for stopping by and Happy Crafting!

Products Used:

Thursday, November 12, 2020

Season’s Greetings Card

Hi everyone,

Today I am sharing a card I made using the Hero Arts Christmas Rose Bold Prints Cling Stamp heat embossed with WOW! White Pearl Embossing Powder to create a gorgeous watercolor Holiday Background. There are many ways to stamp and colour in this image. I embossed it onto Watercolor paper for a watercolour effect. Below you will find the steps to create your own Season’s Greetings Card.

Step 1 - Trim White Cardstock to 8 1/2” x 5 1/2”, score at 4 1/4” and fold in half for a vertical side fold card. (A2)

Step 2 - Trim Schoolhouse Red Cardstock to 4 1/4” x 5 1/2” and adhere to card front using Nuvo Deluxe Adhesive.

Step 3 - Stamp Christmas Rose Bold Prints with Versamark on Watercolor Paper.  I used Strathmore Ready Cut Watercolor Hot Press 5” x 7”, but Cold Press will work as well. Sprinkle Wow! White Pearl Embossing Powder and remove the excess. Heat set it with a Heat Tool. Colour in the images using Watercolor markers. I used Arteza Real Brush but Zig Clean Colors will work as well. Below I listed the colours I used from the Arteza Real Brush markers beneath each photo.

Red / A101

Seaweed Green / A120

Lighter Green Leaves- Light Green / A111
Small seeds - Autumn Red / A118
Orange Flowers - Cadmium Orange / A140
Tiny Leaves - Seaweed Green / A120 & Light Green / A111

Small Poinsettia - Rouge Pink / A190
Small Circles - Orange Rust / A169
Stars - Bumblebee Yellow / A128

Step 4 - Add White Gouache onto an Acrylic Block and add a few drops of water. Using a Watercolor Brush tap on the brush to create a light splatter effect onto the panel created in Step 3. I hadn’t cleaned my Watercolor Brush thoroughly and there was some Green ink on my Brush so I didn’t get the White Bright I had wanted but I love the Soft Green effect. Let dry.

Step 5 - Diecut Double Stitched Rectangles using the panel created from Step 3. (Tip - place a scrap of Printer Paper on top of the panel to protect the panel) Adhere to card front using Nuvo Deluxe Adhesive.

Step 6 - Stamp Holiday Greetings Mix 1 sentiment using Versamark on Midnight Green Cardstock. Sprinkle Wow! White Pearl Embossing Powder and remove the excess. Heat set it with a Heat Tool. Trim the sentiment and adhere to card using Foam Tape.

Step 7 - For added interest and sparkle add Vintage Shimmer Pearls using an Embellishment Wand and Nuvo Deluxe Adhesive to the center of the Flowers.


I love how the White Pearl Embossing created a soft effect. You can also Emboss it in Black for a more dramatic appearance. Below is a link to all the products used. Thank you so much for stopping by and have a wonderful day.

Products Used:

Sunday, November 1, 2020

i-Crafter November Release

Hi everyone, welcome back to another i-Crafter release. Today I am sharing a card using the new Fern Berries Stencil. It is such a delicate and pretty design. I topped it off with the Wonderful World stamp set. Below you will find the steps to create your own What A Wonderful World Card.

Step 1 - Trim White Cardstock to 8 1/2” x 5 1/2”, score at 4 1/4” and fold in half for a vertical side fold card. (A2)

Step 2 - Trim Black Cardstock to 3 7/8” x 5 1/8” and adhere to card front using Nuvo Deluxe Adhesive.

Step 3 - Prep the Fern Berries Stencil by spraying Pixie Spray to the backside. The stencil is very delicate and you will have favourable ink blending by doing this step. Trim White Cardstock to 4 1/4” x 5 1/2”. Place the stencil on the Cardstock. I used Distress Oxide Inks using a Blending Brush. I applied Shabby Shutters to the edges and worked towards the center using Tumbled Glass. Adhere to card front using Nuvo Deluxe Adhesive.

Before you wipe the stencil clean be sure to spray it with water and place a White Cardstock on top to get a second generation ink impression for a watercolor effect to save for another project.


Step 4 - Stamp Wonderful World sentiment using Versamark on Black Cardstock. Sprinkle White Embossing Powder and remove the recess. Heat set it with a Heat Tool. Diecut it with a circle die you have in your stash. Adhere to card using Foam Tape.


This card can be used for many occasions by changing the sentiment and colours of the ink blending. Below is a link to all the products used. Thank you for stopping by and Happy Crafting!

Products Used: