Friday, November 30, 2018

Fall Winter Coffee Lovers Blog Hop With Kat Scrappiness

Hi Everyone,
Welcome back to another Coffee Lover Blog Hop with Kat Scrappiness for Fall winter. Kat Scrappiness is a Super Sponsor and has a $25 Gift Card to shop at the store and a Gift Pack of KS products worth $35. There is also a 15% off coupon: COFFEE18 at checkout. Go here to the Kat Scrappiness Blog. To visit the store go here to katscrappiness.com.Today's card I wanted a winter feel to it so I went with the colors White and Black. Below you will find the steps to replicate this card.


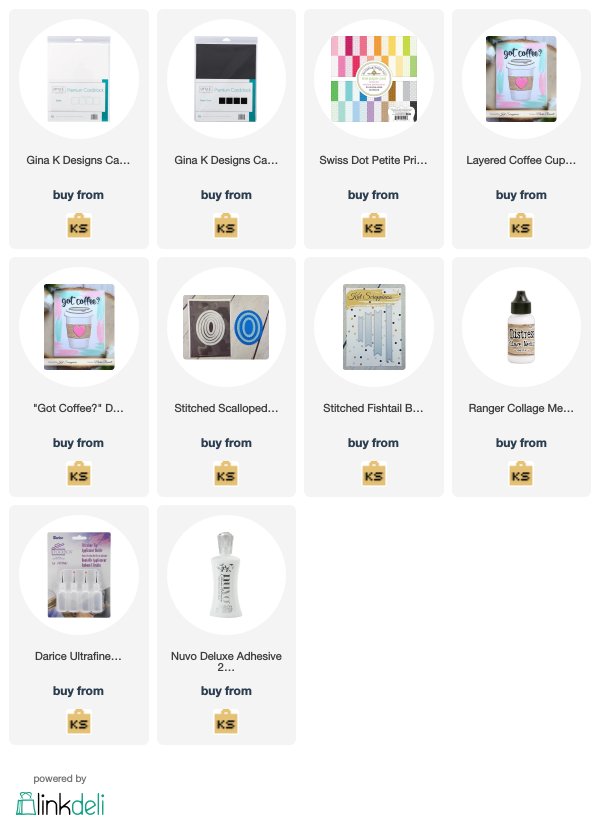
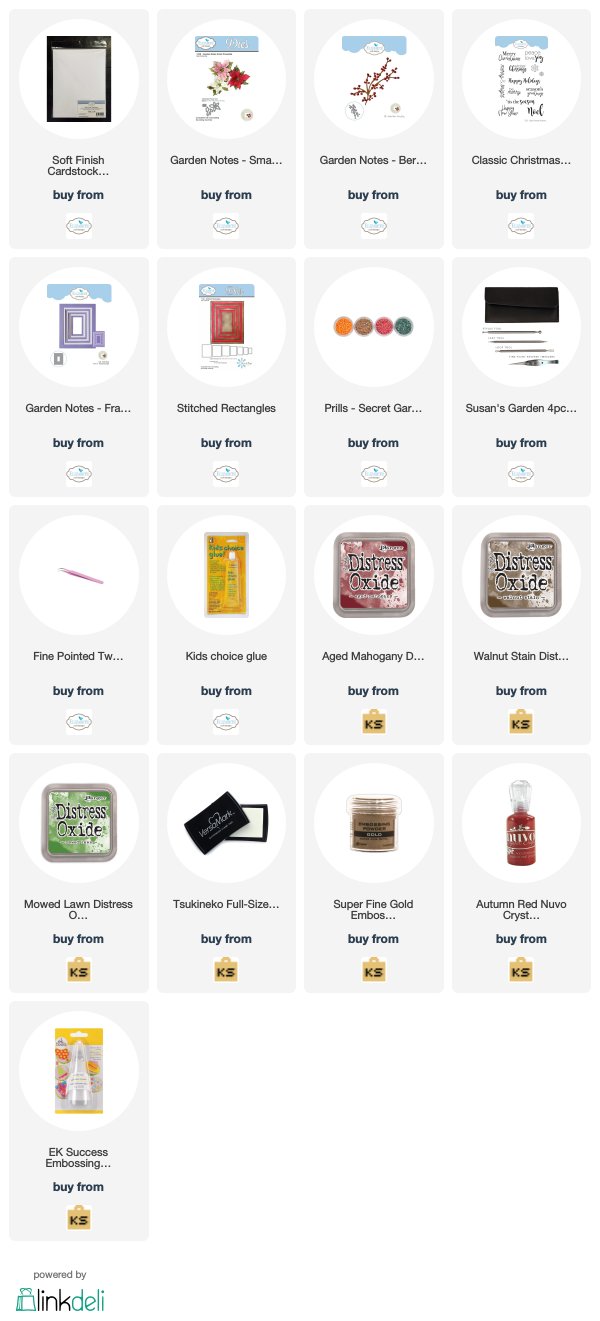
Step 1 - Trim White Cardstock to 8 1/2" x 5 1/2", score at 4 1/4" and fold in half for a vertical side fold card. (A2)

Step 2 - Trim Black Cardstock to 4 3/8" x 5 5/8". Adhere to front of card using Nuvo Deluxe Adhesive Glue.

Step 3 - Trim Swiss Dot Petite Patterned Paper to 4 1/4" x 5 1/2". Diecut Stitched Scallop Oval using Swiss Dot Petite Patterned Paper. You will be using negative diecut. Diecut Double Stitched Rectangles using the negative diecut. Adhere to card using Nuvo Deluxe Adhesive Glue.

Step 4 - Diecut Layered Coffee Cup Build It (Swiss Dot Petite Patterned Paper for base and White Cardstock for all other pieces) Assemble using Collage Medium. Adhere to card on an angle using Nuvo Deluxe Adhesive Glue.

Step 5 - Diecut Fishtail Banners using Black Cardstock. Adhere to card using foam tape.

Step 6 - Diecut Got Coffee? using White Cardstock. Adhere to the top of the Fishtail Banner.


For a full listing go to the Kat Scrappiness Blog. Below is a link to all the Products Used. To receive 10$ off your order use code: TINA10 at checkout. Thank you for stopping by and have a wonderful day.

Products Used:

Tuesday, November 20, 2018

Elizabeth Craft Designs November Challenge A Floral Christmas

Hi Everyone,
Welcome back to another Elizabeth Craft Designs DT Challenge! This month's challenge is A Floral Christmas. Using flowers (ex. poinsettia) or foliage (ex. holly, pineboughs) to create Holiday Cards. Or even use something non traditional and make it Christmassy by using Christmas colors.

But before we start for a chance to win a $20 gift certificate answer this question here in the comments section. Which Elizabeth Craft Designs flower or foliage die or stamp set would you chose to create a Christmas Card or Decoration?  Below you will find the steps to replicate this card.


Step 1 - Trim White Soft Finish to 8 1/2" x 5 1/2", score at 4 1/4" and fold in half for a vertical side fold fold (A2)

Step 2 - Diecut Garden Notes Frame It Rectangles and Stitched Rectangles using White Soft Finish Cardstock to create a window.

Step 3 - Stamp Classic Christmas Sentiment to bottom of window created from Step 2 using Versamark. Sprinkle Gold Embossing Powder and heat set it with a heat tool. Adhere to card using foam tape.

Step 4 - On a scrap piece of White Soft Finish Cardstock apply Distress Oxide Inks Moved Lawn, Aged Mahogany and Walnut Stain.

Step 5 - Diecut Berry Spray with the Walnut Stain paper created from Step 4. Add Crystal Nuvo Drops Autumn Red to create the berries. Once completely dry adhere to the inside of the frame using Kid's Choice Glue.

Step 6 - Diecut Poinsettia with the Aged Mahogany paper and Moved Lawn paper created from Step 4 for the bottom layer of leaves. Assemble the pieces using Kid's Choice Glue. Add Prills to the center of Poinsettia. Once completely dry adhere to the inside bottom right using Kid's Choice Glue.


This card can be used for any occasion by changing the flower, sentiment and colors. Below is a link to all the products used. A reminder don't forget to answer the question in the comments section on the Elizabeth Craft Designs Blog for a chance to win at $20 Gift Certificate. Thanks for stopping by and have a wonderful day.

Products Used: