Tuesday, December 31, 2019

Festive Friends on Neenah Desert Storm

Hi Everyone,
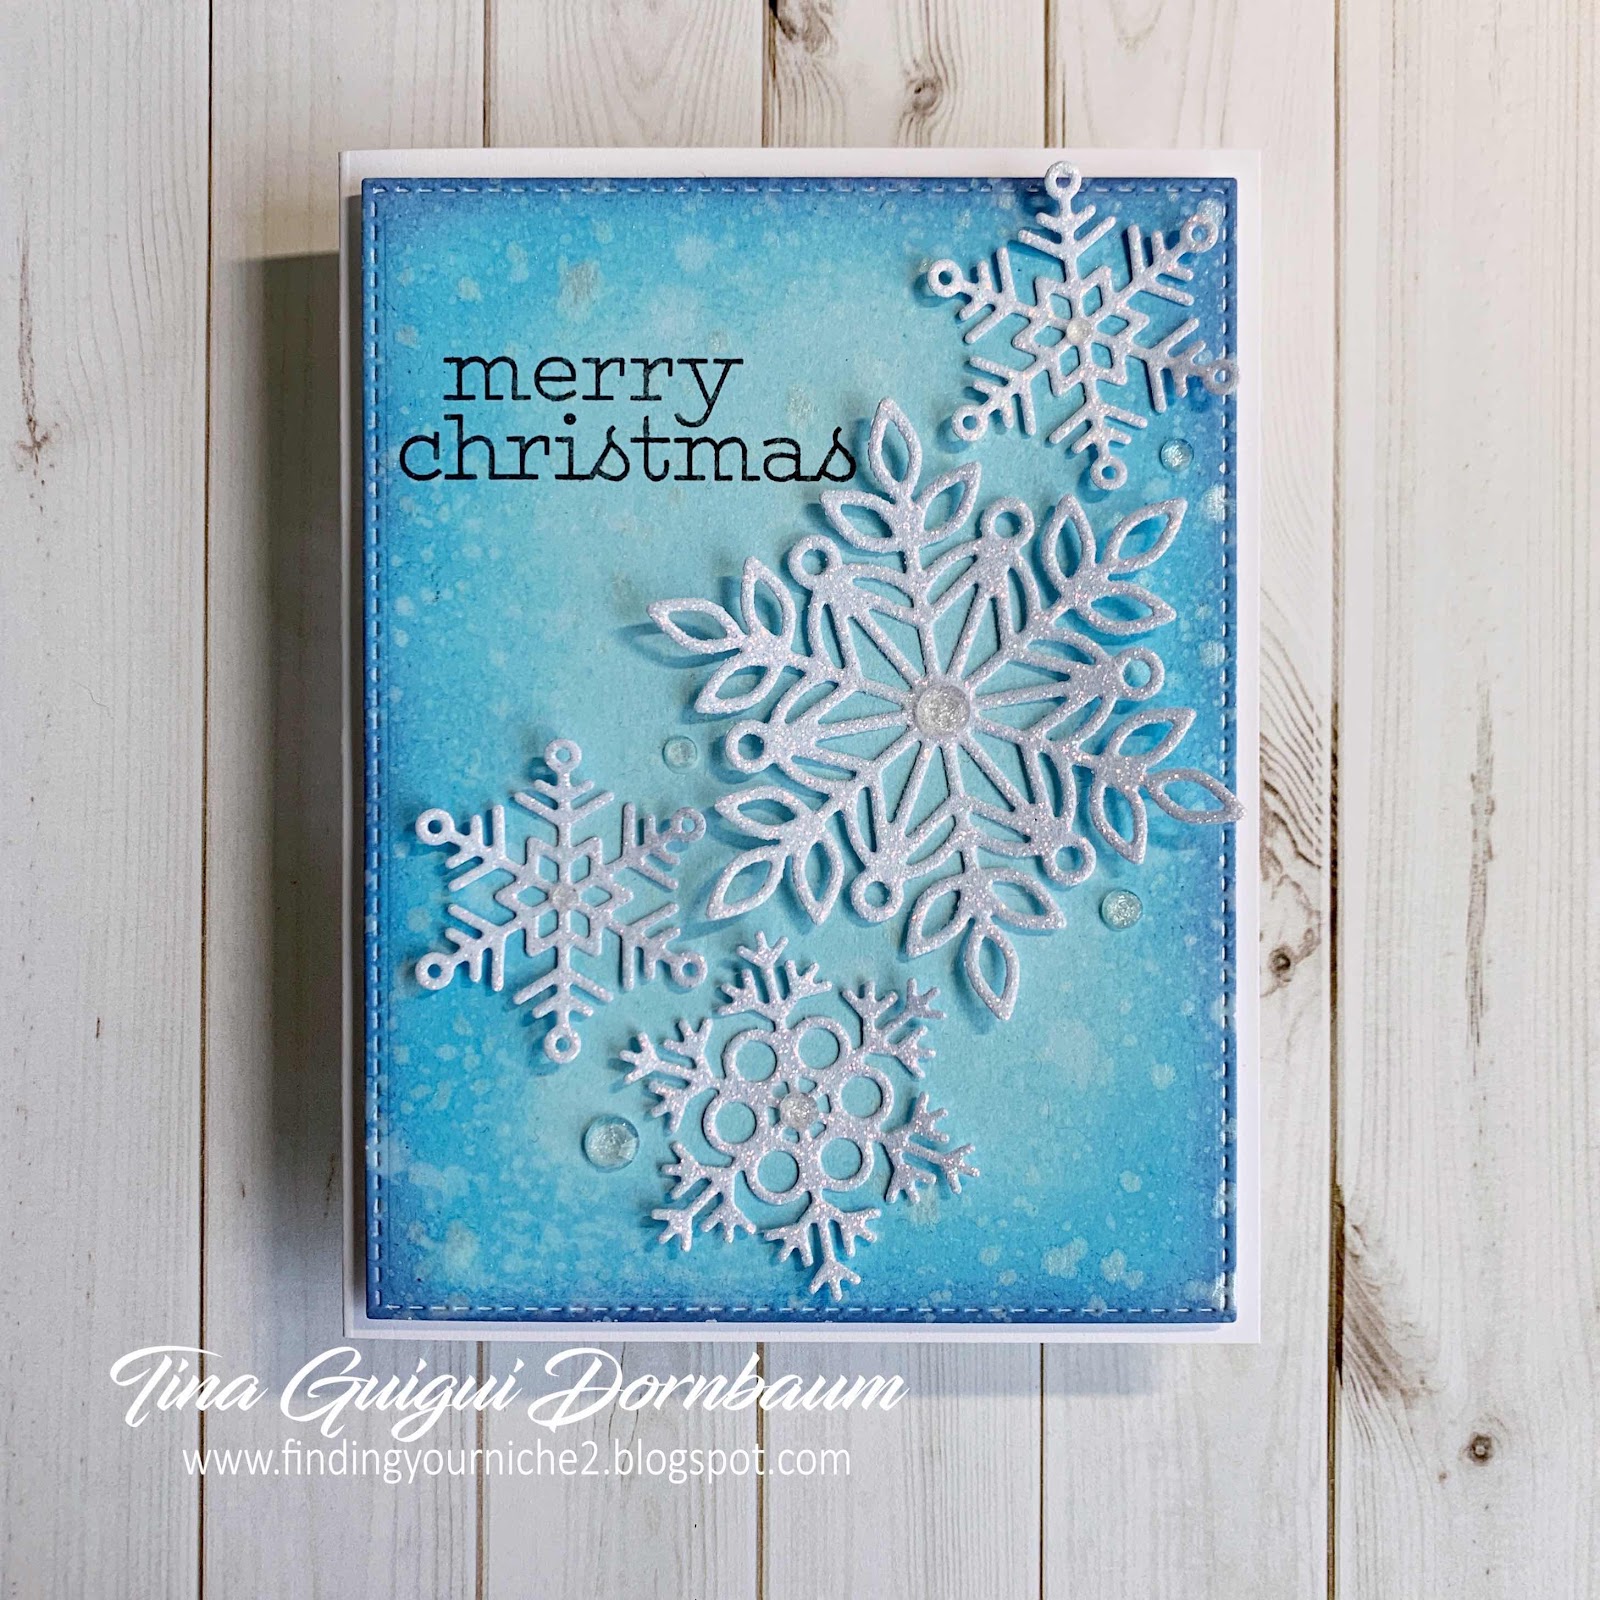
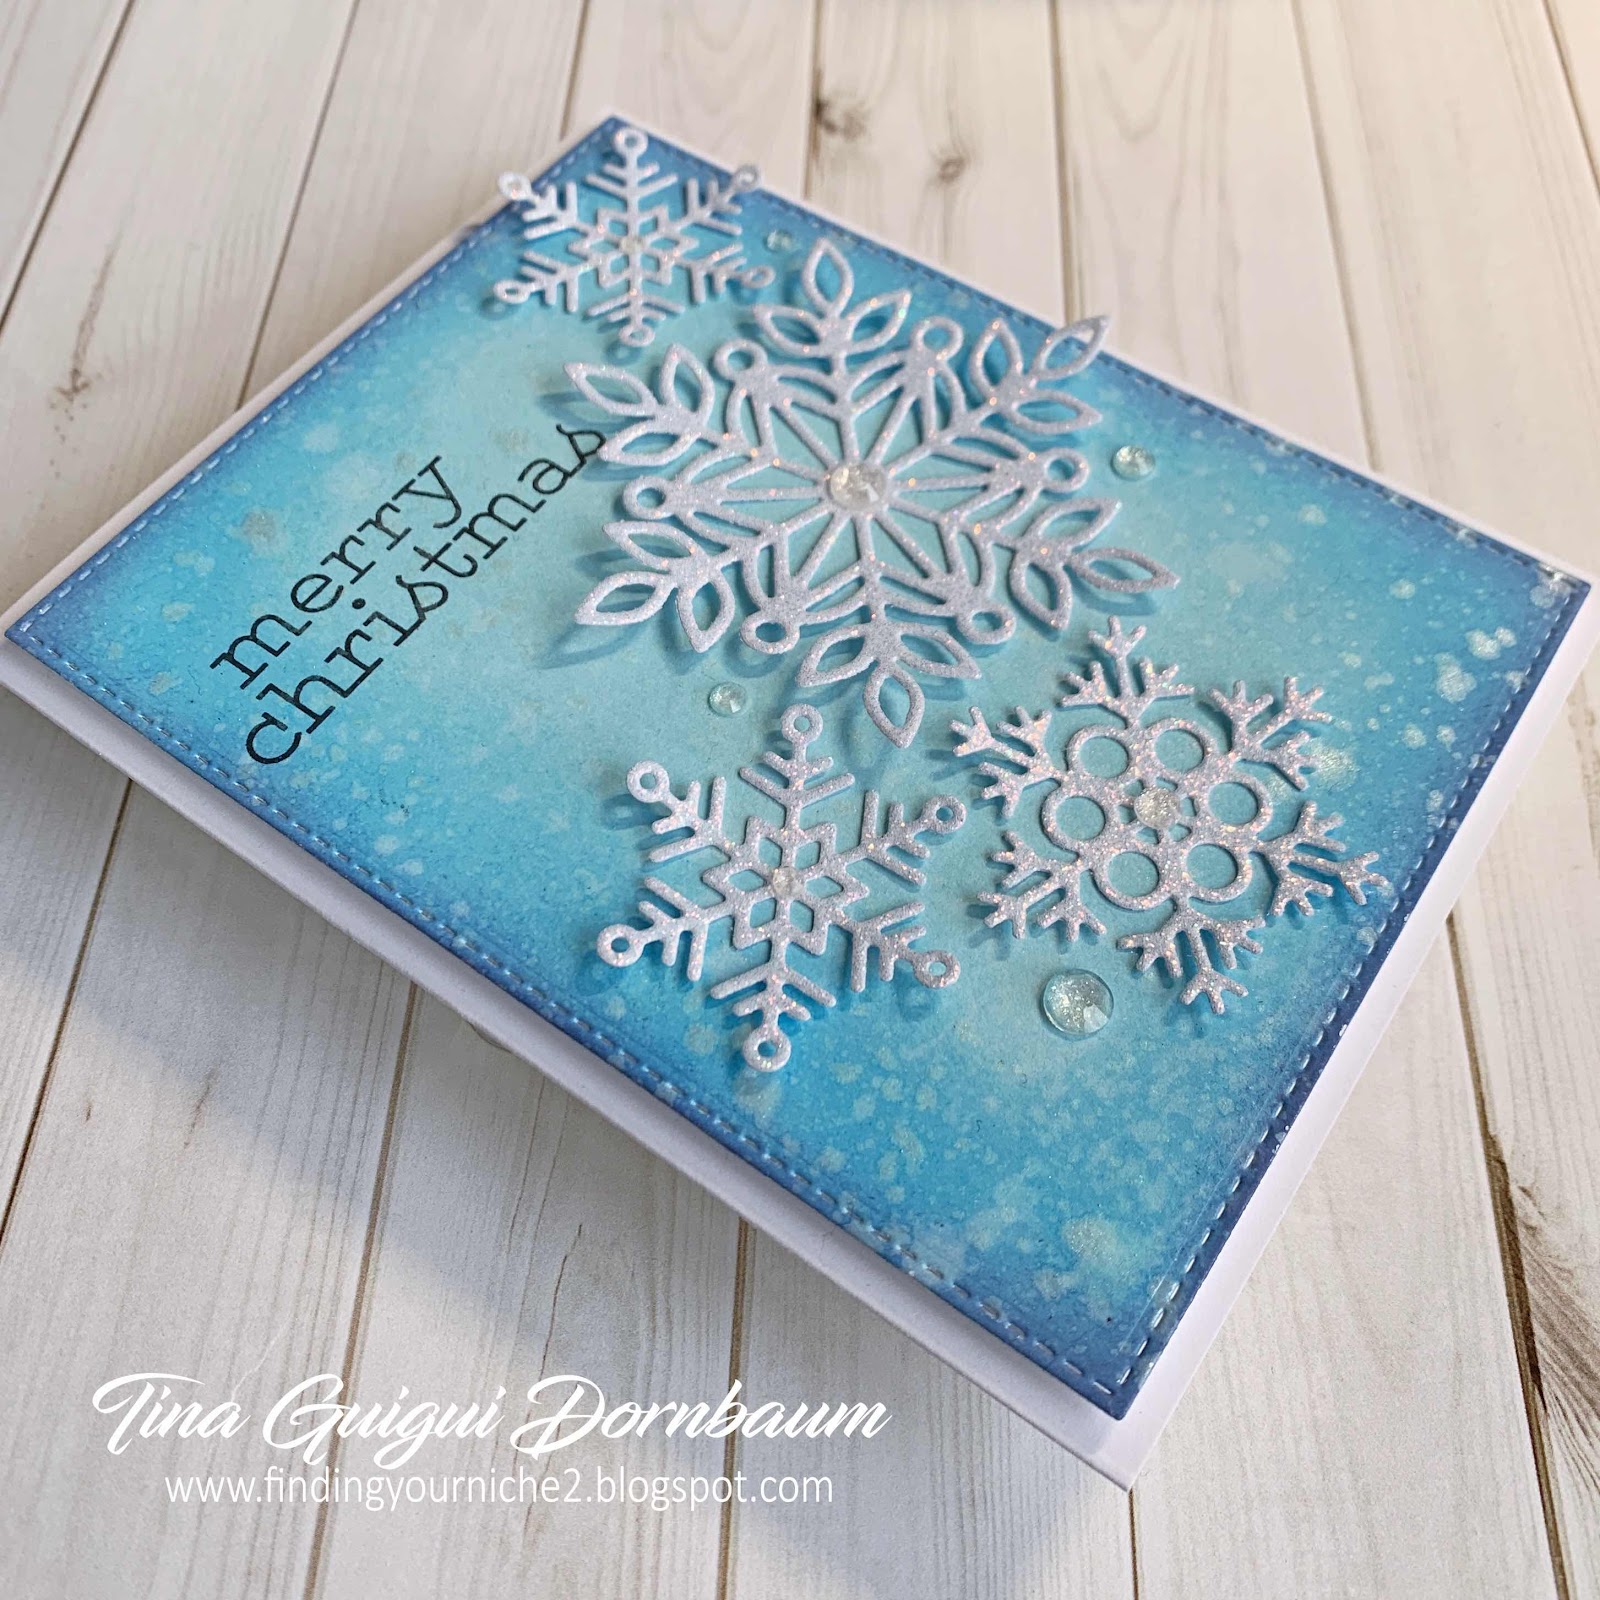
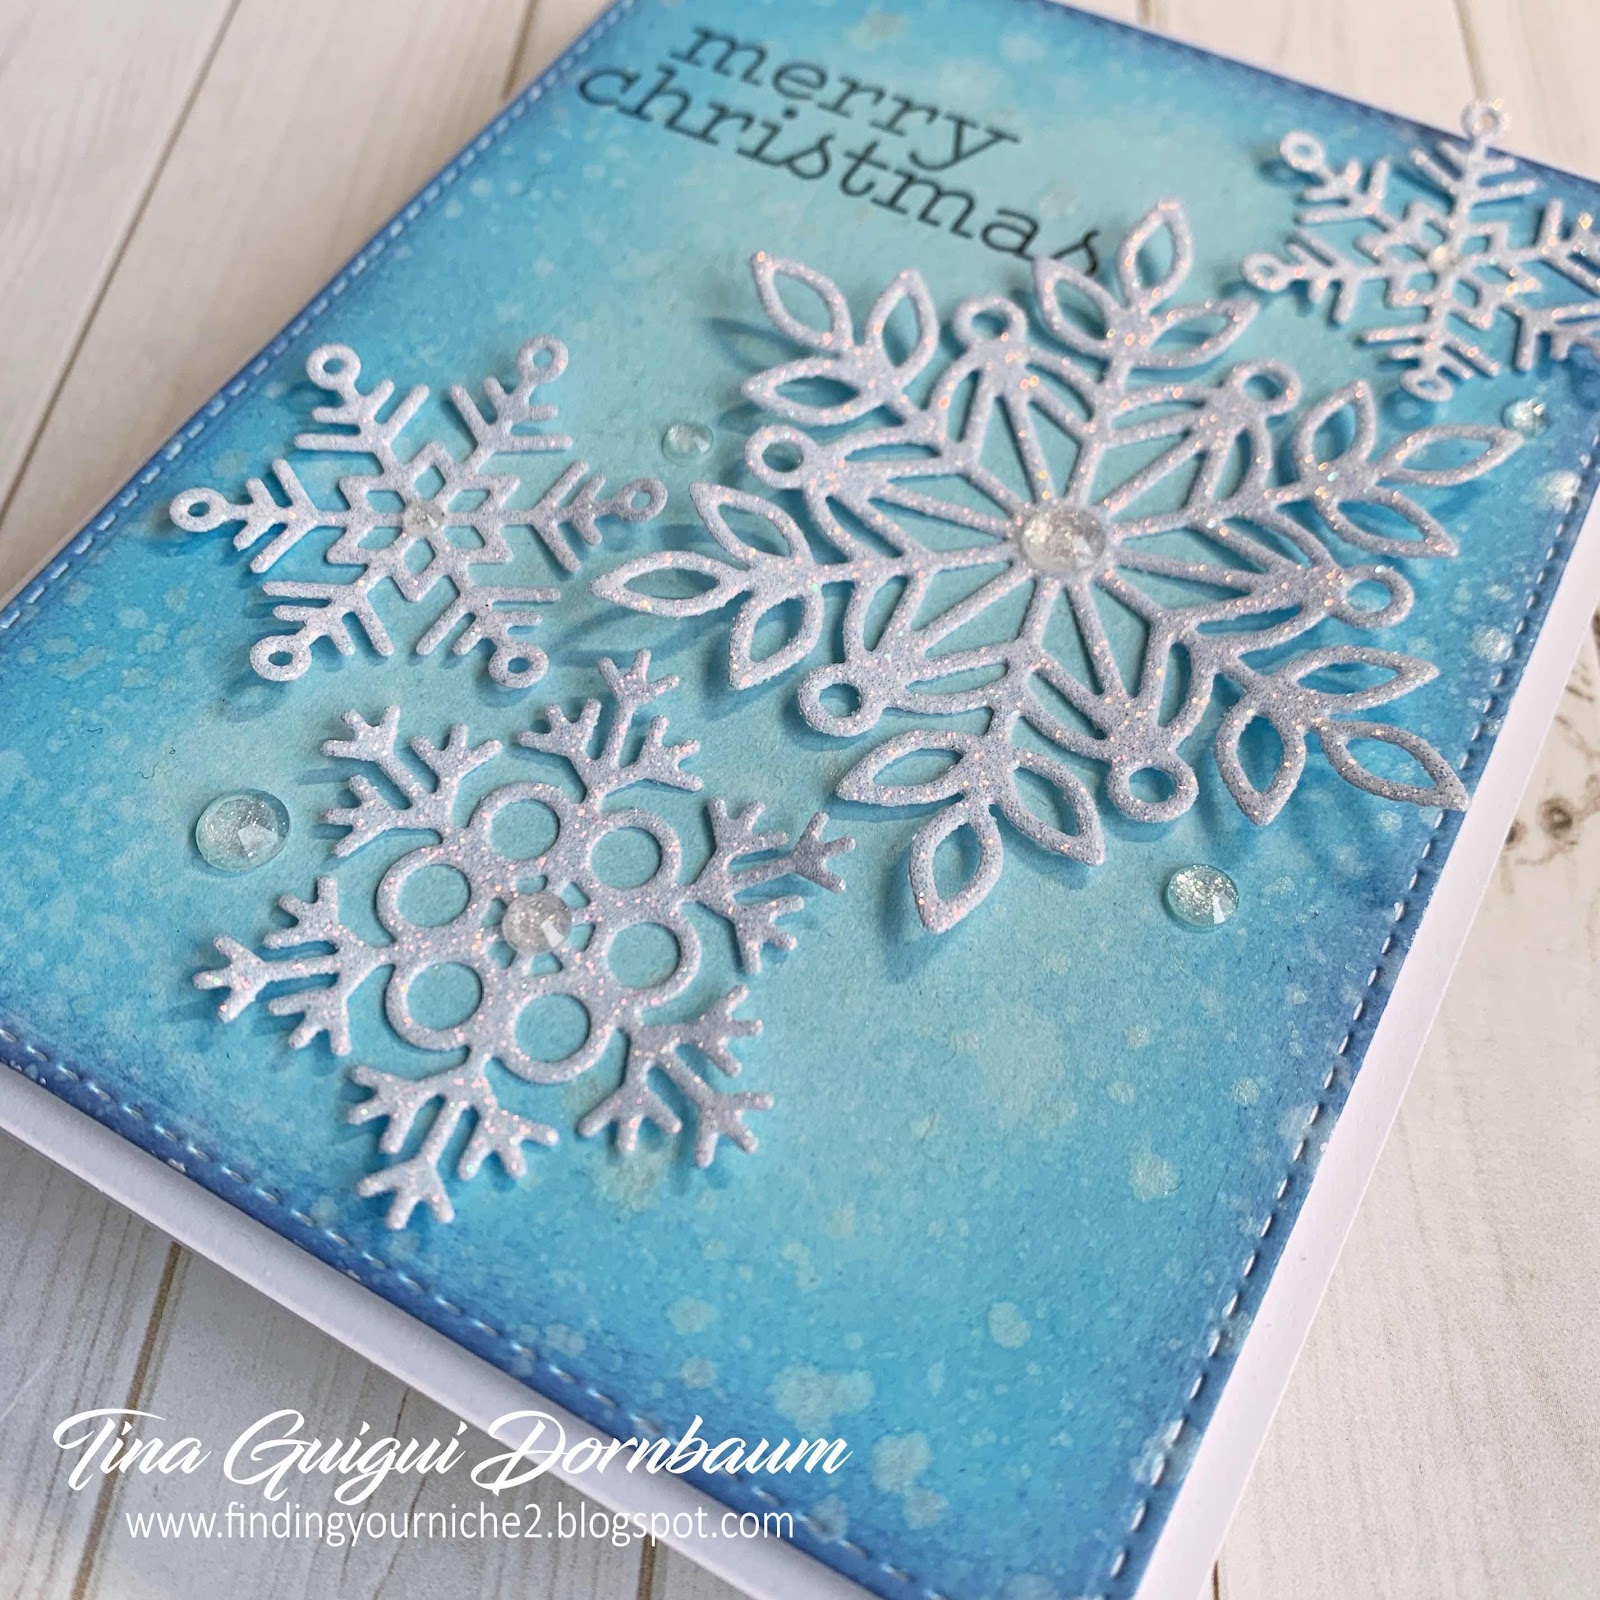
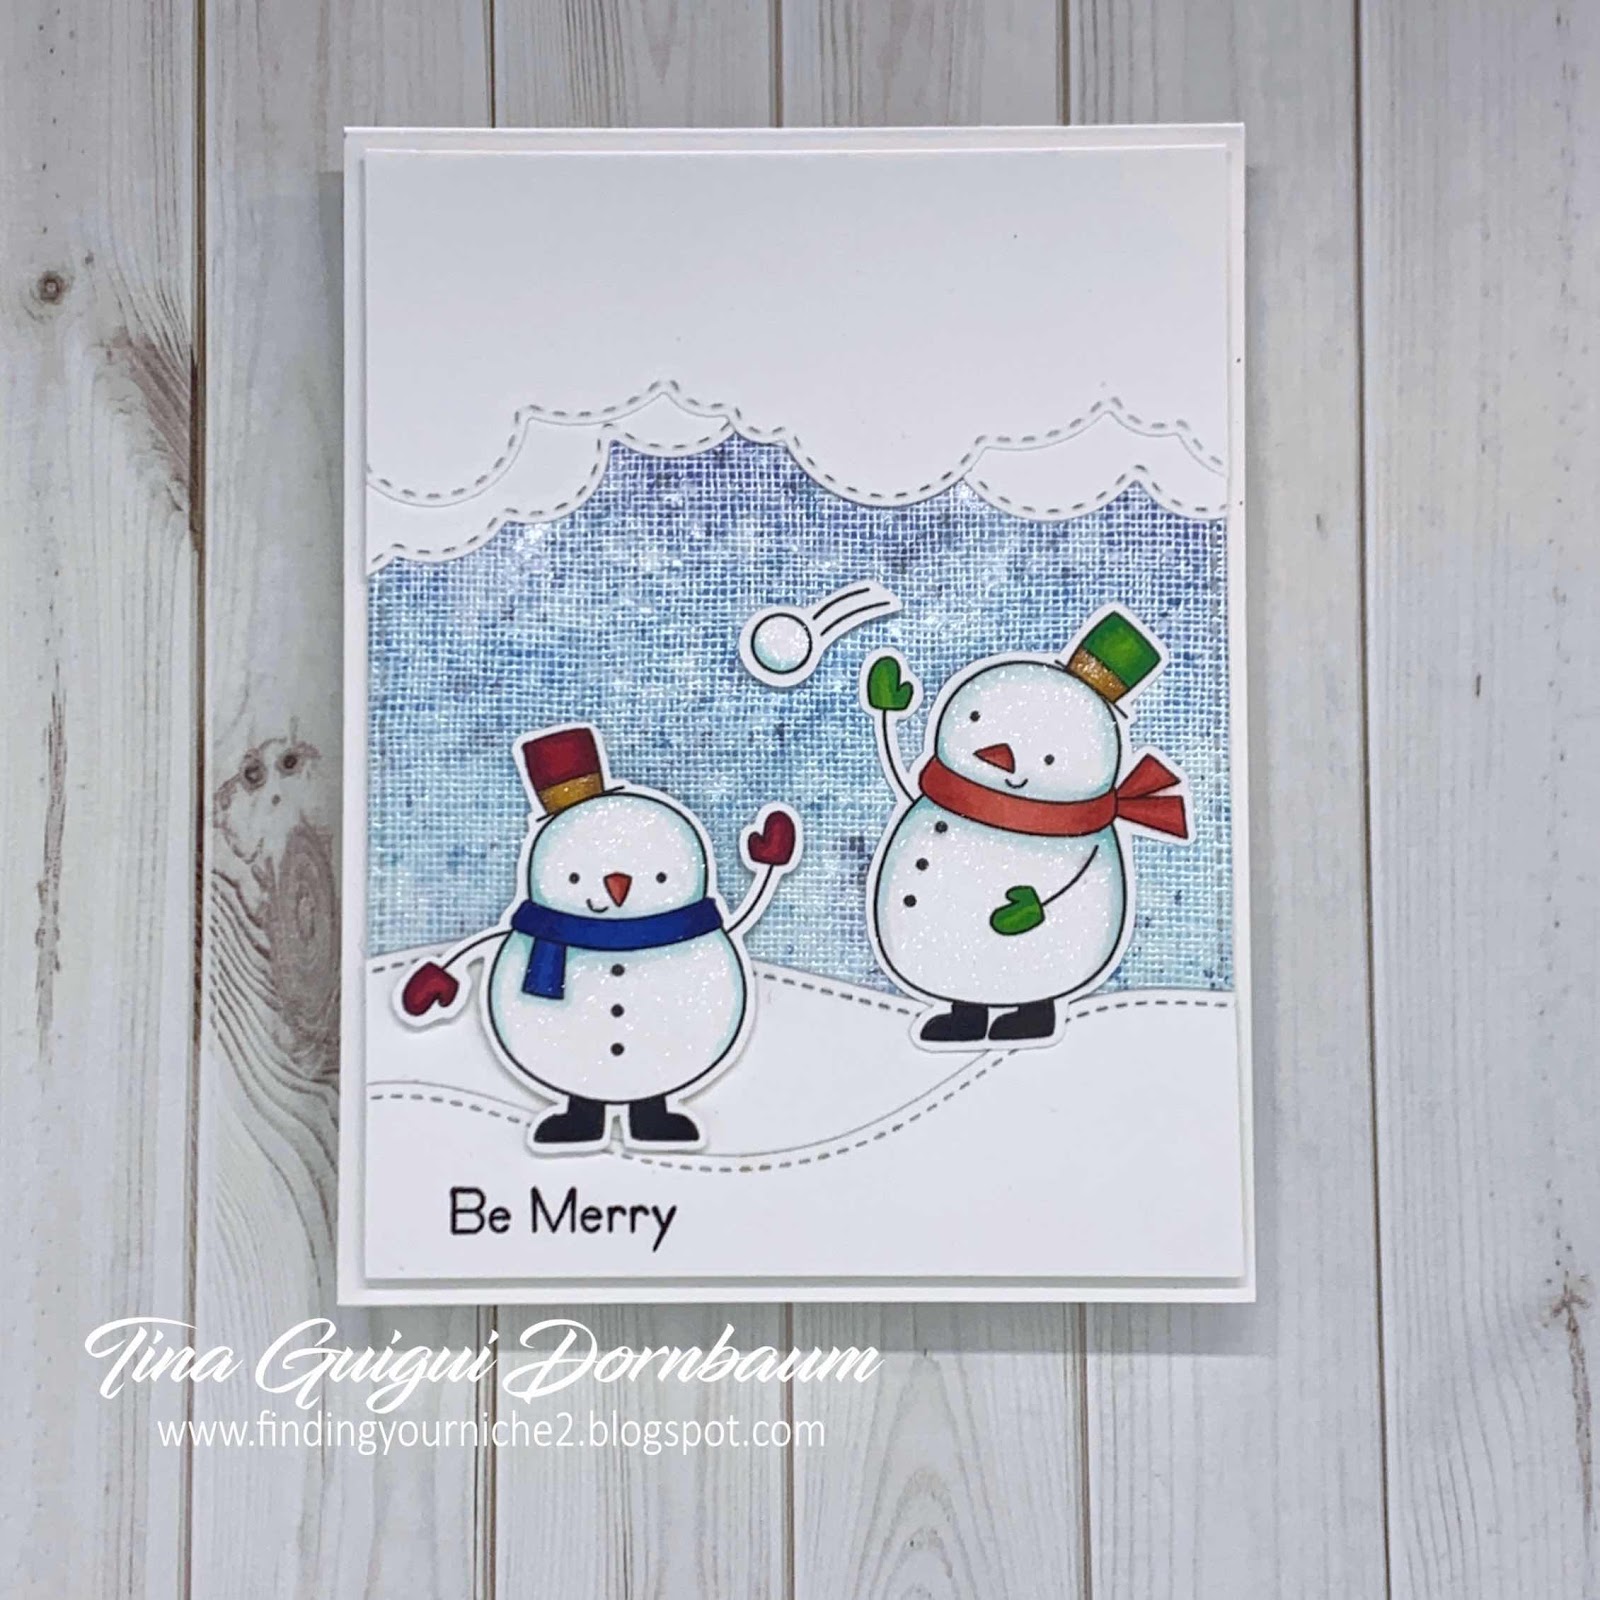
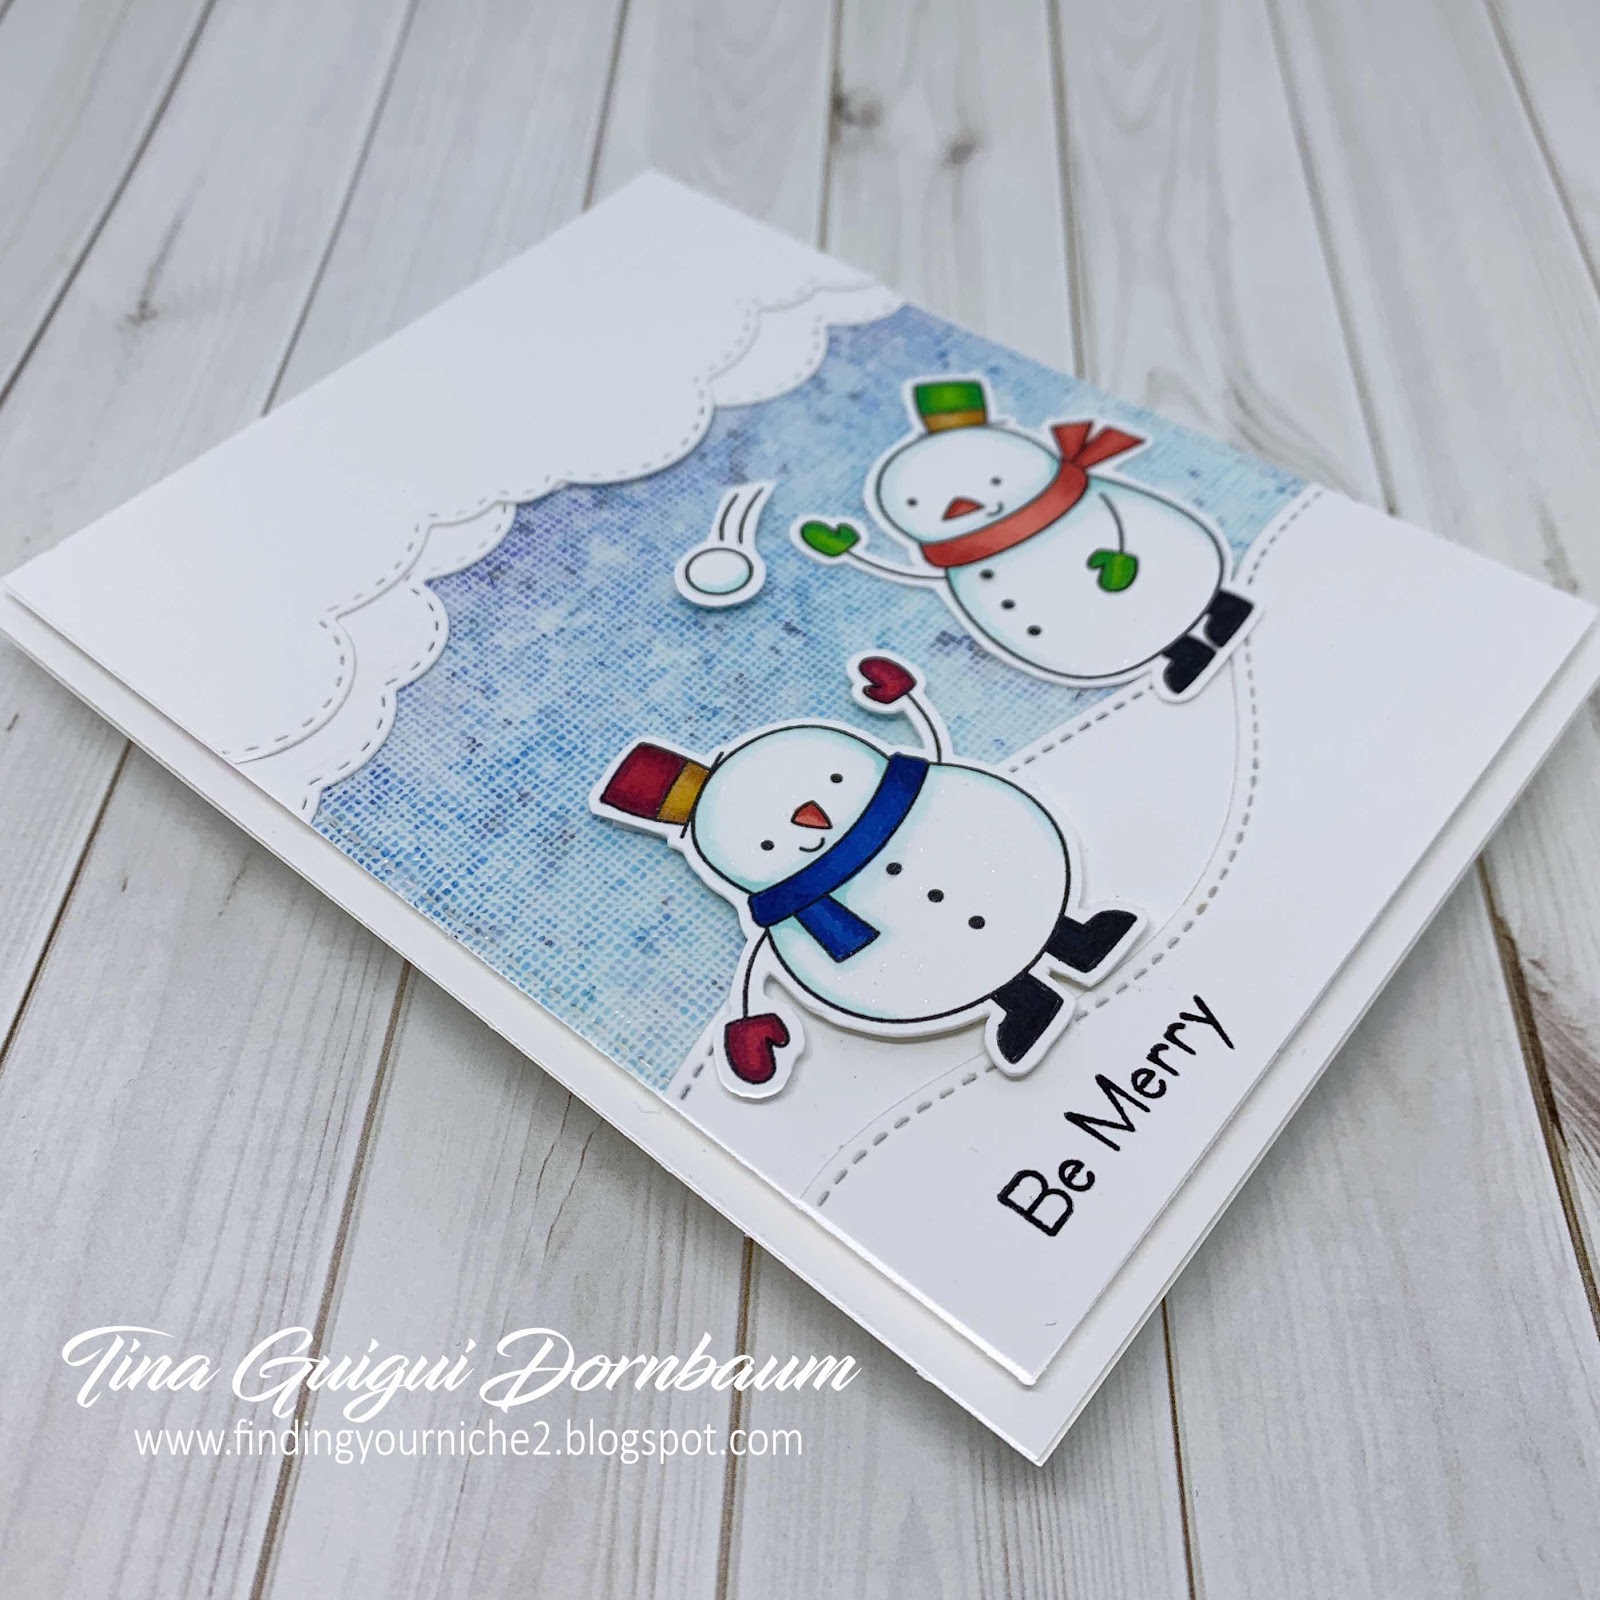
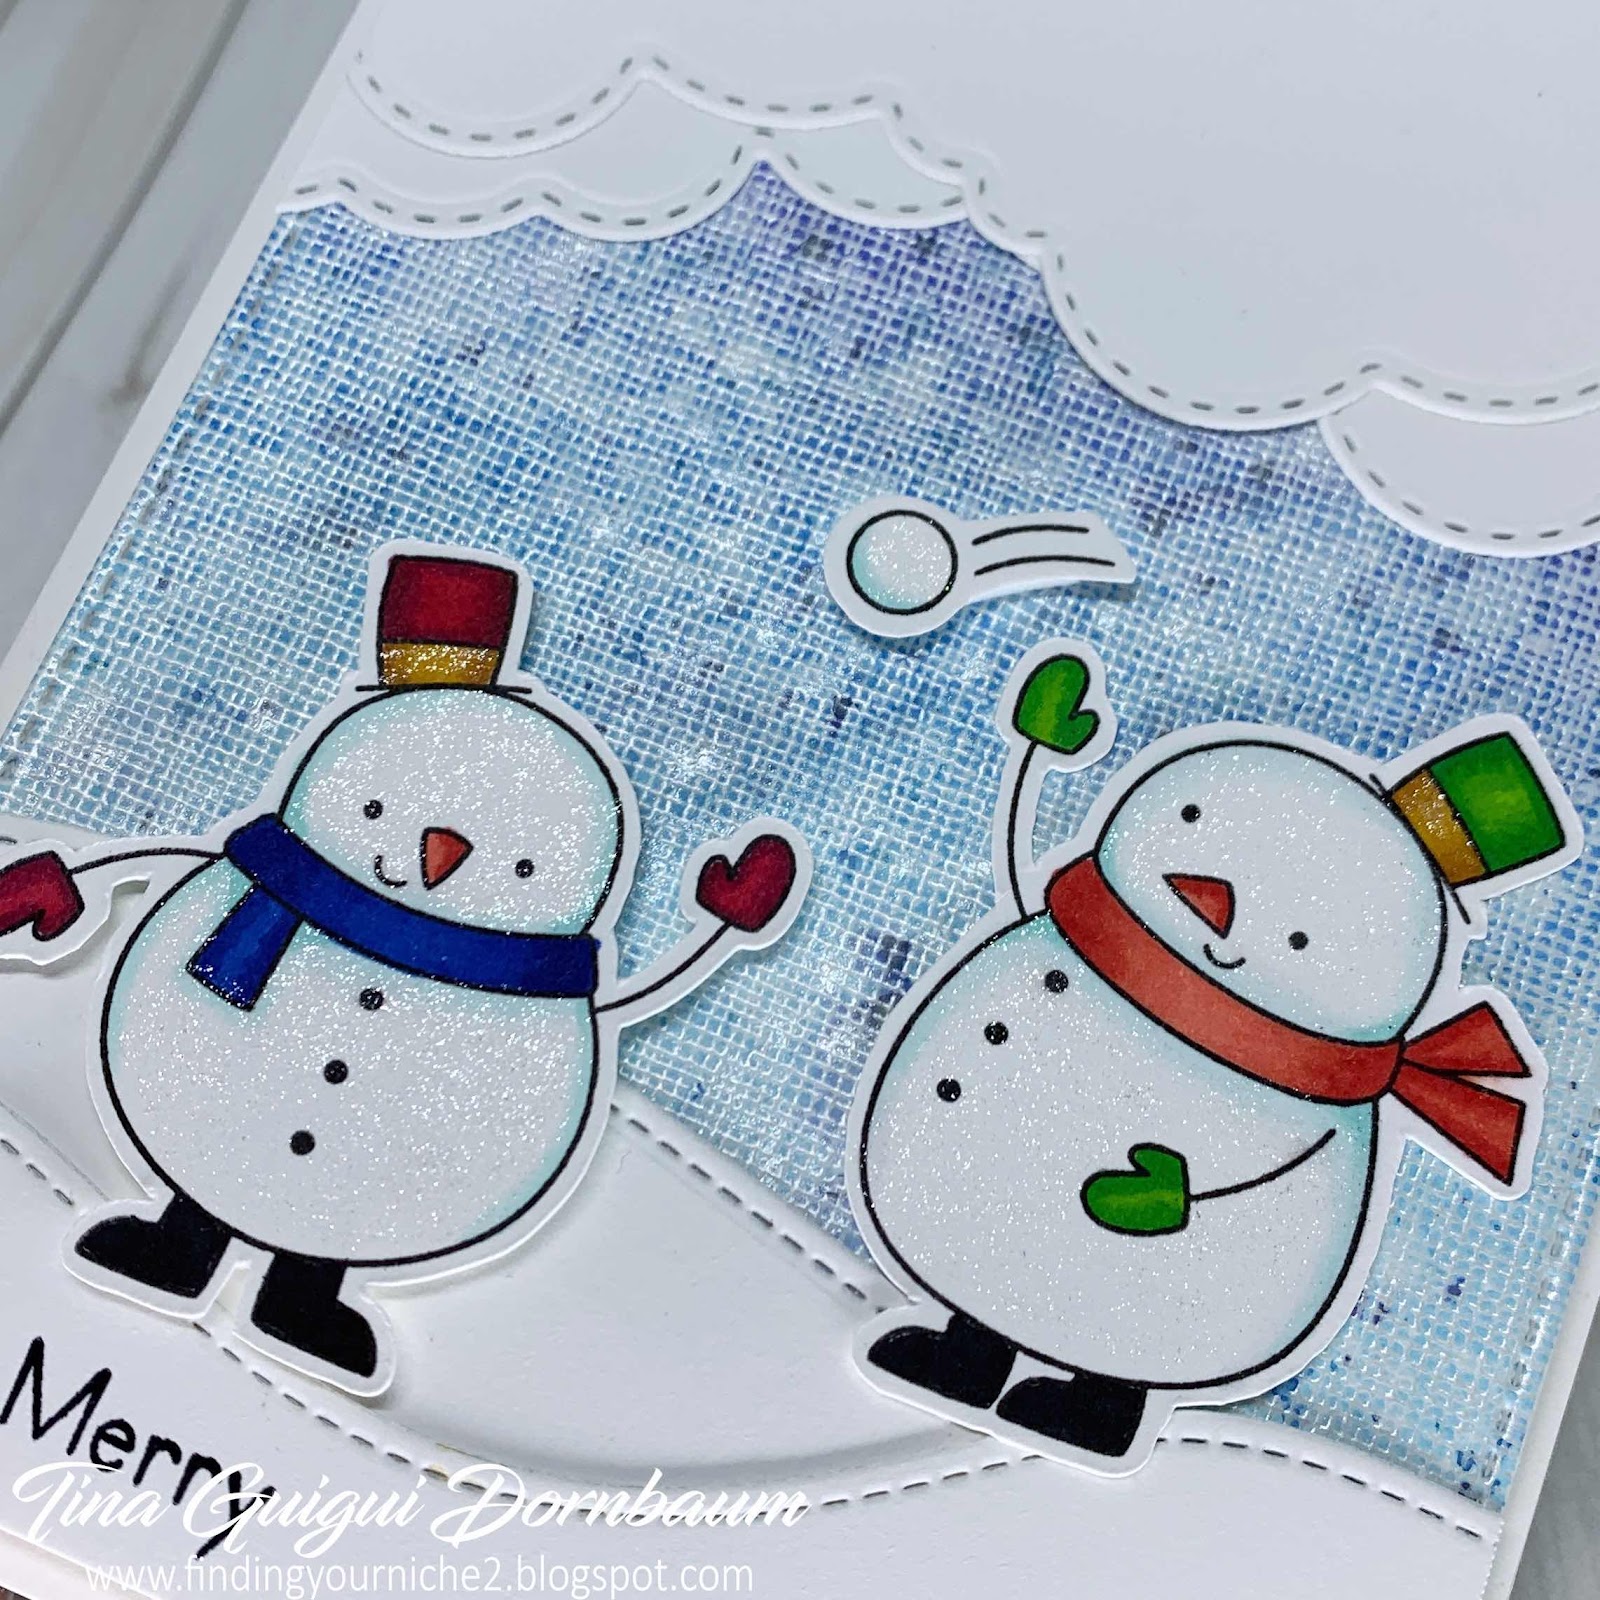
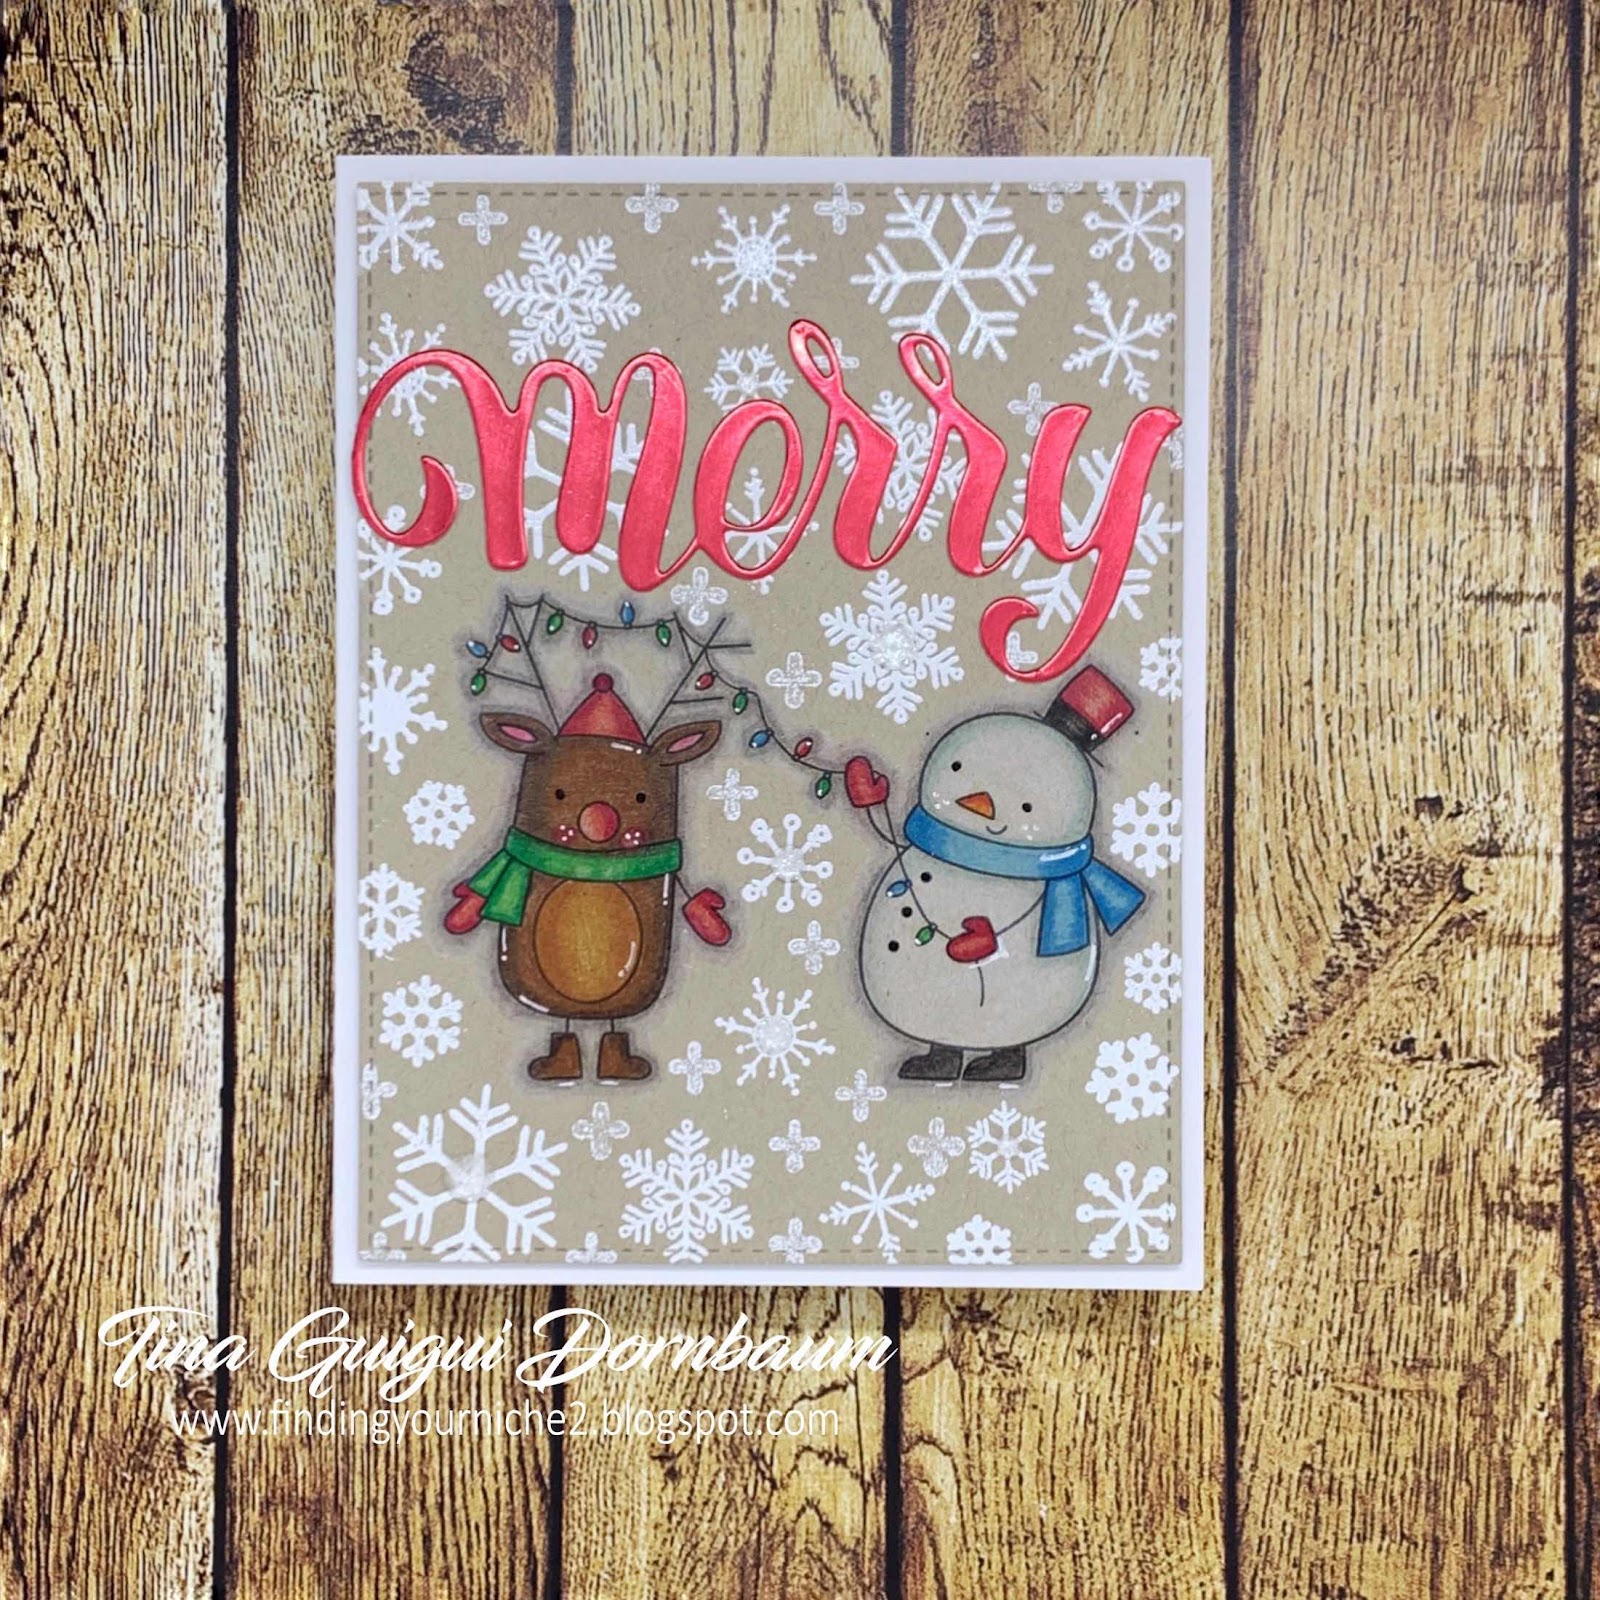
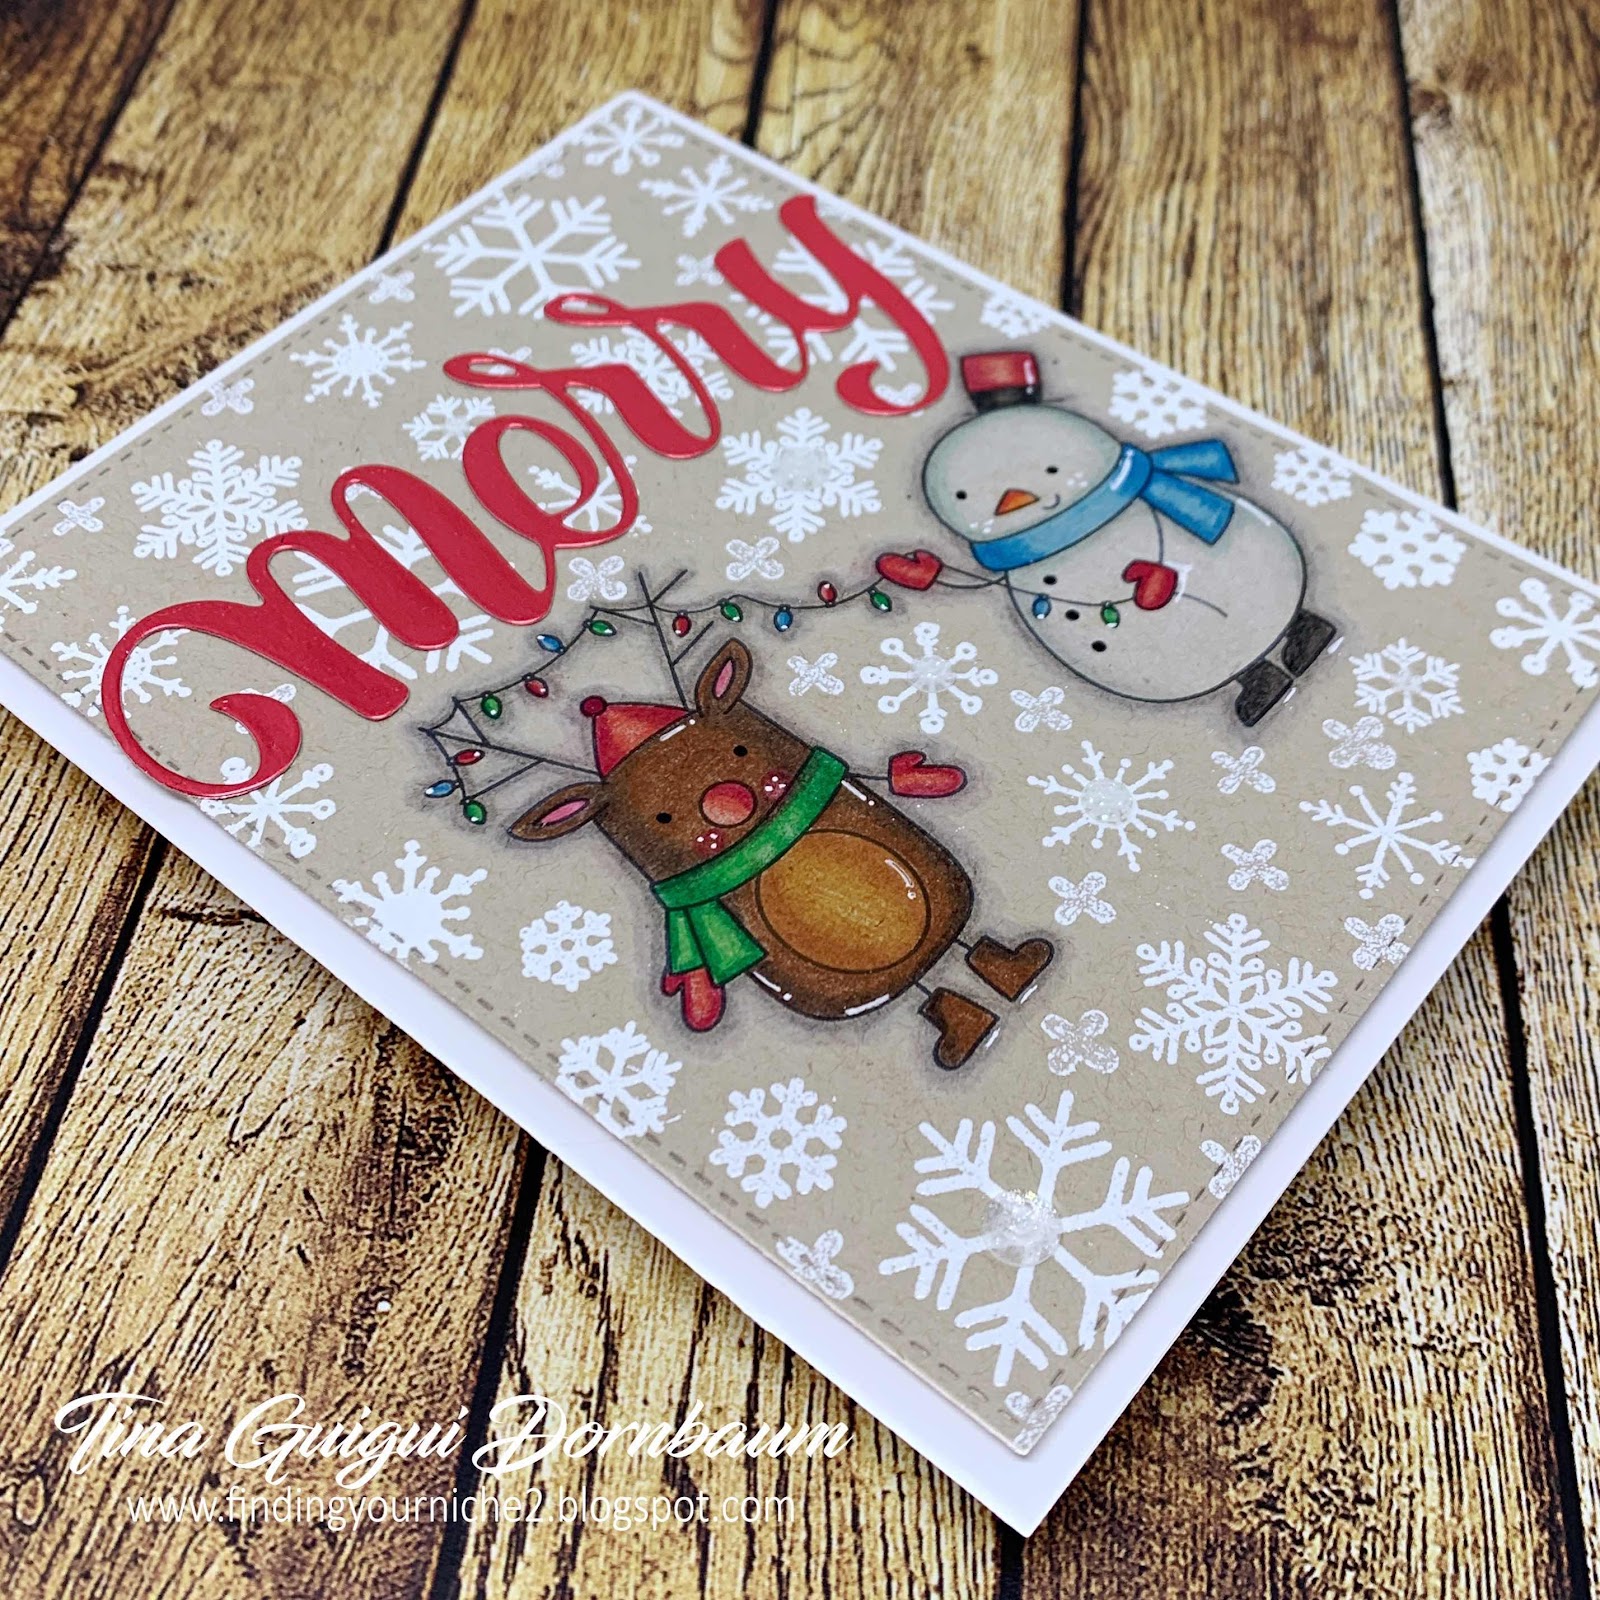
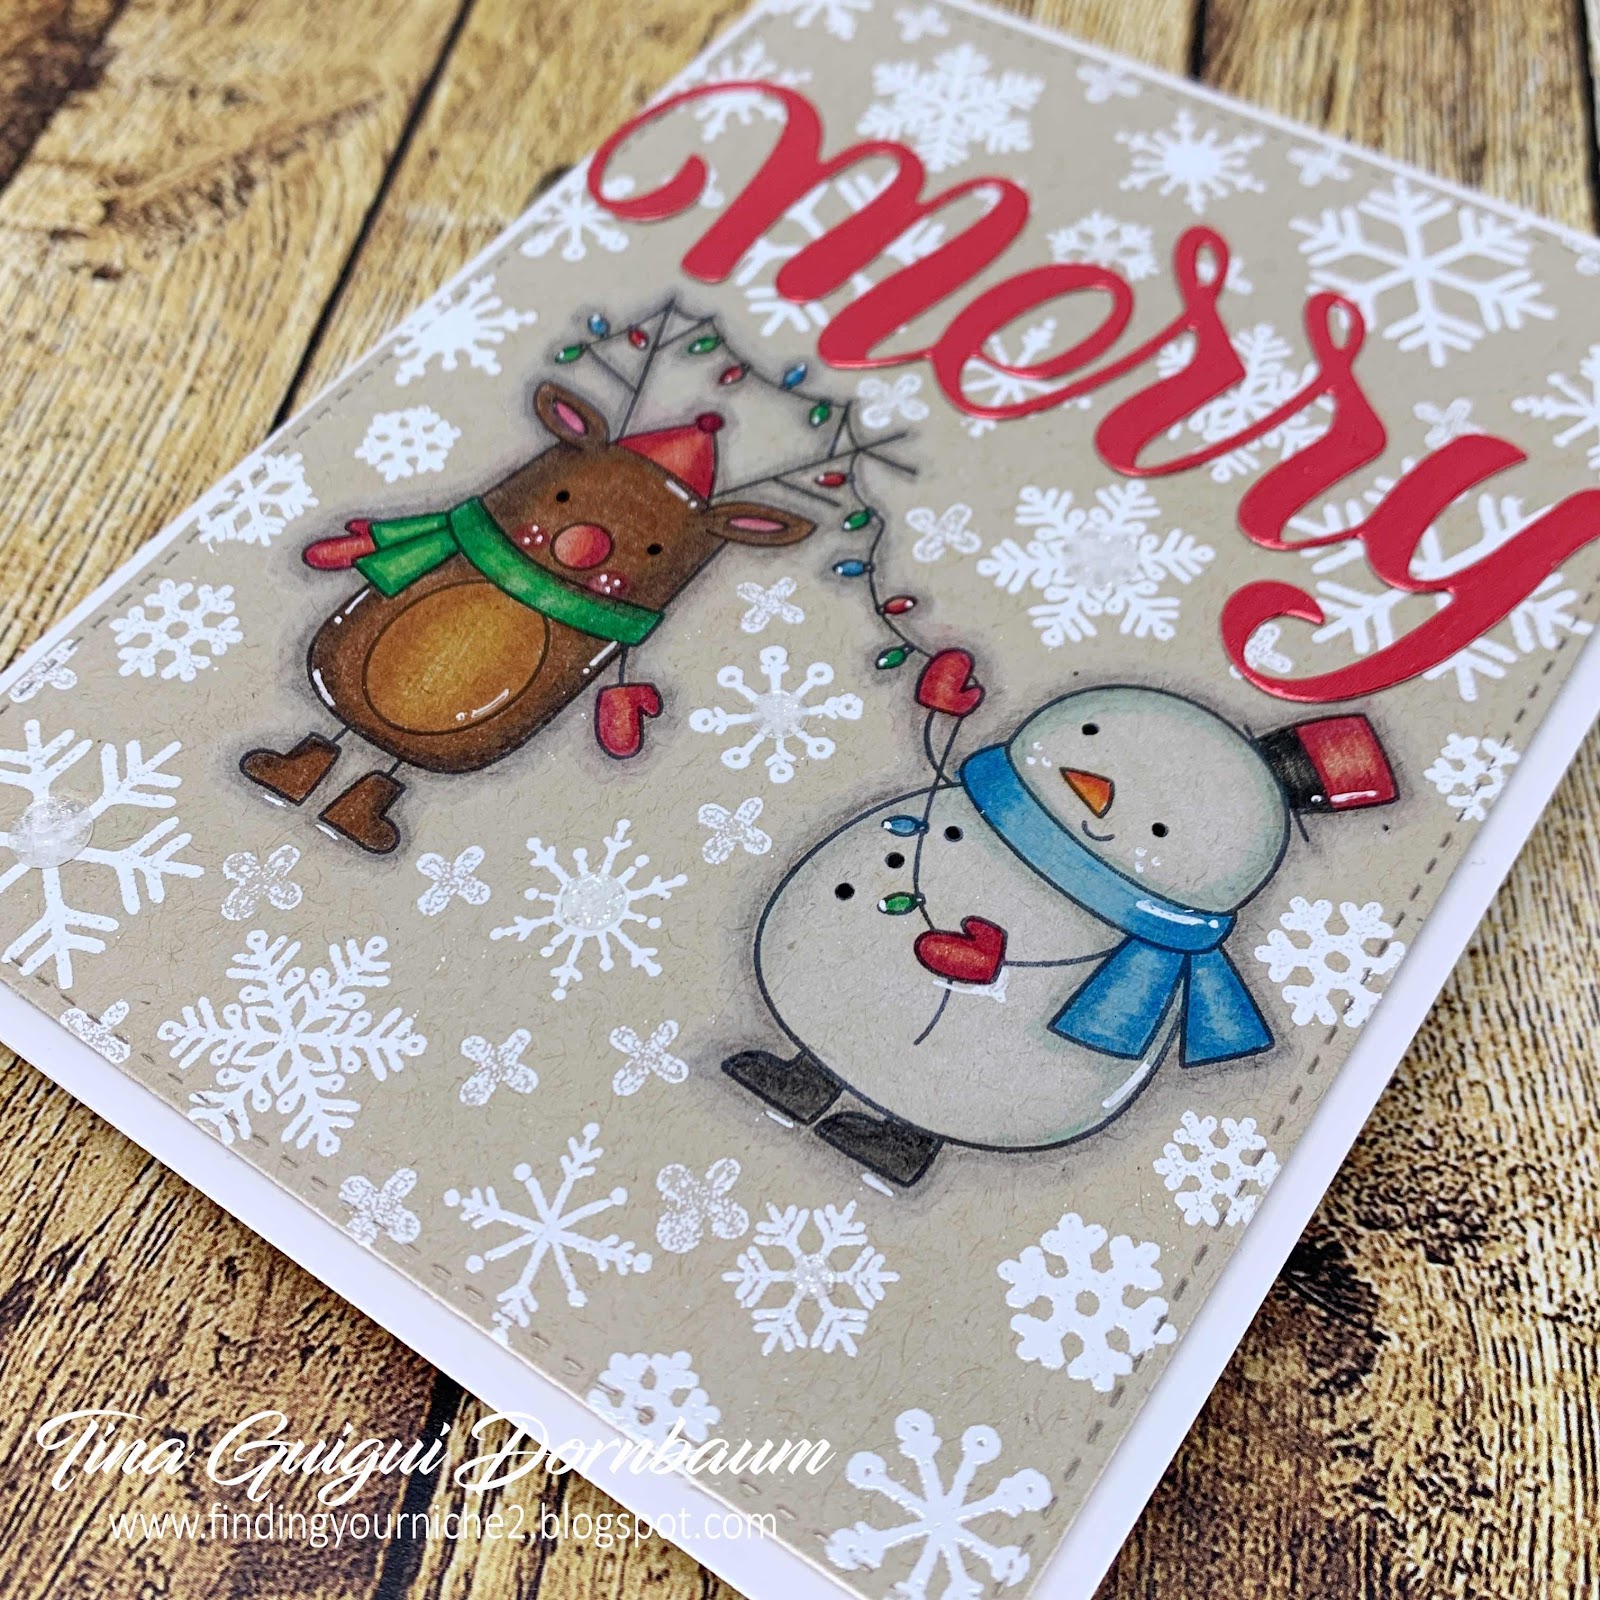
I had my Festive Friends stamp set out and was about to put it away when I thought of trying to colour the images on Neenah Desert Storm. Below are the steps to create your own card.


Step 1 - Trim White Cardstock to 8 1/2" x 5 1/2", score at 4 1/4" and fold in half for vertical side fold card. (A2)

Step 2 - Trim Neenah Desert Storm Cardstock to 5 1/2" x 4 1/4". Stamp Festive Friends image using Gina K. Amalgam Ink. Colour in image using colour medium of your choice. I used ColourBlends from Spectrum Noir.

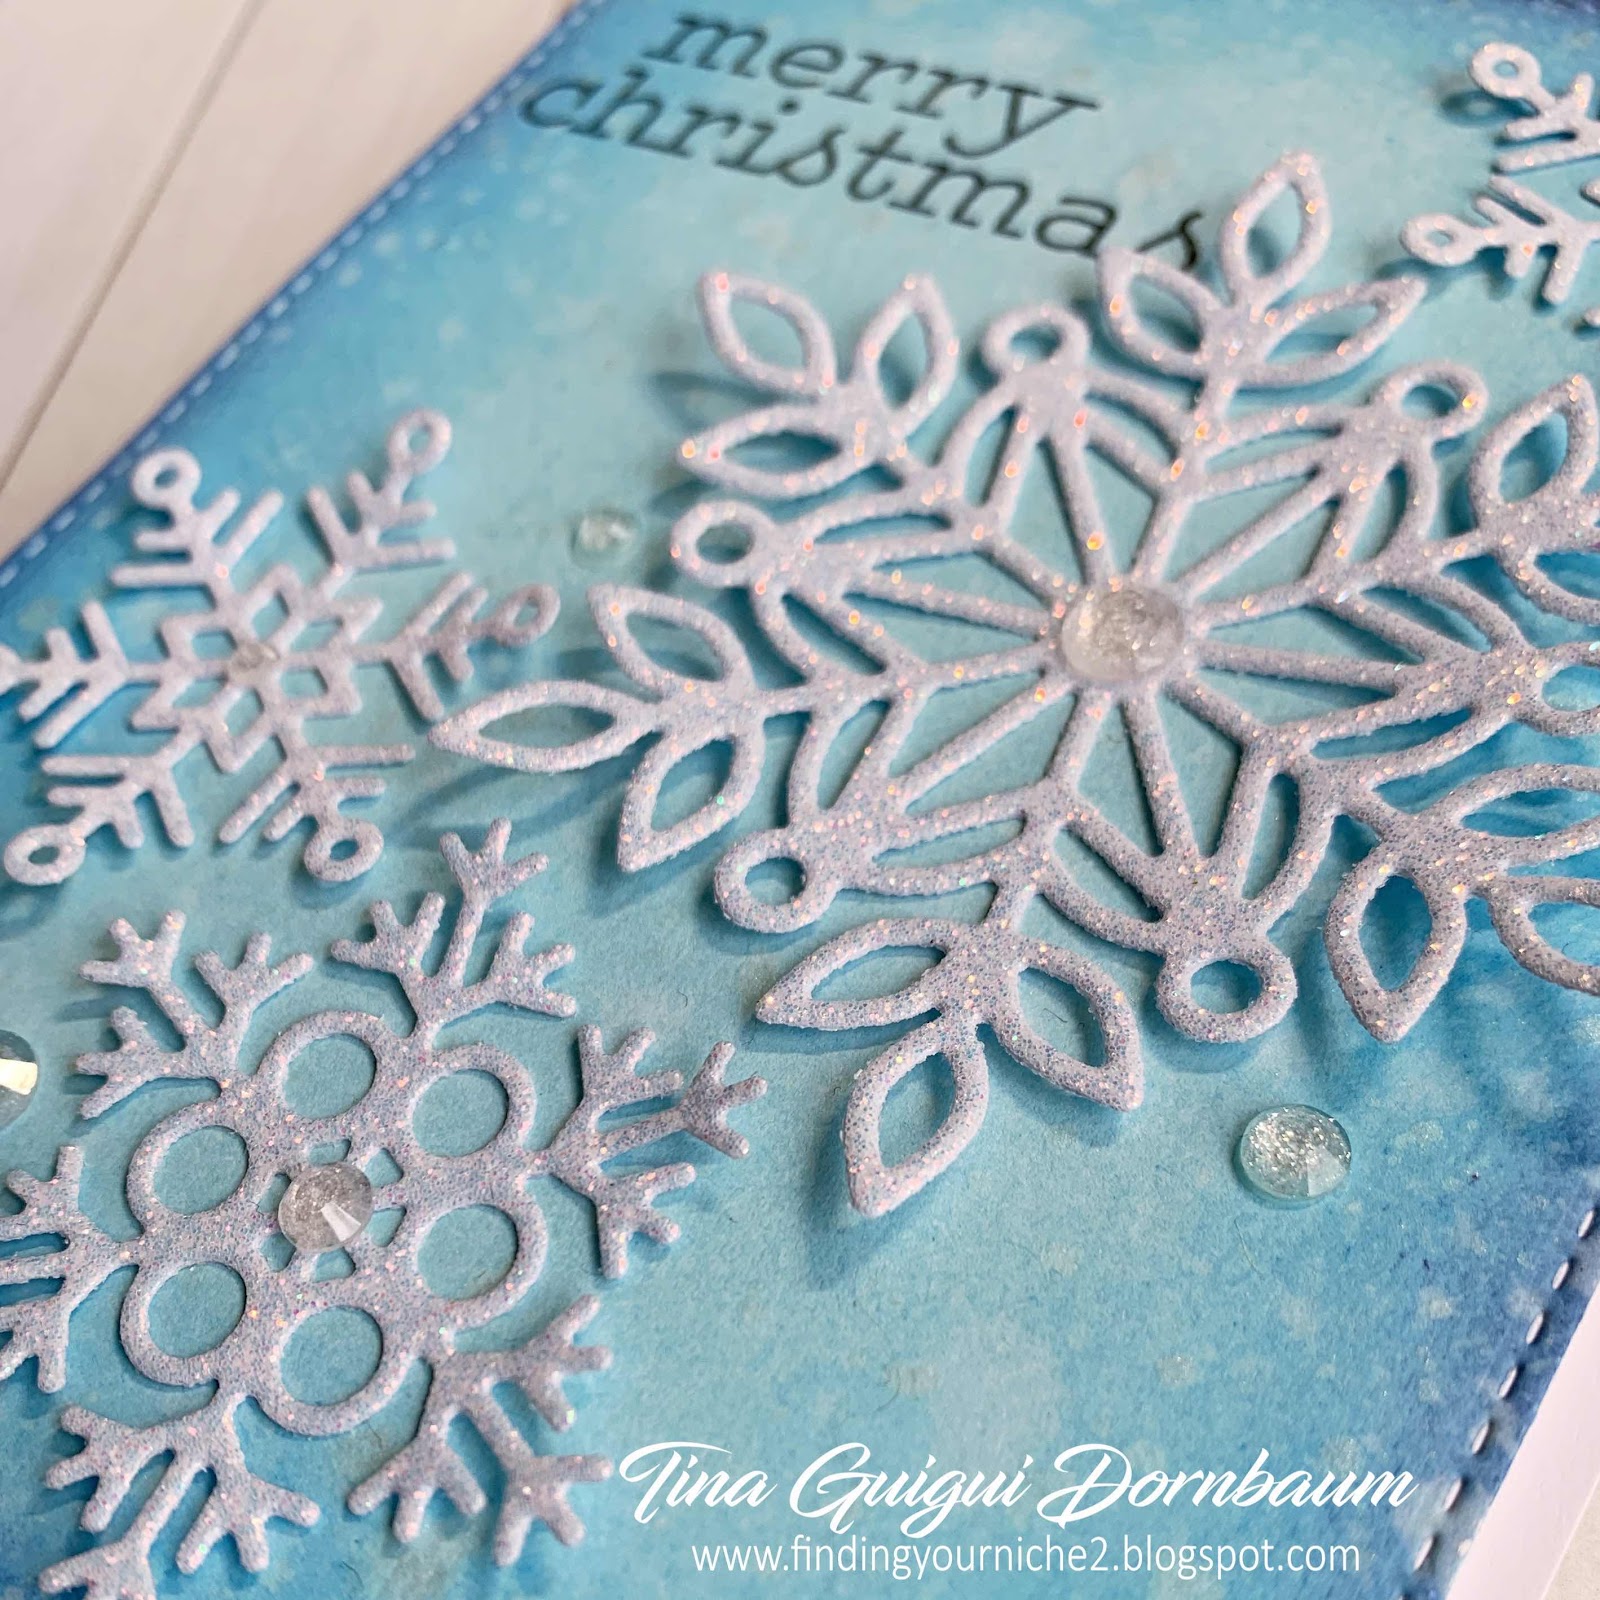
Step 3 - Stamp Warm and Feathered Friends & Snow Much (snowflake images) using Versamark on the panel created in Step 2. Sprinkle Alabaster Embossing Powder and remove the excess. Heat set it with a heat tool.

Step 4 - Diecut Double Stitched Rectangles using the panel created in Step 2. Adhere to card using Nuvo Deluxe Adhesive.

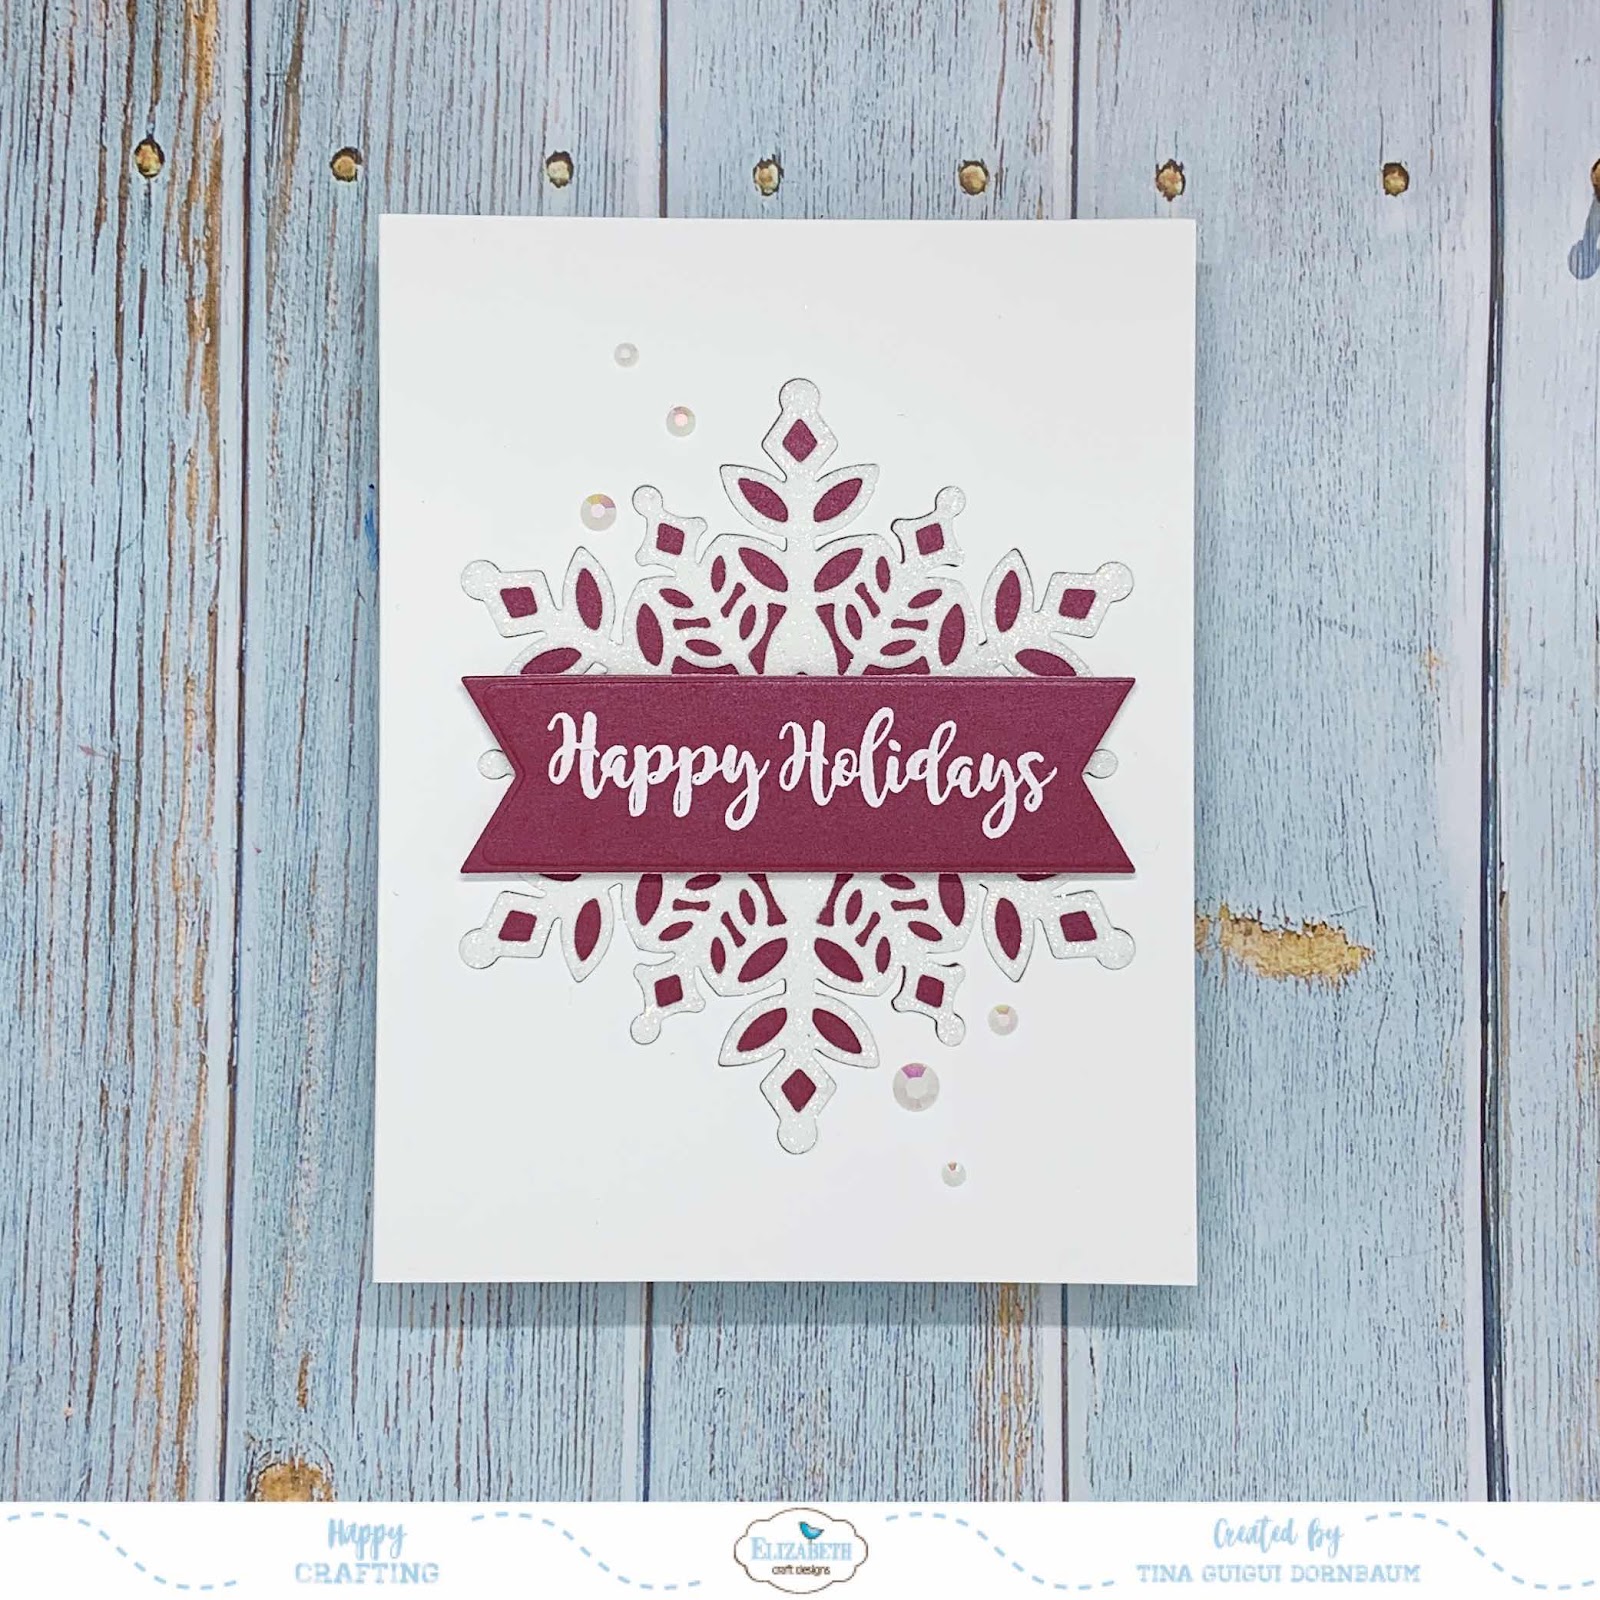
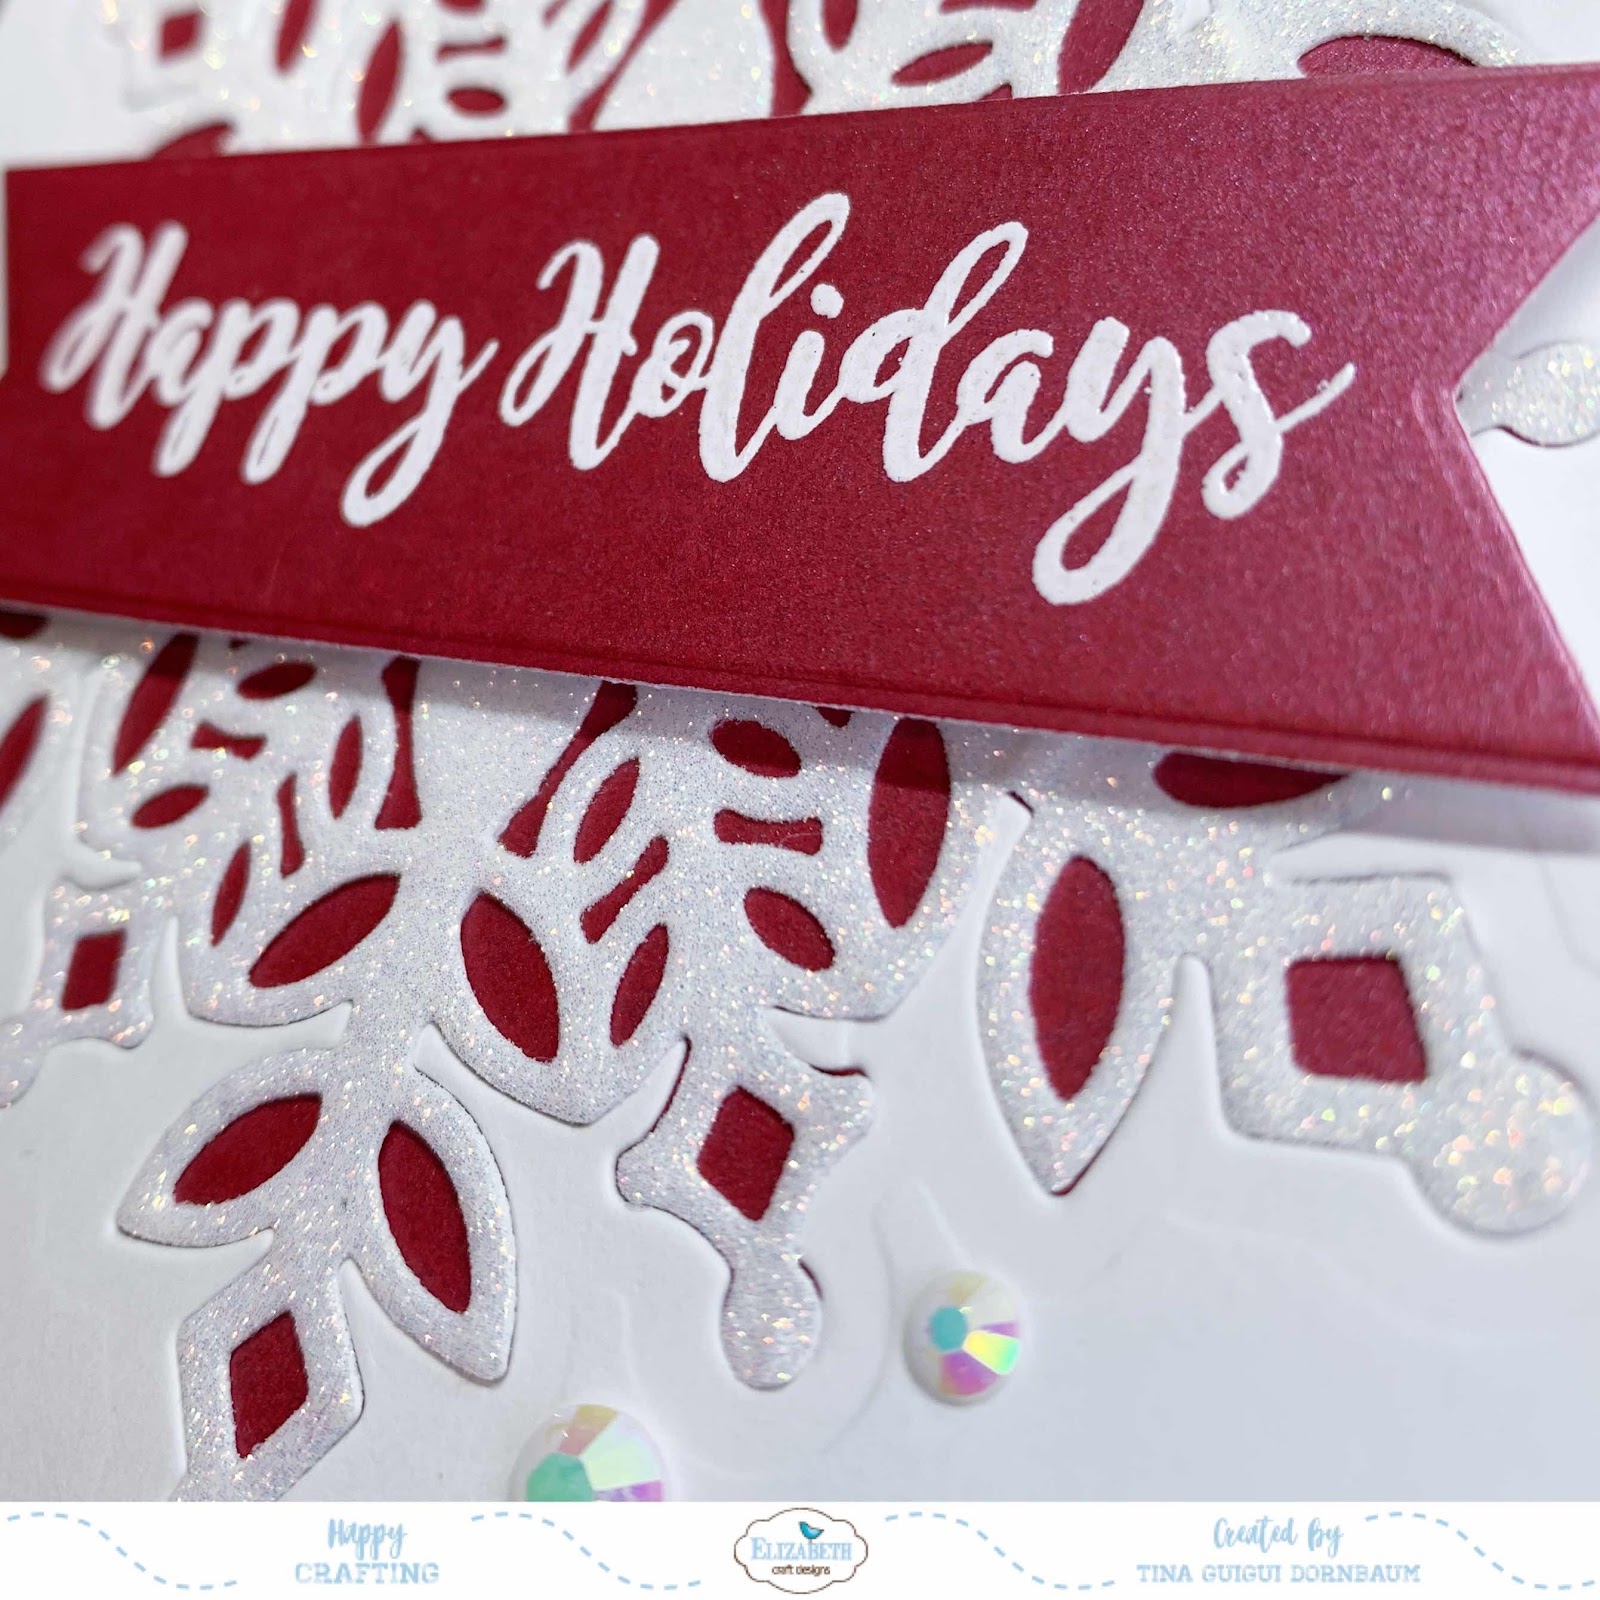
Step 5 - Diecut Merry Christmas with Shadow (only the Merry) using Metallic Kraft Cardstock. Adhere to card using Nuvo Deluxe Adhesive.

Step 6 - For added interest and sparkle randomly adhere Icy Sparkle Crystals using Collage Medium and a Crystal Katana. Optional - use a White Gel pen to add some accents.


I was quite pleased with the results and I will probably try this again. Here is a link for the Spectrum Noir ColourBlend. All orders over $75 will receive free shipping, even international orders. Below is a link to all the products used. Thank you for stopping by and I want to wish you all a Happy Healthy New Year!
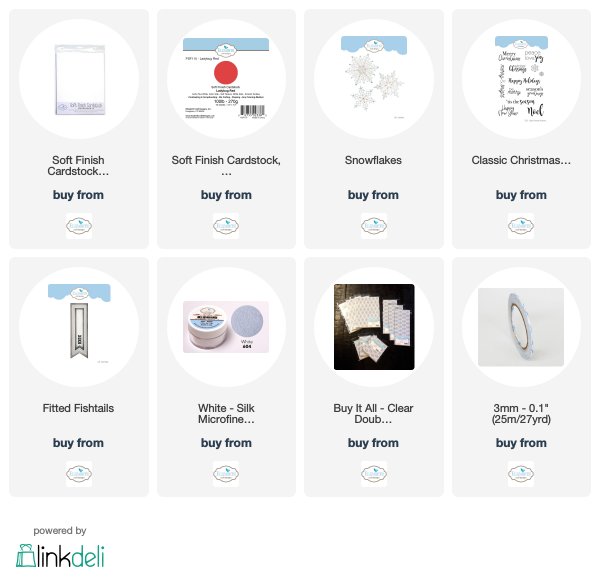
Products Used:

Sunday, December 22, 2019

Glitter Snowflake Card

Hi Everyone,
With the holidays just days away I thought I would share with you a quick and easy holiday card for those last minute cards. Below you will find the steps to create your own Snowflake Holiday card.


Step 1 - Trim White Cardstock to 8 1/2" x 5 1/2", score at 4 1/4" and fold in half for a vertical side fold card. (A2)

Step 2 - Trim White Cardstock to 5 1/2" x 4 1/4". Apply Distress Oxide Ink Tumbled Glass to the entire panel, then apply Salty Ocean to the edges (roughly up to 3/4" in), then apply Chipped Sapphire to the edges. Spray some water and then remove the excess using a Paper Towel. Place the panel in a Splatbox and Spray White Iridescent Shimmer. Let dry.

Step 3 - Diecut Double Stitched Rectangles to the panel created in Step 2.

Step 4 - Stamp Holiday Greetings Mix 1 sentiment to the panel created in Step 2 using Versafine Clair Nocturne Ink. Adhere to the card front using Fun Foam and Nuvo Deluxe Adhesive.

Step 5 - Diecut Marie Snowflake x1, Melody Snowflake x 1 and Maryanne Snowflake x 2 using Glitter White Cardstock. Adhere to card using Nuvo Deluxe Adhesive to the center leaving the edges unglued for dimension.

Step 6 - For added interest and sparkle adhere Icy Sparkle Crystals to the centers of the snowflakes and some randomly on the card front using a Crystal Katana and collage medium.


This card can be mass produced and you can create a different look each time by changing the colour combination and/or the placement of the snowflakes. Below is a list of all the products used. Thank you for stopping by and wishing you all Happy Holidays.

Products Used:

Saturday, December 21, 2019

Be Merry Festive Friends Card

Hi Everyone,
Can you believe the holidays are just 5 days away? Just yesterday it was a few months away. Today’s card is using the Festive Friends stamp set from My Favourite Things which I hope will inspire you. Below are the steps to create your own card. 


Step 1 - Trim White Cardstock to 11” x 4 1/4”, score at 5 1/2” and fold in half for a horizontal top fold card. (A2)

Step 2 - Trim White Cardstock to 5 1/2” x 4 1/4”. Stamp Gauze Background using Versamark. Sprinkle White Satin Pearl Embossing Powder and remove the excess. Heat set it with a heat tool. Apply Distress Oxide Tumbled Glass, Salty Ocean and Chipped Sapphire starting from the bottom working your way up. Remove excess ink with a microfiber cloth. This will remove the ink from on top of the embossed areas. Apply the same inks onto an acrylic block and add some water. Using a waterbrush splash it onto the panel. Place the panel in a Splatbox and spray White Iridescent Shimmer. Let dry.

Step 3 - Diecut Double Stitched Rectangles using the panel created from Step 2.

Step 4 - Diecut Cloud Borders (x2) using White Cardstock. Adhere to card using Nuvo Deluxe Adhesive.

Step 5 - Diecut Stitched Hillside Borders (x2) using White Cardstock. Adhere to card using Nuvo Deluxe Adhesive.

Step 6 - Stamp Festive Friends sentiment on the bottom left side of panel using Versafine Clair Nocturne Ink. Adhere the whole panel to the card front using Fun Foam and Nuvo Deluxe Adhesive.

Step 7 - Stamp Festive Friends using Gina K Amalgam Ink for friendly Alcohol Marker colouring. Colour in images with any Alcohol Marker of your choice. I used Spectrum Noir Classique Markers. Adhere to card using Nuvo Deluxe Adhesive for right snowman and Foam Tape for the rest.

Step 8 - For added interest and sparkle apply Spectrum Noir Clear Overlay Sparkle over the snowmen and snowball. See below photos for the sparkle it creates.


You can get the Spectrum Noir markers at Crafters Companion. You safe on shipping when it is over $75, even International. You can also find them at Simon Says Stamp. Below is a link to all the products used. I want to take this time to wish you all Happy Holidays! Have a wonderful time with your loved ones and stay safe.

Products Used:

Wednesday, December 18, 2019

Snowflake Glitter Inlay Card

Hi Everyone,
Elizabeth Craft Designs has a Blog Post with a Group Post showing all the ways to create Holiday Projects. I chose to make a card using the Snowflakes die and the Silk Microfine Glitter. Below you will find the steps to creating your own Snowflake Glitter Inlay Card.


Step 1 - Trim White Soft Finish Cardstock to 8 1/2” x 5 1/2”, score at 4 1/4” and fold in half for a vertical side fold card (A2)

Step 2 - Diecut Snowflakes to the front of the card. The Diecut will be used for another card. Trim Red Cardstock to 5 1/2” x 4 1/4”. Trim a sliver more from one side length wise and one side width wise. Adhere inside left side of card so that the red is showing in the front of the card using 3mm Clear Double Sided Adhesive Tape. 

Step 3 - Trim White Soft Finish Cardstock to 5 1/2” x 4 1/4”. Adhere Clear Double Sided Adhesive Sheets to the top. Smooth it out using a bone folder. Diecut Snowflakes. Remove all the excess pieces. Carefully remove the release sheet and sprinkle White Diamond Silk Microfine Glitter. Remove the excess. Use your finger tip in a circular motion to bring out the shine and set the glitter onto the adhesive. Add Kids Choice Glue to the backside and adhere inside the Diecut in the front of the card. This creates the inlay. 

Step 5 - Stamp Classic Christmas sentiment into Red Cardstock using Versamark. Sprinkle White Embossing Powder and remove the excess. Heat set it with a heat tool. Diecut Fitted Fishtail using the sentiment created. I did it twice, one for each side. Adhere to center of snowflake using Foam Tape. 

Step 6 - For added interest and sparkle randomly adhere White Jewels.


This technique can be used for any dies with a pattern. The possibilities are endless. Below you will find all the products used. Thank you for stopping by and have a wonderful day. 

Products Used:

Friday, December 13, 2019

The Magic Of Christmas Card

Hi Everyone, Today I have a video showing you how I created a classic holiday card. When I first created my card I was using the Merry & Bright Set by Gina K Designs. Unfortunately it is no longer available but I found The Magic Of Christmas Stamp Set from Simon Says Stamp which is a great substitution. My video is showing The Magic Of Christmas Stamp Set.


I am definitely loving the Tumbled Glass and Shabby Shutters colours for my holiday cards this year. Below is a link to all the products used. Thank you for stopping by and have a wonderful day.

Products Used:

Sunday, December 8, 2019

Winter Floral Holiday Card

Hi Everyone,
I am loving the Winter Floral Layering Stencils and  I wanted to create a holiday card with a touch of a winter storm feel to it. I love it when I have an idea and it works out better than I expected. Below you will find the steps to create your own Winter Floral Holiday card.


Step 1 - Trim White Cardstock to 8 1/2" x 5 1/2", score at 4 1/4" and fold in half for a vertical side fold card. (A2)

Step 2 - Trim White Cardstock to 5 1/2" x 4 1/4". Apply Distress Oxide Ink Tumbled Glass to the entire panel. Make sure it is completely dry before the next step.

Step 3 - Place the Winter Floral Stencil Layering Stencil (Poinsettia) on top of the panel created in step 2. Apply Distress Oxide Ink Candied Apple. Remove the stencil and sprinkle White Satin Pearl Embossing Powder, remove the excess and heat set it with a heat tool. Repeat for the leaves and branches using Shabby Shutters, again sprinkling White Satin Pearl Embossing Powder and heat set it.

Step 4 - Diecut Wonky Stitched Rectangle using the panel from Step 3.

Step 5 - Place the panel from Step 3 into a Splatbox and spray White Iridescent Shimmer. I was generous with the spray. Set aside to dry completely.

Step 6 - Adhere Fun Foam to the backside of the panel from Step 3 and then adhere to the card using Nuvo Deluxe Adhesive.

Step 7 - Apply Distress Oxide Ink Tumbled Glass to a scrap piece of White Cardstock. Stamp Holiday Greetings Mix 1 using Versafine Clair Nocturne Ink. Trim the sentiment and then apply Distress Oxide Ink Shabby Shutters to the edges, then Spray White Iridescent Shimmer. Once completely dry adhere to card using Foam Tape.

Step 8 -  I didn't have Red Crystals so I took a small plastic cup and placed some Icy Crystals with a few drops of Alcohol Pearl Deception. I shook the cup until all the Crystals were completely coated. Once they were dry I adhered them to the center of the Poinsettias using a Crystal Katana and Collage Medium.


I just love how wintery the card looks. I think the rest of my holiday cards that have a snowy background will be created with the White Iridescent Shimmer Spray. Below is a link to all the products used. Thank you for stopping by and have a wonderful day.

Products Used:

Wednesday, December 4, 2019

Christmas Joy Holiday Card

Hi Everyone,
The holidays are right around corner and I have a card to share with you using the Ho Ho Deer Circle and the Holiday Greetings 1 Stamp Set from Simon Says Stamp. Below you will find the steps to create your own Holiday card.


Step 1 - Trim White Cardstock to 8 1/2" x 5 1/2", score at 4 1/4" and fold in half for a vertical side fold card. (A2)

Step 2 - Trim Xmas Vintage Patterned Paper 3/4" x 5 1/2" strips x 2. Adhere to card using Nuvo Deluxe Adhesive on both sides of the card.

Step 3 - Trim Dark Chocolate Cardstock to 2 3/4" x 5 1/2". Diecut Ho Ho Deer Circle. Trim a small piece of Xmas Vintage Patterned Paper and adhere behind the panel. Diecut Ho Ho Deer Circle using Neenah Desert Storm. Trim off the antlers and the excess and adhere on top of the Dark Chocolate diecut. Diecut Nesting Circle die (use 2 circles close together to create a frame for the deer). Adhere to card using Nuvo Deluxe Adhesive.

Step 4 - Stamp Holiday Greetings 1 sentments and snowflakes using Versamark. Sprinkle Gold Embossing Powder and remove the excess. Heat set it using a heat tool. Adhere to card using Nuvo Deluxe Adhesive.

Step 5 - Optional - Adhere a small Red Pom Pom to the nose using Nuvo Deluxe Adhesive. If you don't have a Pom Pom then diecut Ho Ho Dear Circle using Red Cardstock for the nose.

Step 6 - For added interest and sparkle adhere Red Jewels to the center of the snowflakes using a Crystal Katana and Collage Medium.


You can mass produce this card by using different patterned paper and change the colors of the cardstock and embossing powders. Below is a link to all the products used. Thank you for stopping by and have a wonderful day.

Products Used:

Sunday, December 1, 2019

Winter Wishes Holiday Card With CAS 349

Hi Everyone,
Happy Sunday! With the holidays around the corner and ideas running short using a sketch can help you out as well as surprise you with what you come up with. Which is the case with the Case This Sketch #349. Below are the steps to create your own Winter Wishes card.


Case This Sketch #349

Step 1 - Trim White Soft Finish Cardstock to 8 1/2" x 5 1/2", score at 4 1/4" and fold in half for a vertical side fold card. (A2)

Step 2 - Trim Soft Sky Cardstock to 5 1/2" x 4 1/4". Using a snowflake stencil apply Nuvo Glimmer Paste Moonstone using a spatula. Remove the excess and set aside to dry. If you do not have a stencil you can add splatters using White Acrylic Paint with a waterbrush by tapping the brush. Adhere to card using 3mm Clear Double Sided Adhesive Tape.

Step 3 - Trim Unconventional Xmas Patterned Paper to 2 1/4" x 4 1/4". Adhere to card using 3mm Clear Double Sided Adhesive Tape.

Step 4 - Diecut Snowflakes using White Soft Finish Cardstock. Adhere to card using Kids Choice Glue. I only added glue to the center so that the edges add some dimension. Trim off the hanging parts of the snowflake using scissors.

Step 5 - Diecut Penguin using True Black for the main body, arms, feet and mouth, White for the center body and Soft Sky for the scarf. Assemble the penguin and then adhere to the center of the Snowflake using Kids Choice Glue.

Step 6 - Stamp Joyful Wishes sentiment using Versafine Clair Nocturne Ink.

Step 7 - For added interest and sparkle apply Nuvo Aqua Shimmer Glitter Gloss on the scarf.


I love hanging shapes off the paper which adds a different element to your card. Don't be afraid to try this technique. It's nice to break free from your comfort zone. Below is a link to all the products used. Thank you for stopping by and have a wonderful day. Be sure to come back soon as I will be having a Blog Giveaway.

Products Used: