Friday, May 5, 2023

Kat Scrappiness Coffee Lovers Blog Hop Spring Summer 2023

Hi everyone,

Welcome to my Blog! Kat Scrappiness is please to be a super sponsor for the Coffee Lover's Blog Hop for Spring/Summer 2023. The design team members have joined in to show you some of the fun with coffee themed cards we made using some of the Kat Scrappiness "Coffee" related products. We currently have over 100 Coffee themed products available here. Everything in our "Coffee" Category is 10% off your order.

Since Kat Scrappiness is a super sponsor, we will be giving away a $25.00 gift card to the store to a lucky entry at the Coffee Lovers Hop Main Post located here.

I love Hot Coffee but in the Spring/Summer I like to indulge in Iced Coffee or a Coffee Frappe with whipped cream. Where I'm from there are places that sell it in a Mason Jar. When Kat Scrappiness came out with the Mason Jar Shaker Dies I knew I had to use it in my card. Below you will find the steps to create your own card.


Step 1 - Trim White Cardstock to 4 1/4" x 11", score at 5 1/2" and fold in half for a horizontal top fold card. (A2)

Step 2 - Diecut Double Stitched Rectangle using Hop Into Easter 6x8 Paper Pad. Adhere to card using Bearly Art Precision Glue.

Step 3 - Trim White Cardstock to 4" x 5 1/4", apply an Ink you have in your stash in color Pink using a Blender Brush. Once it is completely covered adhere to card front using Foam Tape.

Step 4 - Diecut Mason Jar (solid piece) using White Cardstock and the top and straw using Hop Into Easter 6x8 Paper Pad. Optional: use the same ink left on the brush from Step 3 to add some shading to the edges of the solid piece. Assemble using Bearly Art Precision Glue. Before adhering to the card front see Step 5.

Step 5 - Stamp Coffee Quokka (image with the coffee beans) to the bottom of the Jar using Brown Ink. Use washi tape or non permanent tape to mask of the areas that doesn't have the coffee beans. Once inked remove the tape and then stamp. 

Step 6 - Stamp Perk Up sentiment using the same Brown Ink from Step 5. Adhere to card front using Bearly Art Precision Glue.

Step 7 - Optional: for added interest and sparkle randonly adhere Brown Diamond Rhinestone Mix and Be My Valentine Sprinkle Mix using a Pick Up Tool.


Below are the links to all the products used. Thank you for stopping by and Happy Crafting!

Products Used:

Sunday, June 12, 2022

Kat Scrappiness Summer Vibes

Hi everyone,

On Saturday was the Summer Vibes Release from Kat Scrappiness. Below are 3 cards I made using most of the products. Normally I give Step by Step when I post but today I will post the completed cards with the product I used so it doesn’t become a long post. The links to all the products is at the end of this post.

Card 1


1) Fluttering By Stamps and Dies

2) Stitched Foliage Dies

3) Mini Slimline Quilted Backdrop die

4) Hello My Crafty Friend w/Shadow Die (used only Hello)

5) Pink Sapphire Rhinestone Mix


Card 2


1) Layered Bokeh 6x6 Stencils

2) Oopsie Daisy Layered Stamps and Dies

3) Mini Slimline Lattice Frame Die

4) Stitched Foliage Dies

5) Happy Anniversary w/Shadow Die (used only Happy)

6) Happy Day Stamps

7) Clear Solid Round Confetti Mix

Card 3


1) Oopsie Daisy Stamps and Dies

2) Summer Vibes Paper Pad

3) Stitched Slimline Strips Dies

4) Mini Slimline Frame Dies

5) Nesting Fishtail Banner Dies (used the sentiment only)

6) Clear Solid Round Confetti Mix

This release is packed with stencils, stamps, and dies. I still have many other cards I made which will be on the Kat Scrappiness Blog coming soon.

Below is a link to all the products used. Thank you for stopping by and Happy Crafting!

Products Used:
Sunday, May 22, 2022

Happy Birthday Floral Mini Slimline Card

Hi everyone,

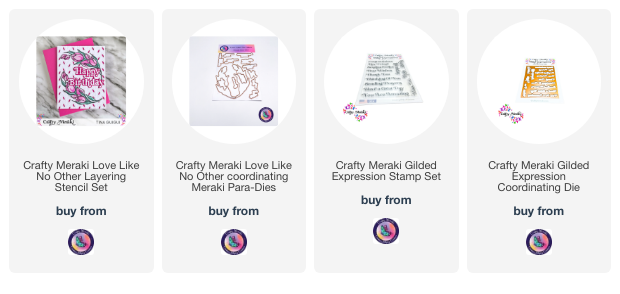
I have a quick and easy card to share with you using the Pink Fresh Studio Simplest Gestures Stamp, stencils and die and used the Simon Says Stamp Soft Plaid Background to create a subtle background. Below is the steps to create your own card.


Step 1 - Trim White Cardstock using a trimmer to 7” x 6”, score at 3 1/2” using a bone folder and fold in half for a vertical side fold card. (Mini Slimline)

Step 2 - Trim White Cardstock using a trimmer to 3 1/4” x 5 3/4”. Place the panel in a Misti and Stamp the Soft Plaid Background using Pawsitively Saturated Ink. I used Sunbeam. Don’t ink the whole stamp and to remove the edges use a Blender Brush. Add some Liquid Pixie Dust to give your background some sparkle. Let dry. Adhere the panel to the card front using Foam Tape. (If you don’t have Foam Tape you can add Bearly Art Precision Glue to a piece of Fun Foam on both sides.)


Step 3 - Place Pink Fresh Studio Simplest Gestures (floral) in a Misti and stamp using White Cardstock with SSS Black Intense Ink. Once the ink is dry place the Pink Fresh Studio Simplest Gestures Stencils and use various Pawsitively Saturated Inks. I used the following combinations on my flowers and leaves. Cheeky/Blush, Marine/Cadette/Royal, Sprout/Teal, Bubblegum/Sweets. Diecut the image using Pink Fresh Studio Simplest Gestures die. To add more dimension diecut 2-3 floral outline using White Cardstock. Stack together and adhere to card using Bearly Art Precision Glue.

Step 4 - Place White Cardstock in a Misti and Stamp Trinity Stamps Simply Sentimental - Happy using Versafine Onyx Black Ink. Diecut Happy with the matching die. Adhere to card front using Bearly Art Precision Glue.

Step 5 - For added interest and Sparkle adhere Trinity Stamps Bubble Bath Embellishment Mix to the center of the flowers using Bearly Art Precision Glue.


This card can be used for several occasions by changing the sentiment and/or colors. Below is a link to all the products used. Thank you for stopping by and Happy Crafting!

Products Used:
Sunday, January 30, 2022

One Stencil Two Ways

Hi everyone,

Today I am sharing two cards using the Fading Tiny Dots Stencil. Each card is using the stencil in different way to create a different look. Below you will find the steps to create your own cards.

Card #1


Step 1 - Trim White Cardstock to 7” x 6”, score at 3 1/2” and fold in half for a vertical side fold card. (Mini Slimline)

Step 2 - Trim White Cardstock to 3 1/4” x 5 3/4”. Apply Inks of your choice using a Blending Brush. I used Simon Says Stamp Pawsitively Saturated Inks in rainbow order starting with Cheeky, Peachy, Lemonade, Celery and Seafoam. Optional - Sprinkle some water for an oxidized look.

Step 3 - Dry Emboss Fading Tiny Dots Stencil using the panel created in Step 2 in a Die Cutting Machine. Make sure to use the right sandwich for your machine. Adhere to card using Foam Tape.

Step 4 - Diecut Thankful For You Using White Cardstock for the base and Inked Cardstock to the Thankful. Inks are Lemonade and Celery. Assemble using Bearly Art Precision Glue and adhere to card using Foam Tape.

Step 5 - For added interest and shine randomly adhere Pearl Mix in the same color range as a rainbow using a Pick Up Tool and Bearly Art Precision Glue. I used Ballerina Pink, Apricot, Bumble Bee, Mint Green and Seafoam Pearl Mix.


Card #2


Step 1 - Trim White Cardstock to 7” x 6”, score at 3 1/2” and fold in half for a vertical side fold card. (Mini Slimline)

Step 2 - Trim White Cardstock to 3 1/4” x 5 3/4”. Apply Inks of your choice using a Blending Brush. I used Simon Says Stamp Pawsitively Saturated Inks in rainbow order starting with Cheeky, Peachy, Lemonade, Celery and Seafoam.

Step 3 - Place Fading Tiny Dots Stencil on top of the panel created in Step 2. Apply the same ink colors as the background using a Blending Brush.

Step 4 - Adhere 4 strips of Red Line tape to the backside of the panel to each edge created in Step 2. Remove the release sheet to three sides and place a piece of cellophane packaging making sure to secure the corners. Add in a sequin mix and remove the last release sheet and close. I used Tutti Fruiti, 12th Man and Spring Leaves Sequins. Now you have a flat edge to edge shaker. Secure it to the front of the card using Red Line Tape.

Step 5 - Diecut Small Script Trio (hugs) 3 times. 2 times using White Cardstock and 1 time using Gold Matte Cardstock. Assemble each layer and adhere to card using Bearly Art Precision Glue. 

Step 6 - Stamp Heartfelt Sentiments (and kisses) using Pawsitively Saturated Ink in Celery. Make sure to use a piece of washi tape to cover (Love) if you just want (and Kisses). Trim sentiment and adhere to card using Bearly Art Precision Glue.


I love stretching my supplies and getting different looks from the same stencils, stamps or dies. Below is a link to all the products used. Thank you for stopping by and Happy Crafting!

Products Used:

Tuesday, December 21, 2021

May Your Holiday Be Filled With Joy Mini Slimline Card

Hi everyone,

Can you believe the holidays is days away? I can’t. I have another holiday card to share with you. I used some new and older product from Elizabeth Craft Designs. Below is the steps to create your own card.


Step 1 - Trim White Soft Finish Cardstock to 7” x 6”, score at 3 1/2” and fold in half for a horizontal side fold card. (Mini Slimline)

Step 2 - Trim White Soft Finish Cardstock to 3 1/2” x 6”. Apply Inks of your choice using a Blender Brush, starting lightest at the bottom and working to darkest at the top. I used Pawsitively Saturated Inks in Seafoam, Surf and Ocean. Adhere to card using Bearly Art Precision Glue.

Step 3 - Diecut Holiday Train using Red, White and Gold Glitter Cardstock. Assemble using Kids Choice Glue and adhere to card using Foam Tape.

Step 4 - Diecut Train Carts using Red, White and Gold Glitter Cardstock. Assemble using Kids Choice Glue and adhere to card using Foam Tape.

Step 5 - Diecut Penguin using White, Black and Orange Cardstock. Assemble using Kids Choice Glue and adhere to card using Foam Tape in back of the Train Cart.

Step 6 - Diecut Santa Claus (hat) in White and Red Cardstock. Assemble and adhere to Penguin using Kids Choice Glue.

Step 7 - Stamp Classic Christmas Special Stamp Set using Versafine onto Teal Cardstock. Diecut sentiment with Fitted Fishtails. To get the fishtails on both sides diecut regular first pass then flip the die and diecut a second time. Adhere to card using Foam Tape.


Although the Holiday Train dieset has details for the holidays it can easily be used all year round. Below is a link to all the products used. Thank you for stopping by and Happy Crafting!

Products Used:

Thursday, December 16, 2021

Happy Holidays Mini Slimline Card

Hi everyone,

With a little more than a week left until the Holidays I am trying to get in as much Holiday cards for inspiration. Every year Gina K Designs comes out with a Holiday Kit that is packed with stamps, dies, and paper that doesn’t disappoint. This year is no different. I created a card using the Playful Penguins Stamps and dies and the Star Struck Stamp set. Below you will find the steps to create your own card.

Step 1 - Trim White Cardstock to 7” x 6”, score at 3 1/2” and fold in half for a vertical side fold card. (Mini Slimline)

Step 2 - Trim Black Cardstock to 3 1/8” x 5 5/8”. Adhere to card using Bearly Art Precision Glue.

Step 3 - Trim White Cardstock to 3 1/2” x 6”. Apply Pawsitively Saturated Inks using a Blender Brush. Starting in the middle use Seafoam, Surf and then ending with Ocean at the edges. Diecut Double Stitched Mini Slimline using the panel just created.

Step 4 - Stamp Star Struck (image) to the panel created in Step 3 using Versamark. Sprinkle White Embossing Powder and remove the excess. Heat set it with a Heat Tool. 

Step 5 - Stamp Star Struck (sentiment) to the panel created in Step 3 using Versamark. Sprinkle White Embossing Powder and remove the excess. Heat set it with a Heat Tool. 

Step 6 - Stamp Playful Penguins (image) using Gina K Amalgam Ink. Color the image using any Alcohol Markers of your choice. I used the Altenew Artist Markers. Diecut the image with the matching die. Adhere to card using Bearly Art Precision Glue.

Step 7 - Optional - Randomly adhere White Snowflake Sprinkles using a Pick Up Tool and Bearly Art Precision Glue.


This card be used for the Holidays but also for a Winter Birthday card by simply changing the sentiment. Below is a link to all the products used. Thank you for stopping by and Happy Crafting!

Products Used:

Wednesday, December 8, 2021

Kindness Mini Slimline Card

Hi everyone,

Today I am sharing a Mini Slimline card using the Beautiful Blooms Mindfulness and Kindness Stamps and Dies from Elizabeth Craft Designs. Below are the steps to create your own card.


Step 1 - Trim White Soft Finish Cardstock to 7" x 6", score at 3 1/2" and fold in half for a vertical side fold card. (Mini Slimline)

Step 2 - Trim White Soft Finish Cardstock to 3 1/4" x 5 3/4". Apply Ink of your choice using a Blender Brush. I used Distress Oxide Tumbled Glass and Twisted Citron making sure to overlap the 2 colors. Optional: Apply Distress Oxide Black Soot onto an Acrylic Block and add some water. Using a fan brush splatter it to the background. Let dry.

Step 3 - Stamp Mindfulness images using Gina K Amalgam Ink onto White Soft finish Cardstock. Color in using any alcohol markers of your choice. I used Altenew Alcohol Artist Markers. Diecut images with the matching dies. Adhere the floral image using Kids Choice Glue and the bird using Foam Tape.

Step 4 - Stamp Kindness sentiment using Versafine Onyx Black Ink onto White Soft Finish Cardstock. Diecut sentiment with the matching die. Adhere to card using Kids Choice Glue.

Step 5 - Optional - For added interest and sparkle randomly adhere Purple Pearls using a Pickup Tool and Kids Choice Glue.


This card can be for any occasion by simply changing the sentiment. Below is a link to all the products used. Thank you for stopping by and Happy Crafting!

Elizabeth Craft Designs Products Used:

Other Products Used: