Tuesday, October 20, 2020

YouTube Alcohol Ink Tutorial

Hi everyone,
Today I am sharing a YouTube video tutorial for Alcohol Inks which was asked by popular demand when I shared them on Facebook and Social Media. Below are the photos that inspired this video. 


I hope you this video has inspired you to take out your Alcohol Inks and start playing. The technique is so easy. The key is to build it slowly. Below is a link to all the products used. Thanks for watching and have a wonderful day! 

Products Used:

Monday, October 12, 2020

Elizabeth Craft Designs October Group Post Halloween

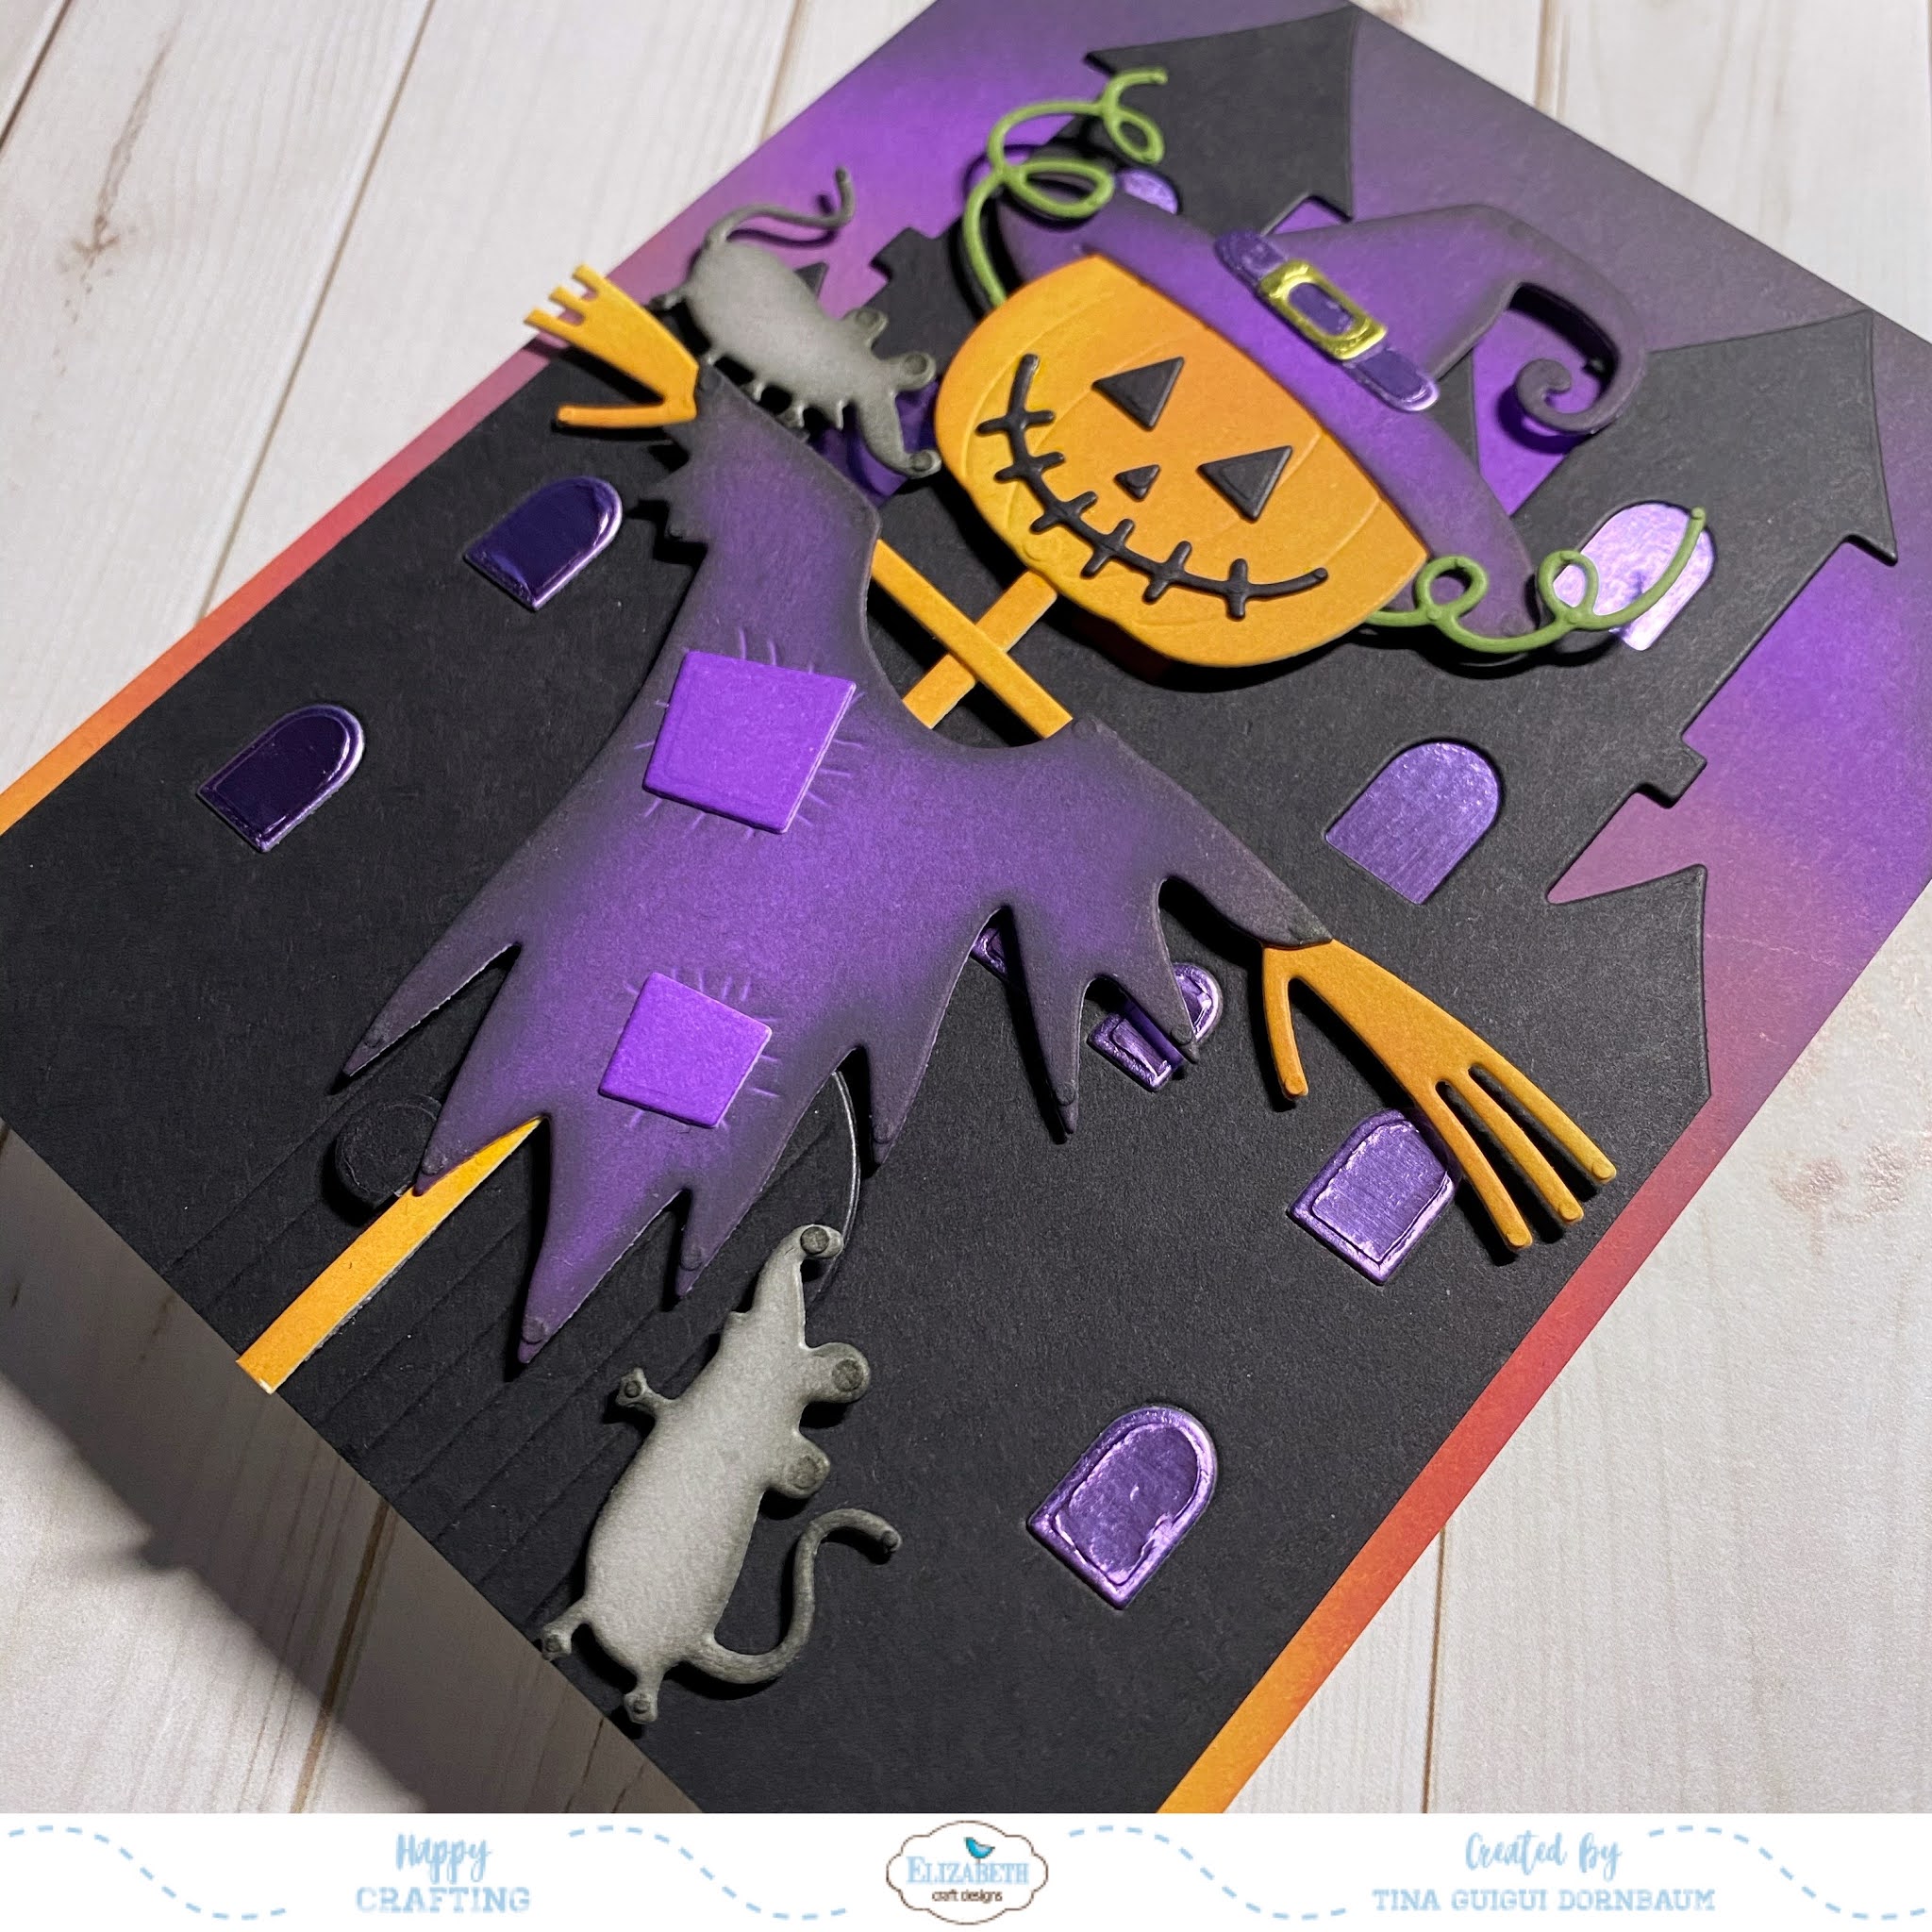
Hi everyone, welcome to another Elizabeth Craft Designs Group Post. This month the theme is Halloween. I had fun turning the Castle Folding Card into a spooky old Mansion. Below you will find the steps to create your own Halloween Card.


Step 1 - Trim White Soft Finish Cardstock to 8 1/2” x 5 1/2”, score at 4 1/4” and fold in half for a vertical side fold card. (A2)

Step 2 - Trim White Soft Finish Cardstock to 5 1/2” x 4 1/4”. Apply Distress Oxide Ink using a Foam Applicator. Starting from the bottom going up I used Spiced Marmalade, Barn Door, Dusty Concord, Wilted Violet, Black Soot.


Step 3 - Diecut Castle Folding Card (the side with the windows) using Black Cardstock. Trim off the embossed area where the fold would be. You only need the front of the Castle. Adhere Purple Metallic to the back of the diecut windows. Diecut the little windows using Purple Cardstock and adhere to card using Kid’s Choice Glue. Adhere the Mansion to the front of the card using 3mm Clear Double Sided Adhesive Tape.

Step 4 - Diecut Scarecrow and mice using White Soft Finish Cardstock. Ink the pieces and assemble using Kids Choice Glue. Adhere to card using Foam Tape.

Step 5 - Stamp Spooky Sentiment (Hello Pumpkin) inside the card using Versafine Onyx Black Ink (I stamped inside because I had no space on the front of the card.)


I love how the ink blending on the background makes the scarecrow glow. Below you will find the link to the products used. Thank you for stopping by and Happy Crafting!
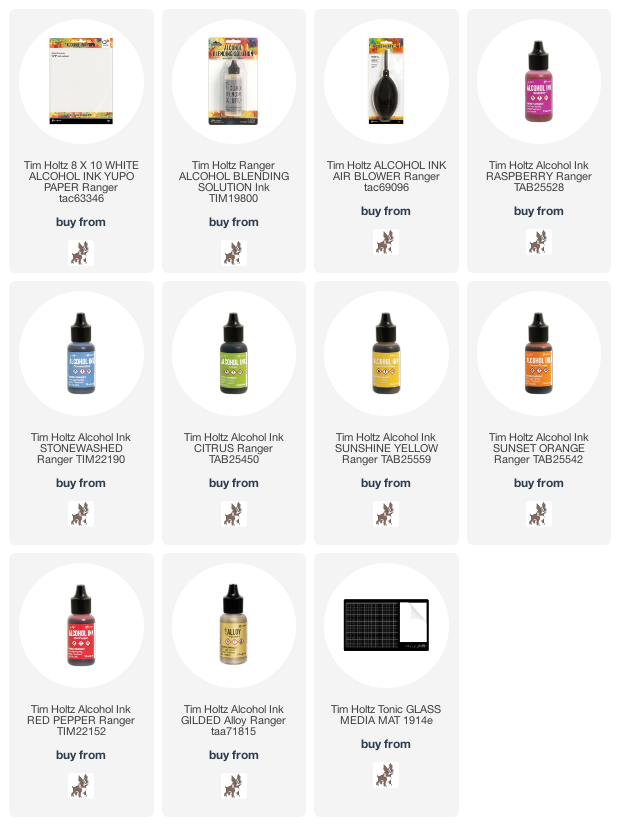
Products Used:

Thursday, October 1, 2020

i-Crafter October Release

Hi everyone! Welcome to the i-Crafter October Release. This month there is a lot of Holiday product. I chose the beautiful Snowflakes Bursts die and Christmas Sentiments Stamps to create a Happy Holidays Card. Below you will find the steps to create your own card.


Step 1 - Trim White Cardstock to 8 1/2” x 5 1/2”, score at 4 1/4” and fold in half for a vertical side fold card. (A2)

Step 2 - Trim Patterned Paper to 5 1/2” x 4 1/4” and adhere to card using Nuvo Deluxe Adhesive.

Step 3 - Trim Patterned Paper to 4 1/2” x 3 1/4” and adhere to card using Nuvo Deluxe Adhesive.

Step 4 - Diecut Snowflakes Bursts using Glittered Cardstock and another in White Cardstock. Adhere the White first using Nuvo Deluxe Adhesive (this will remain flat). Adhere the Glittered diecut using Nuvo Deluxe Adhesive. Lift all the flakes to add some dimension.

Step 5 - Stamp Christmas Sentiment (Happy and Holidays) using Versafine Onyx Black Ink on White Cardstock. You can leave it as is but I chose to colours the letters using the same colours as the Christmas Lights on the Patterned Paper. I coloured them in using Spectrum Noir Classique Markers. Trim it out and adhere to card using Nuvo Deluxe Adhesive.


It is hard to see the sparkle but in real life it is stunning. Below is a link to the products used. Thank you for stopping by and Happy Crafting!

Products Used: