Tuesday, December 21, 2021

May Your Holiday Be Filled With Joy Mini Slimline Card

Hi everyone,

Can you believe the holidays is days away? I can’t. I have another holiday card to share with you. I used some new and older product from Elizabeth Craft Designs. Below is the steps to create your own card.


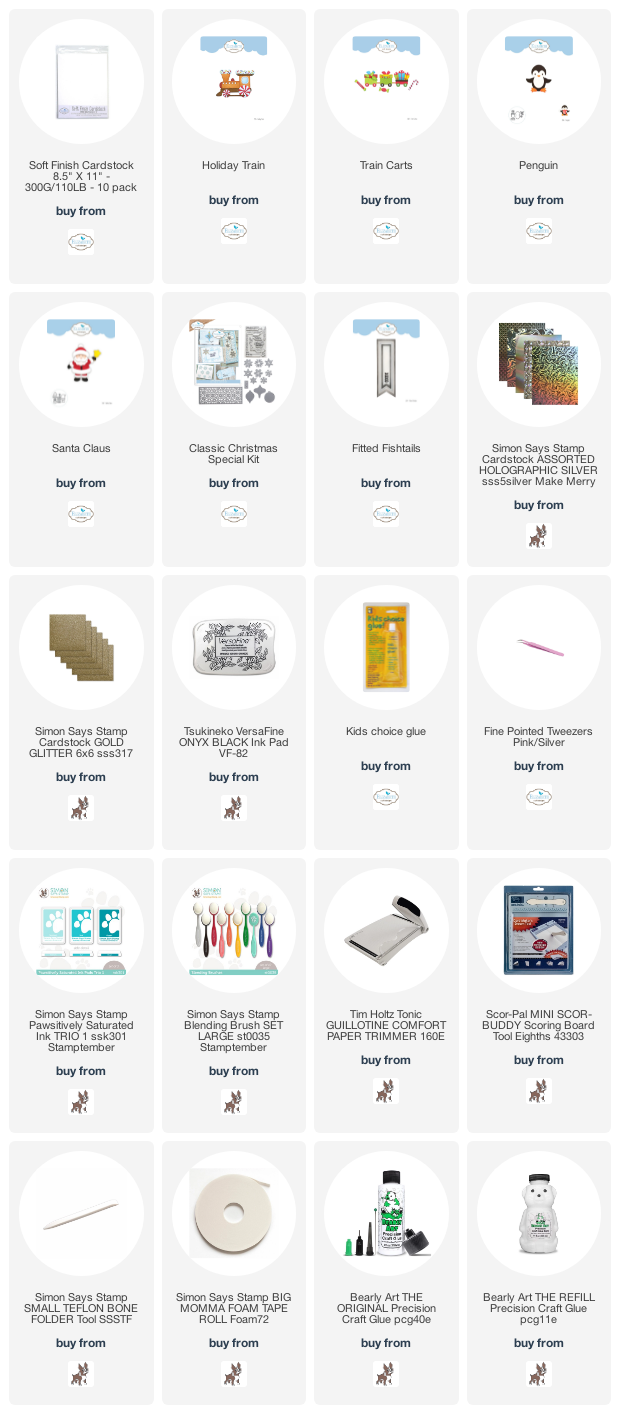
Step 1 - Trim White Soft Finish Cardstock to 7” x 6”, score at 3 1/2” and fold in half for a horizontal side fold card. (Mini Slimline)

Step 2 - Trim White Soft Finish Cardstock to 3 1/2” x 6”. Apply Inks of your choice using a Blender Brush, starting lightest at the bottom and working to darkest at the top. I used Pawsitively Saturated Inks in Seafoam, Surf and Ocean. Adhere to card using Bearly Art Precision Glue.

Step 3 - Diecut Holiday Train using Red, White and Gold Glitter Cardstock. Assemble using Kids Choice Glue and adhere to card using Foam Tape.

Step 4 - Diecut Train Carts using Red, White and Gold Glitter Cardstock. Assemble using Kids Choice Glue and adhere to card using Foam Tape.

Step 5 - Diecut Penguin using White, Black and Orange Cardstock. Assemble using Kids Choice Glue and adhere to card using Foam Tape in back of the Train Cart.

Step 6 - Diecut Santa Claus (hat) in White and Red Cardstock. Assemble and adhere to Penguin using Kids Choice Glue.

Step 7 - Stamp Classic Christmas Special Stamp Set using Versafine onto Teal Cardstock. Diecut sentiment with Fitted Fishtails. To get the fishtails on both sides diecut regular first pass then flip the die and diecut a second time. Adhere to card using Foam Tape.


Although the Holiday Train dieset has details for the holidays it can easily be used all year round. Below is a link to all the products used. Thank you for stopping by and Happy Crafting!

Products Used:

Thursday, December 16, 2021

Happy Holidays Mini Slimline Card

Hi everyone,

With a little more than a week left until the Holidays I am trying to get in as much Holiday cards for inspiration. Every year Gina K Designs comes out with a Holiday Kit that is packed with stamps, dies, and paper that doesn’t disappoint. This year is no different. I created a card using the Playful Penguins Stamps and dies and the Star Struck Stamp set. Below you will find the steps to create your own card.


Step 1 - Trim White Cardstock to 7” x 6”, score at 3 1/2” and fold in half for a vertical side fold card. (Mini Slimline)

Step 2 - Trim Black Cardstock to 3 1/8” x 5 5/8”. Adhere to card using Bearly Art Precision Glue.

Step 3 - Trim White Cardstock to 3 1/2” x 6”. Apply Pawsitively Saturated Inks using a Blender Brush. Starting in the middle use Seafoam, Surf and then ending with Ocean at the edges. Diecut Double Stitched Mini Slimline using the panel just created.

Step 4 - Stamp Star Struck (image) to the panel created in Step 3 using Versamark. Sprinkle White Embossing Powder and remove the excess. Heat set it with a Heat Tool. 

Step 5 - Stamp Star Struck (sentiment) to the panel created in Step 3 using Versamark. Sprinkle White Embossing Powder and remove the excess. Heat set it with a Heat Tool. 

Step 6 - Stamp Playful Penguins (image) using Gina K Amalgam Ink. Color the image using any Alcohol Markers of your choice. I used the Altenew Artist Markers. Diecut the image with the matching die. Adhere to card using Bearly Art Precision Glue.

Step 7 - Optional - Randomly adhere White Snowflake Sprinkles using a Pick Up Tool and Bearly Art Precision Glue.


This card be used for the Holidays but also for a Winter Birthday card by simply changing the sentiment. Below is a link to all the products used. Thank you for stopping by and Happy Crafting!

Products Used:

Wednesday, December 8, 2021

Kindness Mini Slimline Card

Hi everyone,

Today I am sharing a Mini Slimline card using the Beautiful Blooms Mindfulness and Kindness Stamps and Dies from Elizabeth Craft Designs. Below are the steps to create your own card.


Step 1 - Trim White Soft Finish Cardstock to 7" x 6", score at 3 1/2" and fold in half for a vertical side fold card. (Mini Slimline)

Step 2 - Trim White Soft Finish Cardstock to 3 1/4" x 5 3/4". Apply Ink of your choice using a Blender Brush. I used Distress Oxide Tumbled Glass and Twisted Citron making sure to overlap the 2 colors. Optional: Apply Distress Oxide Black Soot onto an Acrylic Block and add some water. Using a fan brush splatter it to the background. Let dry.

Step 3 - Stamp Mindfulness images using Gina K Amalgam Ink onto White Soft finish Cardstock. Color in using any alcohol markers of your choice. I used Altenew Alcohol Artist Markers. Diecut images with the matching dies. Adhere the floral image using Kids Choice Glue and the bird using Foam Tape.

Step 4 - Stamp Kindness sentiment using Versafine Onyx Black Ink onto White Soft Finish Cardstock. Diecut sentiment with the matching die. Adhere to card using Kids Choice Glue.

Step 5 - Optional - For added interest and sparkle randomly adhere Purple Pearls using a Pickup Tool and Kids Choice Glue.


This card can be for any occasion by simply changing the sentiment. Below is a link to all the products used. Thank you for stopping by and Happy Crafting!

Elizabeth Craft Designs Products Used:

Other Products Used:

Thursday, November 18, 2021

Happy Birthday Mini Slimline Flat Shaker Card

Hi everyone,
I have a fun Mini Slimline Flat Shaker card to share with you using the Altenew Polka Dot Buds, SSS Happy Birthday dies, and the SSS Hybrid Ink Pad. Below is the steps to create your own card.


Step 1 - Trim White Cardstock to 7" x 6", score at 3 1/2" and fold in half for a vertical side fold card. (Mini Slimline)

Step 2 - Trim White Cardstock to 3 1/8" x 5 5/8". Place Altenew Stencil Polka Dot Buds (circles) on the cardstock and using a Blender Brush apply ink of your choice. I used SSS Hybrid Hot Lips. Remove the stencil and place the 2nd stencil (leaves and tiny dot) and apply SSS Hybrid Jellybean. I deepened the small dot using an Altenew Detailed Blender Brush. Let dry.

Step 3 - Trim a piece of cellophane slightly bigger than panel from Step 2 and place it on top of the panel. Flip it over and add Red Line Tape to the backside on all sides at the edges. Remove the release sheet from 3 sides and fold the cellophane to secure it to the tape. Flip over and add Pretty Pink Posh Sweet Pea Mix (using only the yellow/green and pink sequins). Remove the release sheet from the last piece of tape and secure the cellophane. Remove the excess pieces at each corner being careful not to remove too much that will leave a hole. Adhere to card front using Red Line Tape or Bearly Art Precision Glue. Either one works fine.

Step 4 - Diecut SSS Happy Birthday using Pink Cardstock for words and White Cardstock for the shadow. I did not have the right Pink Cardstock so before I diecut the word I inked a scrap piece of cardstock using the same SSS Hybrid Hot Lips ink I used on the stencil. Assemble and adhere to card using Bearly Art Precision Glue.


This card can be used for many occasions by simply changing the colors and/or changing the sentiment. Below is a link to all the products used. Thank you for stopping by and Happy Crafting!

Products Used:

Monday, November 15, 2021

Sunshine Mini Slimline Card

Hi everyone,

I love Sunflowers and Elizabeth Craft Designs came out with a beautiful stamp set from the Beautiful Blooms Collection called Sunshine. Below you will find the steps to create your own card.


Step 1 - Trim White Soft Finish Cardstock to 7” x 6”, score at 3 1/2” and fold in half for a vertical side fold card (Mini Slimline)

Step 2 - Trim White Soft Finish Cardstock to 3 1/2” x 6”. Diecut Floral Burst Background using scrap piece of cardstock. Place the diecut on the panel to use as a stencil and apply any ink of your choice using a Blender Brush. I used Dried Marigold and Spiced Marmalade. Since the diecut doesn’t fill the entire panel I flipped it and found the repeat pattern and continued to fill the panel. Trim the edges 1/8” each side and adhere to card front using Foam Tape.

Step 3 - Stamp Sunshine image using Gina K Amalgam Ink on White Soft Finish Cardstock. Color in with any color medium of your choice. I used Prismacolor Premier Pencils and using Gamsol to blend. I will have a video on YouTube soon on a technique I tried to make blending with Gamsol easier so stay tuned. Diecut the image with the matching die and adhere to card using Kids Choice.

Step 4 - Stamp Sunshine sentiment using Versafine Onyx Black Ink on White Soft Finish Cardstock. Diecut with matching die and adhere to card using Kids Choice.

Step 5 - For added interest and sparkle randomly adhere Sequins using a Pick Up tool and Kids Choice Glue.


This card can be used for any occasion by simply changing the sentiment. Below is a link to all the products used. Thank you for stopping by and Happy Crafting!

Products Used:

Friday, November 12, 2021

Fall Winter 2021 Coffee Lovers Blog Hop

Hi everyone, 

Welcome to my blog! Kat Scrappiness is pleased to be a returning super sponsor for the Coffee Lover’s Blog Hop for the Fall/Winter 2021. As a design team member I’m thrilled to show you a project I made using some of the Kat Scrappiness “Coffee” related products. They currently have over 100 Coffee themed products available!

Everything in their “Coffee” Category is 15% off from NOV 12-19th, And as an added bonus they will include EVERYTHING else on their site as well!!!! Use coupon code: “FWCOFFEEHOP” at checkout for 15% off your order).

Since Kat Scrappiness is a super sponsor, they are also be giving away a $25.00 gift card to the store, PLUS a flash prize which is a surprise package of Kat Scrappiness products! Be sure to leave a comment on the Kat Scrappiness Blog Post for a chance to win!

Below are the steps for my card.


Step 1 - Trim White Cardstock to 7” x 6”, score at 3 1/2” and fold in half for a vertical side fold card. (Mini Slimline)

Step 2 - Trim White Cardstock to 3 1/2” x 6”. Apply Ink of your choice using a Blender Brush. I used Distress Oxide Inks in Twisted Citron, Mowed Lawn. Sprinkle some water and remove the excess with a paper towel. Let dry.

Step 3 - I had a cellophane package in my stash so I trimmed it to be slightly larger than my panel from Step 2. Add Double Sided Tape to the backside of the panel from Step 2 on all sides. Remove the release sheet from 3 sides and adhere the Cellophane. Fold the edges of the 3 sides and insert in the front panel the Glistening Tinsel Sequin Mix. Now remove the release sheet and fold the remaining side closed. Remove all the excess at the corners. Adhere Bearly Art Precision Glue to the back and adhere to the card front.

Step 4 - Diecut Layered Coffee Cup using Ugly Sweater Patterned Paper to the base and White Cardstock to all the pieces of the topper and Desert Storm Cardstock for the piece in the center. Assemble using Bearly Art Precision Glue but don’t adhere the middle piece. Add some twine around the center piece and tie in a knot. Add it to the card using Bearly Art Precision Glue.

Step 5 - Diecut Got Coffee? Using White Cardstock. Adhere to card using Bearly Art Precision Glue.

Step 6 - Stamp Naughty Christmas sentiment using Versamark on Green Cardstock. Sprinkle White Embossing Powder and remove the excess. Heat set it with a Heat Tool. Diecut the sentiment using Boxed Sentiment Strip. To even out both ends Diecut again by placing the die on the opposite end making sure it is perfectly aligned. Adhere to card using Bearly Art Precision Glue.

Step 7 - Diecut Holly Leaves and Berries using Green Cardstock to the Holly. Using a Blender Brush apply Distress Oxide Mowed Lawn and Pine Needles to the edges. Adhere to card using Bearly Art Precision Glue. Instead of diecuting the berries I adhered Red Sequins from the same mix I used inside my flat shaker.


My card is using 2 things I am loving recently. Mini Slimline size and flat shaker cards. Below you will find the link to all the products used. Be sure to leave a comment over at the Kat Scrappiness Blog. Thank you for stopping by and Happy Crafting!

Products Used:

Sunday, August 1, 2021

i-Crafter August 1st Release

Hi everyone,

It’s August Release time at i-Crafter. I have a super fun card to share using the Twist Pop Card dies. This dieset makes Twist Cards super easy. Below you will find the steps to create your own card.


Step 1 - Trim Cardstock to 4 1/4” x 8 1/2”, score at 5 1/2” and fold in half for a horizontal top fold card. A2)

Step 2 - Trim Patterned Paper to 4 1/4” x 5 1/2” and adhere to card front using Bearly Art Precision Glue. Trim Patterned Paper to 1/2” and adhere to right side using Bearly Art Precision Glue. 

Step 3 - Adhere Patterned Paper to the inside of the card both top and bottom. 4 1/4” x 5 1/2”. 

Step 4 - Diecut Twist Pop (sentiment) and adhere to Green Cardstock. Trim and add fishtail to the right. Adhere to card using Bearly Art Precision Glue.

Step 5 - Diecut Twist Pop the two shapes with a tab 2 times each. To assemble flip one of the diecuts so one tab is on the top and one at the bottom. Adhere using Bearly Art Precision Glue. 


Assemble the pieces to the card. Diecut Twist Pop square and adhere to the pop mechanism. Adding FALL diecuts.


This card can be used for any occasion by changing the sentiment and patterned paper. Below is a link to the product used. Thank you for stopping by.

Products Used:

Thursday, July 1, 2021

I-Crafter July 1st Release

Hi everyone,

Welcome to the July 1st Release Day from I-Crafter. It’s Christmas Time in July. For my card I used the Box Pops Holiday Truck Add On for a Scenic Holiday Card. Below you will find the steps to create your own card.


Step 1 - Trim White Cardstock to 7” x 6”, score at 3 1/2” and fold in half for a horizontal top fold card. (Mini Slimline)

Step 2 - Trim Whimsy Stamps Blurry Flurries 6” x 6” Paper Pad to 3 1/3” x 6”. Adhere to card front using Bearly Art Precision Glue.

Step 3 - Fussy cut 2 wavy strips measuring 6” using White Cardstock. Apply Distress Oxide Ink Tumbled Glass to create 2 hillside strips. Adhere to card using Bearly Art Precision Glue.

Step 4 - Diecut Box Pops Holiday Truck Add On using various colors of Cardstock. Assemble and adhere to card using Foam Tape. (I used Vellum for the Windows and adhered it to the backside)

Step 5 - Diecut Box Pops Holiday Truck Add On using DCWV Foiled Cardstock. (For the presents and ornaments) Adhere to card using Bearly Art Precision Glue.

Step 6 - Diecut Box Pops Holiday Truck Add On (sentiment) using White Cardstock 2 times and 1 time using DCWV Foiled Cardstock. Adhere each layer using Bearly Art Precision Glue making sure to finish with the foiled Cardstock on top. Adhere to card using Bearly Art Precision Glue.


As this is an Add On it can be used with the Box Pops but I wanted to show the versatility to make a stand alone card. Below you will find the link to the Products Used. Thank you for stopping by and Happy Crafting!

Products Used:

Tuesday, June 1, 2021

I-Crafter June 1st Release

Hi everyone,

Welcome to the i-Crafter June Release. I am loving the new Feline Happy and Puppy Love dies along with the Mini Album Divider Add-Ons. For today’s card I chose the Feline Happy dies. Below you will find the steps to create your own card.


Step 1 - Trim White Cardstock to 7” x 6”, score at 3 1/2” and fold in half for a vertical side fold card. (Mini Slimline)

Step 2 - Trim Lawn Fawn Perfectly Plaid to 3 1/2” x 6” and adhere to card front using Bearly Art Precision Glue.

Step 3 - Diecut Dashed Circles using Soft Pink Cardstock and adhere to card using Bearly Art Precision Glue.

Step 4 - Diecut Feline Happy using Black, White and Soft Pink Cardstock. Assemble to cat directly to the card front using Bearly Art Precision Glue. (Tip: Adhere the cat outline first and then paper pierce the inside) Add some Glossy Accents to the Glasses to add some shine.

Step 5 - Diecut Feline Happy (sentiment) using Black Cardstock and adhere to card using Bearly Art Precision Glue.

Step 6 - Optional: Randomly adhere Pearls using a Pick Up Tool and Bearly Art Precision Glue.

Step 7 - Use a corner rounder punch to the edges on the right side of the card.


This card will make any cat lover happy. Below you will find the link to all the products used. Thank you for stopping by and Happy Crafting!

Products Used:

Tuesday, May 25, 2021

Beautiful Blooms Kindness Mini Slimline Card

Hi everyone,

Have you seen the new Beautiful Blooms Stamps Collection from Elizabeth Craft Designs? It is a stunning collection. They are fantastic for water colouring, alcohol marker blending and pencil blending. For my card I decided to water color a background then go over the image with a brighter water color. Below is the steps to create your own card.


Step 1 - Trim White Soft Finish Cardstock to 7” x 6”, score at 3 1/2” and fold in half for a vertical side fold card. (Mini Slimline)

Step 2 - Trim Water Color Paper to 4” x 6 1/2”. Adhere to a board using Painter’s Tape. (This will prevent the paper from warping.) Wet the panel completely and then start to drop some color and let is spread naturally. Keep adding color until you have filled the entire panel. You panel will need to completely dry for the next step.


Step 3 - Stamp Beautiful Blooms Kindness (image) to the panel created in Step 2 using Versamark. Sprinkle White Embossing Powder and remove the excess. Heat Set it with a heat tool. Water color inside the image using brighter colors than used on the panel. Since the image was embossed it helps to keep the colors from going out of the lines.


Step 4 - Stamp Beautiful Blooms Kindness (sentiment) to the panel created in Step 2 using Versamark. Sprinkle White Embossing Powder and remove the excess. Heat Set it with a heat tool. Trim the image to 3 1/4” x 5 3/4”. Adhere to the card front using Foam Tape.


Step 5 - For added interest randomly adhere Clear Drops using a Pick Up Tool and Bearly Art Precision Glue.


This card can be used for many occasions by changing the colors and/or sentiment. Below is a link to all the products used. Right now you can save 20% off your order by using coupon code FLAG21 at checkout. Offer expires May 31st! Thank you for stopping by and Happy Crafting!

Products Used: