Wednesday, January 31, 2018

Texture Paste With Silk Microfine Glitter

Hi Everyone,
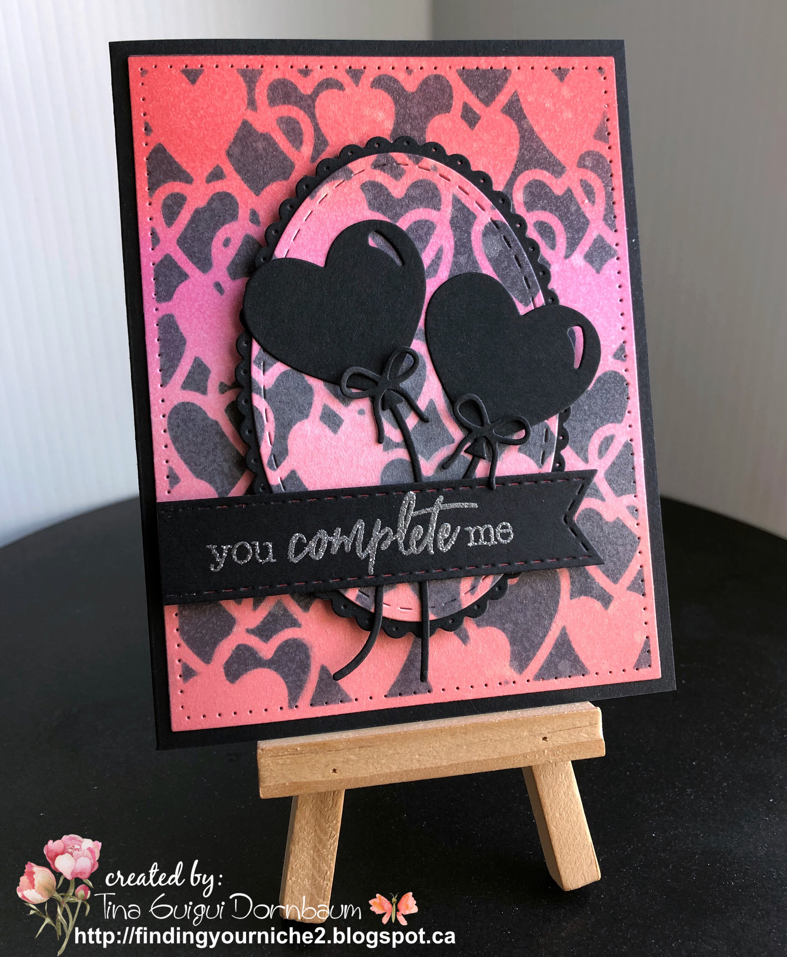
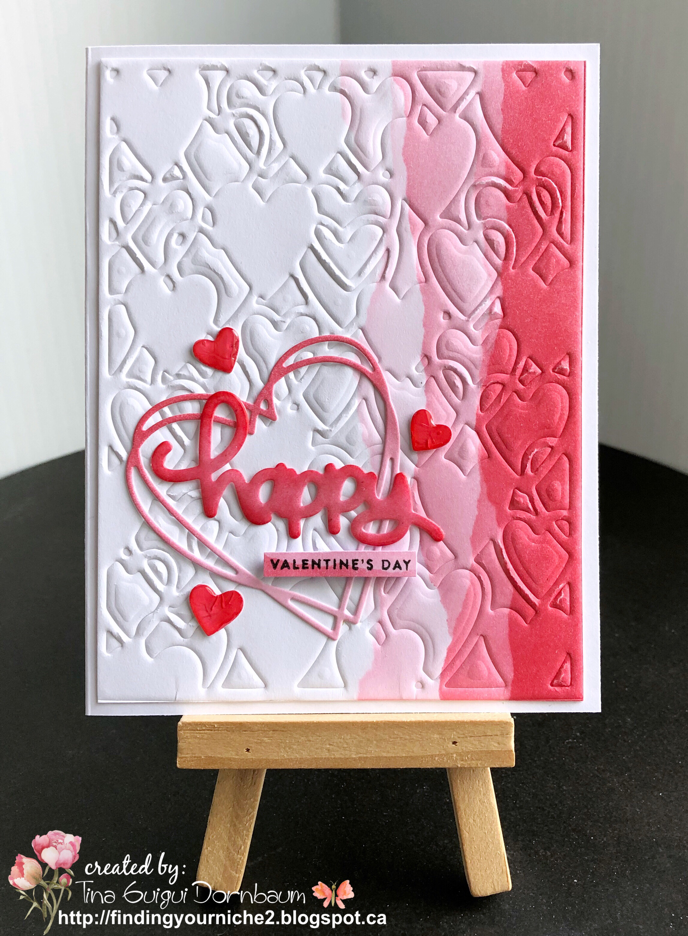
Can you believe tomorrow is February?!?! That means Valentine's Day is nearly here. I have a fun card to share with you today to help you out. This card brings a great technique to make your own glitter paste. Below you will find the easy steps to replicate this card.


  • Step 1 - Base of card, Trim White Soft Finish Cardstock to 5 1/2" x 8 1/2", fold in half for a Vertical Fold Card. Folded card measures 4 1/4" x 5 1/2".
  • Step 2 - Diecut Heart Background 2 times (one of scrap cardstock and one using White Soft Finish Cardstock with Clear Double Sided Adhesive Sheet on the backside). Trim Black Soft Finish Cardstock to 4" x 5 1/4" 2 times. Take a small amount of Texture Paste Transparent Gloss and add Silk Microfine Glitter. You only need a small amount of Silk Microfine Glitter. I created two colors. One using the Vintage Pink and one using the Bright Cranberry. Place Heart Background stencil (the scrap one) on top of the trimmed Black Soft Finish Cardstock using a Palette Knife. I used the Bright Cranberry mixture. Set aside to dry. On the other trimmed Black cardstock using a floral stencil (I used Tim Holtz Mini Stencil #14) apply both colors randomly. I had to do in two steps because my stencil was too small. If you have a larger stencil you only need to do this one time. Set aside to dry. See photo below for visual.


  • Step 4 - Peel off the release sheet from the backside of the Heart Background and adhere to the top of the Heart Glitter paste background making sure to align it properly. Adhere the whole panel to the front of the card using 3mm Clear Double Sided Adhesive Tape.
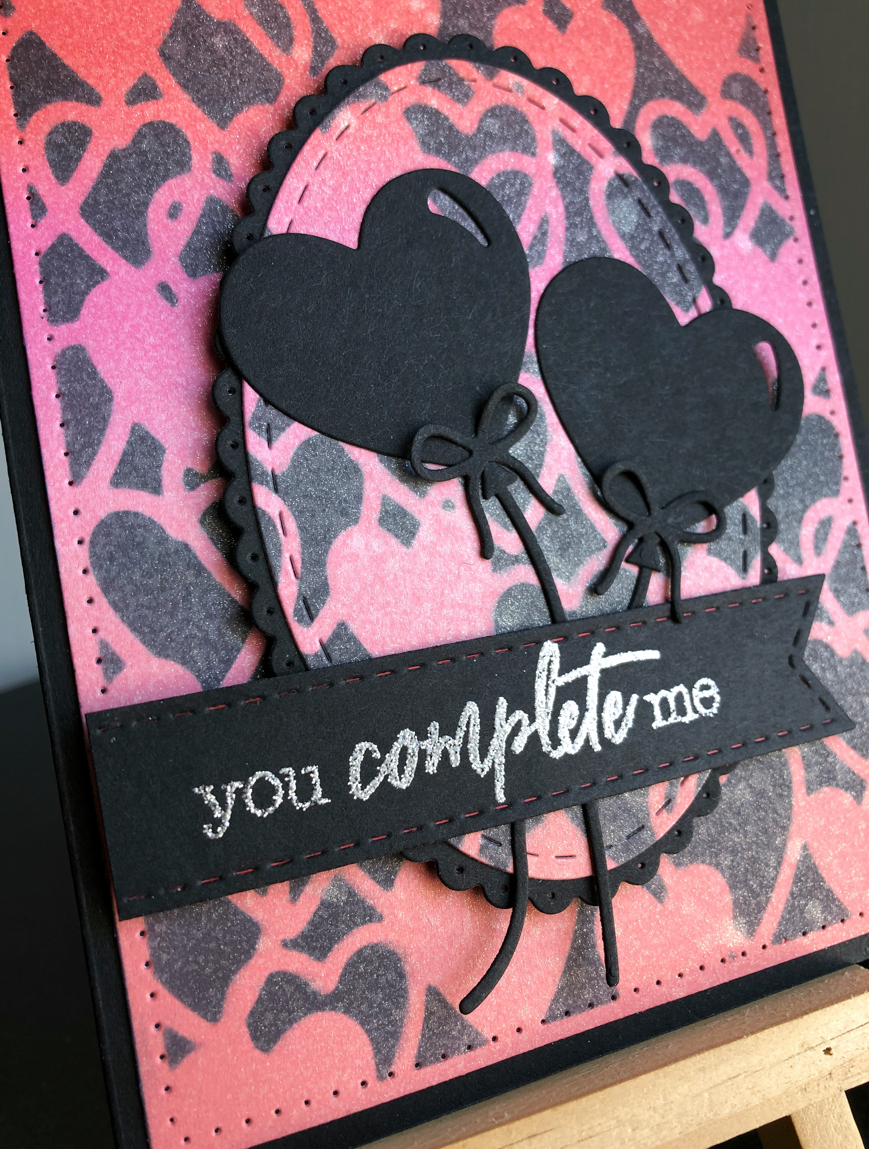
  • Step 5 - Diecut Solid Heart from Heart Cutouts using the Floral Glitter paste background. Diecut Solid Heart from Puzzle Heart using White Soft Finish Cardstock. Adhere the Floral Heart on top of the White Heart. Adhere it to the front of card in an angle using 3mm Clear Double Sided Adhesive Tape. See photo for visual.
  • Step 6 - Diecut Stitched Fishtail Banner (smallest one) using White Soft Finish Cardstock.
  • Step 7 - Stamp Love sentiment on top of the Stitched Fishtail Banner diecut using Black Pigment Ink. Adhere to card using foam tape.


I hoped you enjoyed this fun technique creating your own colored Glitter Paste. Elizabeth Craft Designs has a wide variety of colors for this super easy technique. Elizabeth Craft Designs has a YouTube Channel Technique Friday with Els using this technique that you may want to check out. While you are there be sure to subscribe to the channel to see new techniques every friday from Els. Below you will find links to all the products used for your easy convenience. Thanks for stopping by.
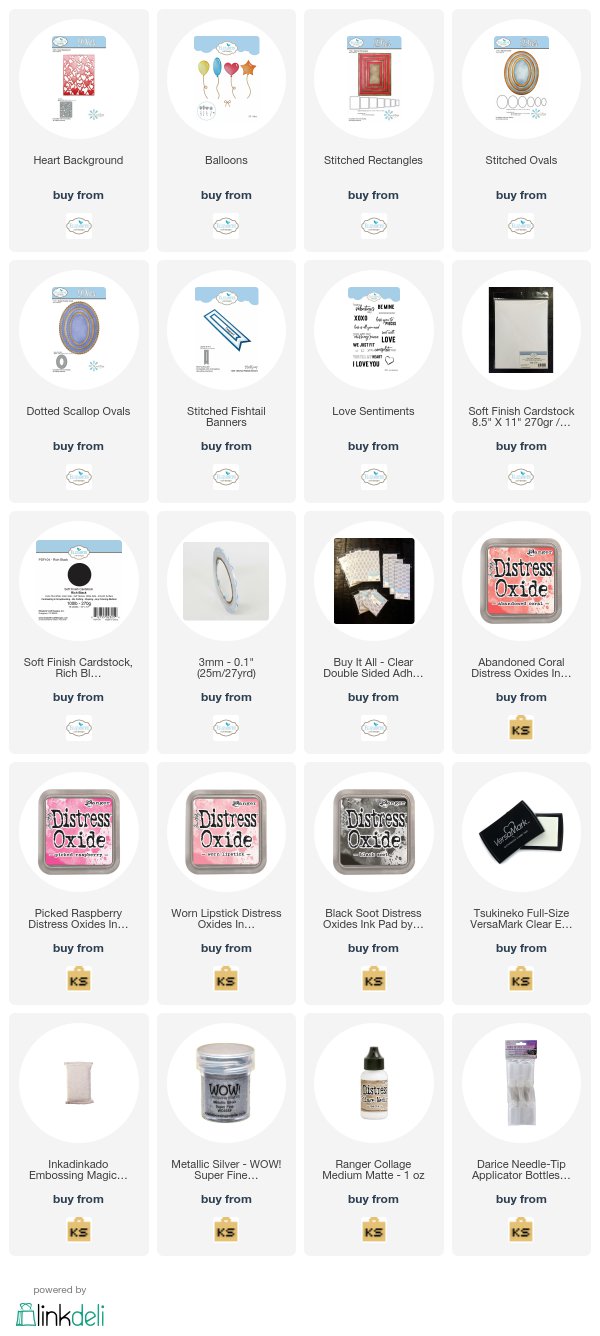
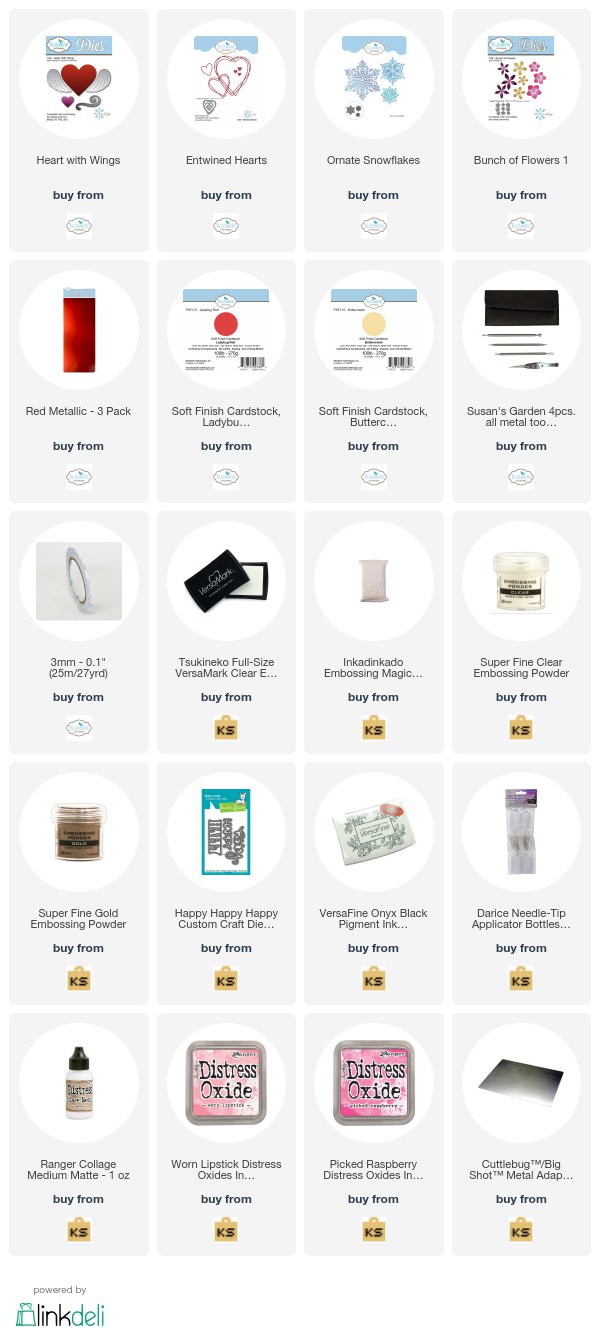
Products Used

Sunday, January 28, 2018

You Complete Me Card

Hi Everyone,

Before I get started with the card below I want to announce the winner of the Lace Corner Die from Elizabeth Craft Designs. Congrats B. Bercu!!! Please send me an email with your full name and address. I will be having another Blog Giveaway starting Feb.1 so be sure to come back. There will be Nuvo Crystal Drops, some embellishments and a few other goodies.

A few days ago I posted two ways to use the Heart Background die from Elizabeth Craft Designs. One was to diecut and the other to emboss. This card I am showing a third way to use the die. This time it is used as a stencil. One die many possibilities. Below you will find the easy steps to replicate this card.

Finished card measures 4 1/4" x 5 1/2" folded
  • Step 1 - Base of card, Trim Black Soft Finish Cardstock to 5 1/2" x 8 1/2", fold in half for a Vertical Fold Card. Folded card measures 4 1/4" x 5 1/2".
  • Step 2 - Diecut Heart Background using scrap Cardstock. The diecut will become your stencil.
  • Step 3 - Diecut Stitched Rectangles using White Soft Finish Cardstock. Ink directly on the cardstock using Distress Oxides in colors of your choice. I used Candied Apple, Picked Raspberry, Worn Lipstick, Abandoned Coral. Place the Heart Background Stencil on on top of inked cardstock and ink using Distress Oxides Black Soot. This will give an illusion that it is inked black cardstock. See picture below for visual.

  • Step 4 - Spray Sheer Shimmer Sparkle Spritz to the inked background. This step is optional. The spray will soften the color a bit and add a shine. If you do add the spray set aside to dry before doing the next step.
  • Step 5 - Diecut Stitched Ovals using the background.
  • Step 6 - Diecut Dotted Scallop Ovals (one die bigger than the Stitched Oval) using Black Soft Finish Cardstock. Adhere the diecut Stitched Oval (background) on top of the diecut Dotted Scallop Oval (black cardstock) using 3mm Clear Double Sided Adhesive Tape. Adhere it to the card using foam tape making sure to keep the position inline with the background.
  • Step 7 - Diecut Balloons (the heart 2 times) using Black Soft Finish Cardstock as well as the string and ribbon die. Assemble the pieces and adhere to the card using Distress Collage Medium.
  • Step 8 - Stamp sentiment using Black Soft Finish Cardstock with an embossing ink. Sprinkle embossing powder Metallic Silver. Heat set with a heat tool.
  • Step 9 - Diecut Stitched Fishtails Banner for the embossed sentiment. Adhere to card using foam tape.


This card can be used for any occasion by changing the colored background, using other diecut shapes and changing the sentiment. Below is a link of all products used for your easy convenience. Thanks for stopping by.

Products Used

Wednesday, January 24, 2018

Happy Valentines Day

Hi Everyone,
Today I have another card to share for Valentines Day. Before I get started I currently have a Blog Giveaway. Click Follow my blog for a chance to win this awesome die from Elizabeth Craft Designs. The Lace Corner Die. The deadline is Friday January 26. The winner will be announced on Saturday January 27.

Lace Corner Die

Below are the steps to replicate this card.
  • Step 1 - Base of card, Trim Ladybug Red Soft Finish Cardstock to 5 1/2" x 8 1/2", fold in half for a Vertical Fold Card. Folded card measures 4 1/4" x 5 1/2".
  • Step 2 - Trim Buttercream Soft Finish Cardstock to 3 1/4" x 5 1/2". With a Diagonal Stripe Stamp or Stencil apply Embossing Ink and sprinkle with Gold Embossing Powder. Heat set it with a heat tool. (I created a Diagonal Stripe Stencil using my ScanNCut. If you don't have a stamp or stencil you can substitute with a Diagonal Stripe Patterned Paper).
  • Step 3 - Diecut a heart from the Heart With Wings using Patterned Paper. Adhere to the card using foam tape (pop ups).
  • Step 4 - Ink a small scrap of paper using Distress Oxide. Diecut 2 outline hearts from Entwined Hearts. Adhere to card using Collage Medium Matte.
  • Step 5 - Diecut Ornate Snowflake (the smallest one) using Red Metallic Shimmer Sheetz. You will need to use a metal plate for this. Adhere to card using Collage Medium Matte.
  • Step 6 - Diecut Bunch of Flowers 1 using a piece of patterned paper. Shape the flower with All Metal Tool Set. Adhere to card using Collage Medium Matte.
  • Step 7 - Ink a small scrap of paper using Distress Oxide. Diecut 3 small hearts from Entwined Hearts. Apply directly to the diecuts Embossing Ink and sprinkle Clear Embossing Powder. Heat set with heat tool. You will need to repeat this 3 times for each heart. Adhere to card using Collage Medium Matte.
  • Step 8 - Ink a small scrap of paper using Distress Oxide. Diecut Happy Happy Happy word sentiment. Apply directly to the diecut Embossing Ink and sprinkle Clear Embossing Powder. Heat set with heat tool. You will need to repeat this 3 times. Adhere to card using Collage Medium Matte.
  • Step 9 - Ink a small scrap of paper using Distress Oxide. Stamp small sentiment using Black Ink. Trim and adhere to card using foam tape.


I hope you enjoyed today's card. A reminder to click on Follow my Blog for a chance to win the  Lace Corner Die. 

Below is a link to all products used for your easy convenience. Thanks for stopping by and see you soon.

Products Used

Tuesday, January 23, 2018

Two cards One Die

Hi Everyone,
Today I have two cards to show you using one die. The Heart Background die from Elizabeth Craft Designs. Before we get started a reminder that I currently have a Blog Giveaway going on. Click Follow my blog for a chance to win this awesome die from Elizabeth Craft Designs. The Lace Corner Die. The deadline is Friday January 26. The winner will be announced on Saturday January 27.

Lace Corner Die

 Card 1

Card 2

  • Step 1 - Base of card, Trim White Soft Finish Cardstock to 5 1/2" x 8 1/2", fold in half for a Vertical Fold Card. Folded card measures 4 1/4" x 5 1/2".
  • Step 2 - Emboss Heart Background die with White Soft Finish Cardstock. To do this you will need to use the embossing mat in your diecut machine. Trim the ends. Diecut Heart Background with Brick Red Soft Finish Cardstock with Clear Double Sided Adhesive Tape on the back.
  • Step 3 - Diecut Solid Heart from Heart Cutouts to both the embossed Heart Background and diecut Heart Background in the same position.
  • Step 4 - Card 1 adhere the white embossed background to front of card using 3mm Clear Double Sided Adhesive Tape. Adhere the diecut red heart to the center. Card 2 adhere the red diecut background. Adhere the embossed white heart to the center using 3mm Clear Double Sided Adhesive Tape.
  • Step 5 - Diecut Stitched Fishtail Banners (one in White Soft Finish Cardstock and one in Red Soft Finish Cardstock).
  • Step 6 - Stamp Love sentiment on diecut Stitched Fishtail Banner. Card 1 on white diecut stamp sentiment in red ink (optional after stamping in red ink stamp again with embossing ink and sprinkle clear embossing powder then heat set with a heat tool). Card 2 on red diecut stamp sentiment with embossing ink and sprinkle white embossing powder then heat set with a heat tool. Adhere using foam tape.


This concept can be used with any background die. Below are the links for all products used for your easy convenience. Thanks for stopping by.

Products Used

Monday, January 22, 2018

Spring Blooms Love Card

Hi Everyone,
Welcome back to another love card. I made this card for my son to give to his new girlfriend for Valentine's Day. I wanted a more non traditional card without the hearts. Below you will find the easy steps to replicate this card.

Before we get started I have a Blog Giveaway going on. Click Follow my blog for a chance to win this awesome die from Elizabeth Craft Designs. The Lace Corner Die. The deadline is Friday January 26. The winner will be announced on Saturday January 27. Good luck to everyone.

Lace Corner Die

  • Step 1 - Base of card, Trim Black Soft Finish Cardstock to 5 1/2" x 8 1/2", fold in half for a Horizontal Fold Card. Folded card measures 4 1/4" x 5 1/2".
  • Step 2 - Trim Strathmore Bristol Smooth Paper 100lbs to 4" x 5 1/4". Run an Embossing Magic Pad over the paper. Stamp Spring Blooms image using an Embossing Ink Pad. Sprinkle White Embossing Powder then heat set with a heat tool. You will need to stamp the image twice by changing the direction.
  • Step 3 - Color the images with watercolor markers or pencils. I used Zig Clean Color Real Brush Markers. Let dry then adhere to card using 3mm Clear Double Sided Adhesive Tape.
  • Step 4 - Stamp sentiment with Black Pigment Ink.


This card can be used for any occasion by changing the sentiment and colors. Below are the links to the products used for your easy convenience. Thanks for stopping by and remember Follow My Blog for a chance to win the Lace Corner Die.

Elizabeth Craft Designs Products Used


Kat Scrappiness Products Used

Other Products Used
Strathmore Bristol Smooth Paper
Heat Gun
Zig Clean Color Real Brush Markers

Sunday, January 21, 2018

You Make Me Incredibly Happy Eclipse Cards

Hi Everyone,
I had so many people writing to me about my last Eclipse card that I decided to make another one. Below you will find two more examples of an Eclipse card. One with the entire background filled and the second one clean with bursts of color. The two examples are using the same stamps in the same position but different coloring for different effects. Neither are wrong.

Before we get started I have a Blog Giveaway going on. Click Follow my blog for a chance to win this awesome die from Elizabeth Craft Designs. The Lace Corner Die. The deadline is Friday January 26. The winner will be announced on Saturday January 27.

Lace Corner Die

Here are the two cards


  • Step 1 - For both cards Trim White Soft Finish Cardstock to 5 1/2" x 8 1/2", fold in half for a Horizontal Fold Card. Folded card measures 4 1/4" x 5 1/2".
  • Step 2 - For first card Trim White Soft Finish Cardstock to 4 1/4" x 5 1/2". On a kraft mat randomly apply Distress Oxide Inks in several colors. Spray with water to activate the inks. Dip the trimmed cardstock into the ink. Repeat several times until you achieve the desired effect. Let dry.
  • Step 3 - Diecut Stitched Rectangles for the Distress Oxide Background, for second card diecut a watercolor paper (I used Strathmore Bristol Smooth). 
  • Step 4 - For both backgrounds stamp images from Spring Blooms Clear Stamps. On the distress background use a Black Pigment Ink. Using a White Uniball Signo Pen randomly add white around the images. On the watercolor background use an Embossing Ink. Sprinkle Black Embossing Powder then heat set with a heat tool. Using a watercolor medium color in the images (I used Zig Clean Color Real Brush Markers with a water brush). 
  • Step 5 - Diecut backgrounds with Alphabet dies in word of your choice. I used my ScanNCut to cut out the word HAPPY. The font is Swis721 BlkCn BT.
  • Step 6 - Adhere background to center front of card using 3mm Clear Double Sided Adhesive Tape, including the center pieces of the letters. In this case for the word HAPPY it was the center for A and both P's. For the alphabet pieces adhere using foam tape to raise the letters for an Eclipse effect.
  • Step 7 - Optional - Stamp sentiment using Black Ink above the word HAPPY.


I hope you enjoyed how the same stamped images can have different effects using different techniques. I have listed the products I used for these cards below for your easy convenience. Thanks for stopping by.

Kat Scrappiness Alpha Dies
Elizabeth Craft Designs Products Used

Other Products Used
Strathmore Bristol Smooth Paper
Heat Tool
Zig Clean Color Real Brush Markers
Distress Oxide Inks
Uniball Signo Pen White
ScanNCut

Wednesday, January 17, 2018

Love You Always And Forever Eclipse Card

Hi Everyone,
Welcome back to another Love Themed Card. Before we get started I would like to remind you that I have a Blog Giveaway. Follow my blog for a chance to win this awesome die from Elizabeth Craft Designs. Lace Corner Die. The deadline has been extended to Friday January 26. The winner will be announced on Saturday January 27.

Lace Corner Die

My card below was inspired by large alphabet dies to create an Eclipse Card. Unfortunately I don't have them but I do have a ScanNCut machine. Not only does this machine scan and cut but it takes the fonts you have on your computer and with a software such as Sure Cuts A Lot it is able to convert the fonts into cutable files. How awesome is that. Below you will find the easy steps to replicate this card. The products I used will be listed at the end of this post.


  • Step 1 - Trim White Soft Finish Cardstock to 5 1/2" x 8 1/2", fold in half for a Horizontal Fold Card. Folded card measures 4 1/4" x 5 1/2".
  • Step 2 - Trim White Soft Finish Cardstock to 4 1/4" x 5 1/2". Apply ink with an ink blending tool using Distress Oxide Inks starting from the bottom in the lightest color and working upward to the darkest color. I used Broken China, Salty Ocean, Faded Jeans and Wilted Violet. Once the inking has been applied spray some water to create a droplet effect. Let dry.
  • Step 3 - Using a Pigment Ink stamp Blossom Time Clear Stamps all over the background. I used Versafine Onyx Black. Once you have fully covered the background take a White Uniball Signo Broad Pen and color inside the lines. See below photo for visual.


  • Step 4 - Diecut the background using Stitched Rectangles. 
  • Step 5 - If you have the Alphabet Dies you can diecut the word LOVE. I used the ScanNCut to cut out the word LOVE. Using Sure Cuts A Lot I centered the word LOVE using the font Swis721 BlkCn BT. I exported the file to fcm file format and transfered the file on a USB key. Before I did my final cut I tested it out on a scrap piece of cardstock to make sure my placement was correct. Luckily I only needed to do this one time. Using 3mm Clear Double Sided Adhesive Tape I adhered the background to the center front of the card. I adhered the center of the letter O directly to the background. For the rest of the pieces I used foam tape to adhere the Letters.
  • Step 6 - Stamp mini sentiment with an Embossing Ink on White Soft Finish Cardstock. Sprinkle Black Embossing Powder and heat set it with a heat tool. Trim the sentiment and adhere to the card using Multi Medium Glue.


This card is versatile and can be used for any occasion by simply changing the stamped images for your background, changing the colors and creating different words. For example you can use pink, red and orange for the inked background with balloon stamped images and the cut out word can be HAPPY with a mini sentiment Birthday.

Below you will find links and a list of all products used for your easy convenience. Thank you for stopping by.

Elizabeth Craft Designs Product Used


Other Products Used
ScanNCut (Font Swis721 BlkCn BT)
Heat Gun
White Uni-ball Signo Blend Pen
Distress Oxide Inks (Broken China, Salty Ocean, Faded Jeans & Wilted Violet)
Ink Blending Tool
VersaMark Embossing Ink
Ranger Black Embossing Powder
Multi Medium Matte

Friday, January 12, 2018

Happy Valentines Day With Elizabeth Craft Designs

Hi Everyone,
Today I am sharing a Valentine's Card which is the first of several more to follow over the next few weeks. I also have a wonderful Blog Giveaway to start the New Year. I am giving away an Elizabeth Craft Designs ModaScrap Lace Corner Die. All you have to do is Follow my Blog to automatically be entered in a random drawing. On January 22 I will announce the winner. Good luck to everyone.

Here is the Prize

Now let's get started. The finished card measures 4 1/4" x 5 1/2" folded. Below you will find the easy steps to replicate this card.

  • Step 1 - Trim White Soft Finish Cardstock to 5 1/2" x 8 1/2", fold in half for a horizontal card.
  • Step 2 - Trim White Soft Finish Cardstock to 4" x 5 1/4". Tear a scrap piece of cardstock and place it on the right side of the trimmed paper leaving a blank section, with an ink blending tool apply red ink. (I used Distress Inks). Move the torn cardstock and repeat Step 2 using a shade lighter. Each time you repeat you will ink a lighter shade. See below photo for reference. 

  • Step 3 - Emboss the inked cardstock with the Heart Background Die in a diecut machine. To do this you will need a diecut machine with the plates as if you were embossing with a folder. You will need to add an embossing pad for this. For instance if using a Cuttlebug you will use Plate A, B, Embossing Pad, Inked Cardstock, Heart Background Die, then Plate B. Instead of the die cutting through the cardstock it will leave an embossed impression. For all other machines you can go on youtube to find out the right "sandwich". Adhere the background to the center front of card using 3mm Clear Double Sided Adhesive Tape.
  • Step 4 - Ink a scrap piece of white Soft Finish Cardstock using the same colors used for the background. Diecut Entwined Hearts (middle size die & smallest die). Adhere the entwined heart to the bottom left side of card using Multi Medium Glue. Add Crystal Nuvo Drops to the 3 small hearts and let dry throughly. Once dry adhere the small hearts using Multi Medium Glue and place around the entwined heart.
  • Step 5 - Diecut sentiment using the same inked Cardstock. Stamp directly on the diecut with Embossing Ink. Sprinkle clear Embossing Powder and heat set it with a Heat Gun. Repeat this 3 times for even smooth coverage. Adhere to the center of entwined heart using Multi Medium Glue.
  • Step 6 - Stamp small sentiment on the same inked Cardstock with Black Ink. Trim and adhere underneath the embossed sentiment using foam tape.


Below is a link for all Elizabeth Craft Designs Product Used for your easy convenience.


Other Products Used
Distress Inks
Crystal Nuvo Drops
Multi Medium Glue
Happy Happy Happy Sentiment Die (Fawn Lawn)
Stained Glass Love Sentiment Stamp (Simon Says Stamp)

Thank you for stopping by and see you soon.