
Hi Everyone,
Welcome back to the first Club Scrap Artist Team Challenge for 2017. Since the January 2017 Color Me Happy kit was inspired by batik designs and artwork, this month we were challenged to create a project that features batik or faux batik techniques. I chose to do my batik technique challenge using the Color Me Happy Kit.
Now first things first if you came from Lisa's blog then to came from the right place. If you didn't you can start at the beginning with Karen at Club Scrap's blog.
Here is a picture of all the cards with the Batik Technique using Color Me Happy Kit. Below you will find the steps to recreate these cards.

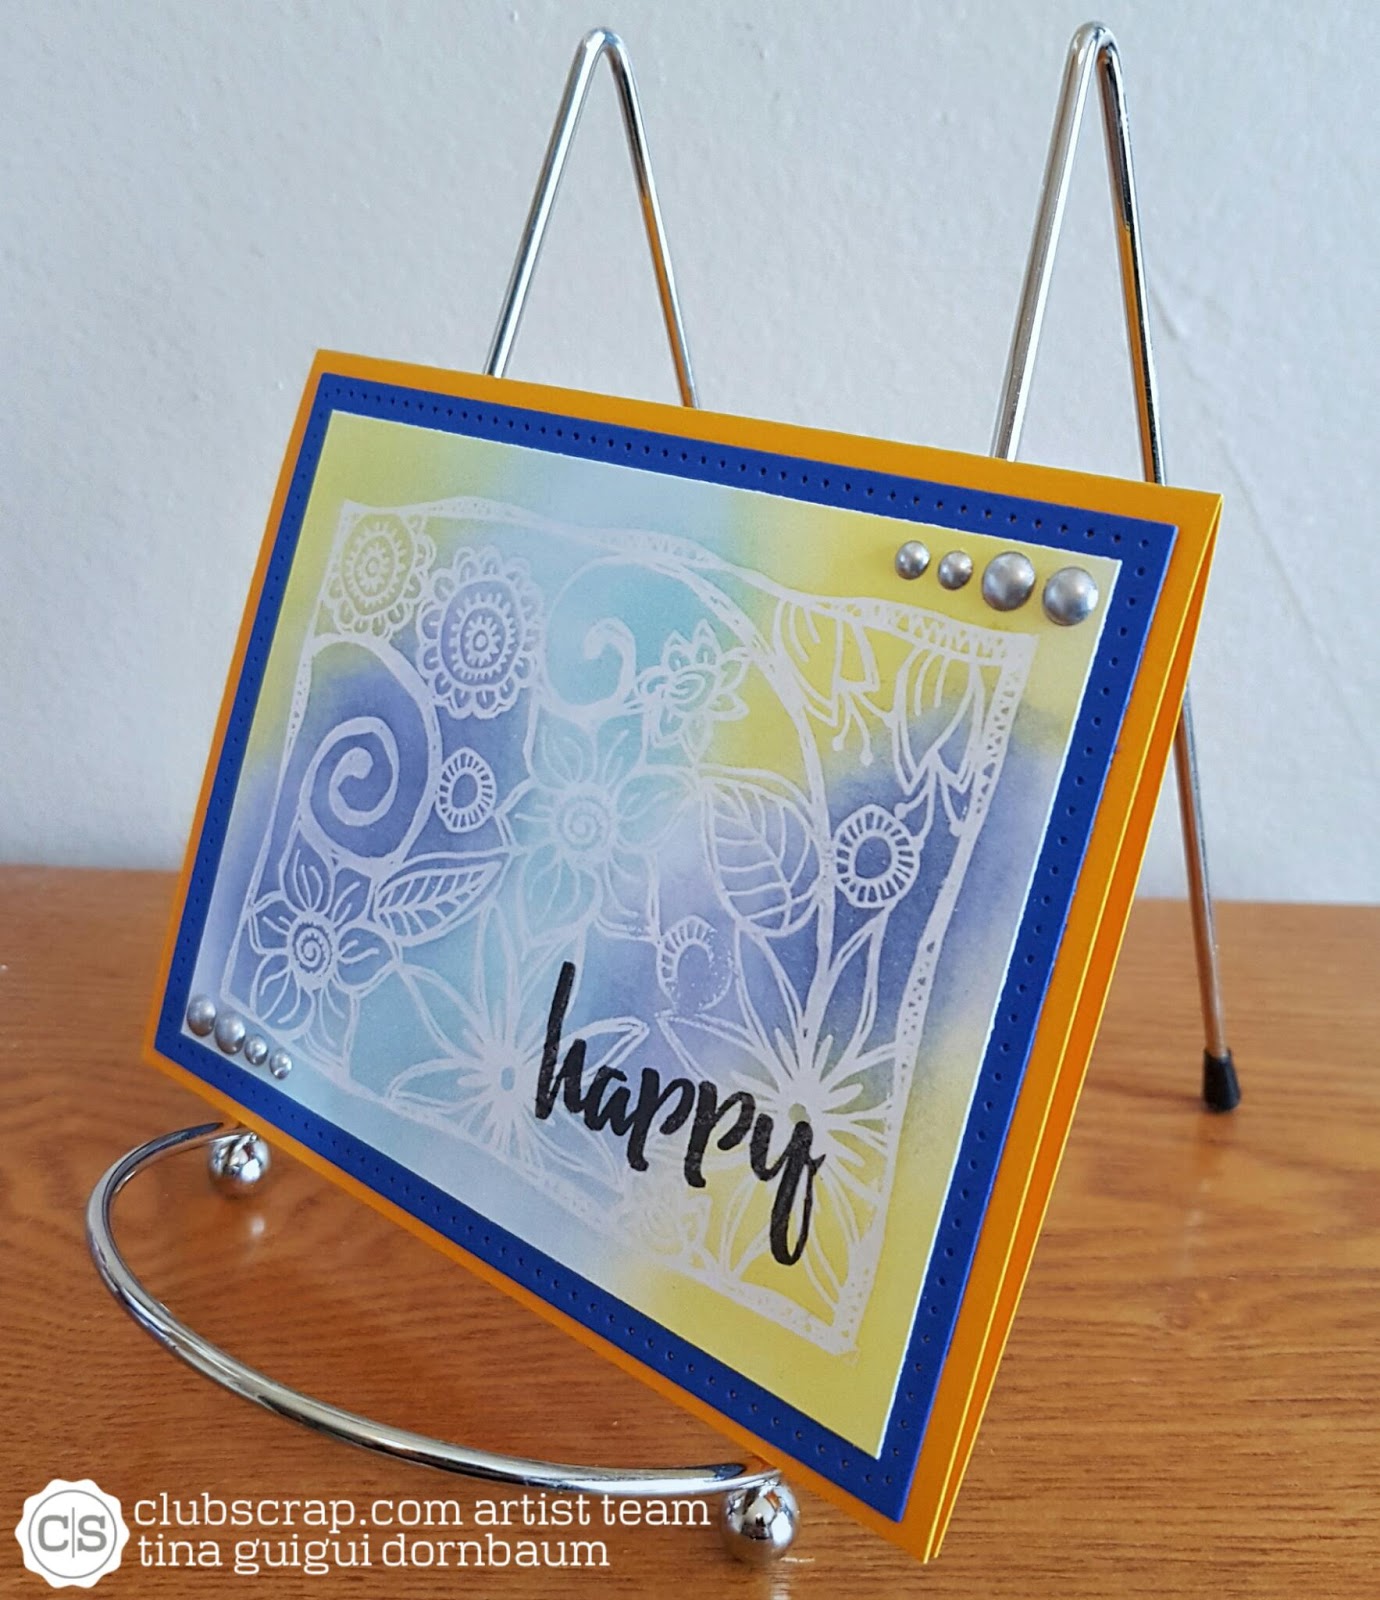
Finished cards measures 4 1/4" x 5 1/2" folded

For my first card I cut plain cardstock 8 1/2" x 5 1/2" for the base of my card, fold in half. I stamped the image from the Color Me Happy Jumbo Unmounted Stamp on Plain White Cardstock using the watermark ink pad. I sprinkled clear embossing powder and heat set. Once it cooled down I used 3 distress inks and randomly applied it in sections. Once I was happy I turned it facedown on a paper towel and heat it with my heat gun. The purpose of this is to have the embossed areas fall off so that your paper remains smooth. I also noticed that my inks felt soft as well. I trimmed the edges and matted with plain cardstock, trimmed the edges and then adhered to center front of my card. I added some Metallic Dot Stickers. Last I stamped the sentiment Happy from the Art Nouveau Unmounted Stamps.

Finished card measures 4 1/4" x 5 1/2" folded

For my second card I cut plain cardstock 8 1/2" x 5 1/2" for the base of my card and folded in half. I used the same technique as the first card this time stamping the dragonflies from Art Nouveau & Jumbo Unmounted Stamps (both are different sizes) and with my distress inks I created a different series of colors and pattern. Once all the embossing was removed I added some random sequins. I added the sentiment Choose to Shine from the Art Nouveau Unmounted Stamp. I diecut the green plain cardstock using Stitched Rectangles from Elizabeth Craft Designs and adhered to center from of card. Last I added the Faux Batik design to center front of card.


Finished card measures 4 1/4" x 5 1/2" folded.

For my third card I cut plain cardstock 8 1/2" x 5 1/2" for the base of my card and folded in half. I used the same technique as the previous two cards however this time instead of coloring with distress inks I used Andirondak Color Wash Sprays. I was really happy with this result. I trimmed my batik design and adhered to center front of card. I created a frame using the Dotted Scallop Rectangle Die and Fitted Rectangle Die from Elizabeth Craft Designs and adhered to center front of card using pop ups. I stamped the Thank you sentiment from the Greeting Unmounted stamps.


Thanks for stopping by. Now to continue the fun head on over to Anne Marie's blog.
Your cards turned out beautifully!
ReplyDeleteLovely Tina...I really like how you framed the Batik in the final card. Sets it off nicely!
ReplyDeleteThree different mediums, but all beautiful results. TFS!
ReplyDeleteI didn't ever get around to using both sizes of dragonflies on the same card. Doing that looks great on your card!
ReplyDeleteLovely!!
ReplyDeleteBeautiful cards Tina!! Love how they turned out!
ReplyDeletehugs
Cheryl
Great examples with different mediums. I love them all!
ReplyDeleteTina, all your cards came out beautiful.
ReplyDeleteWow! Beautiful!!
ReplyDeleteYour cards are beautiful, especially the dragonfly with the gems.
ReplyDeletebeautiful!
ReplyDelete